Managing a call center involves much more than simply scheduling agents to a queue. This section covers how to set up and manage your AVOXI Users within your online platform.
- Viewing, Purchasing, and Assigning Licenses
- Assigning / Un-assigning Licenses
- Understanding User Roles
- Adding Users and Assigning Roles
- Editing User Details and Roles
- Configuring Custom Roles
- Managing Agents with Bulk Actions
Purchasing Licenses
AVOXI users that wish to make/receive calls using the AVOXI webphone require Licenses. As an Admin, you can view, upgrade, or purchase new licenses anytime via your AVOXI online platform.
Viewing Purchased, Used, and Available Licenses
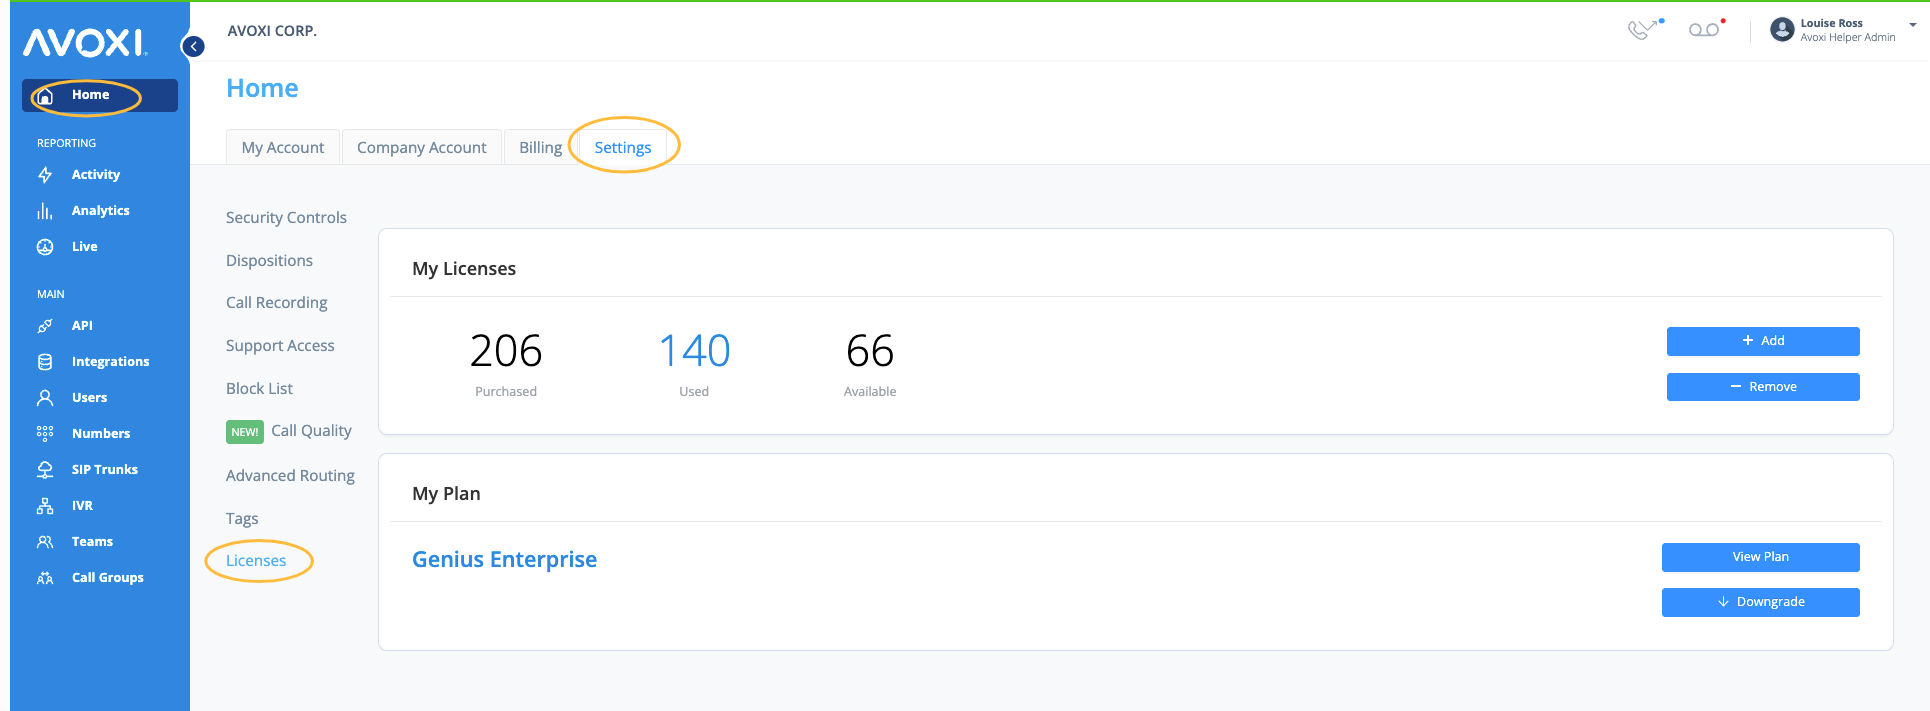
- Select the "Home" icon on the left-hand side navigation to get started.
- On the Home page, select the "Settings" tab.
- Click the "Licenses" section located towards the bottom
- You can now view your purchased, used, and available licenses on the License page.
Purchase New or Additional Licenses
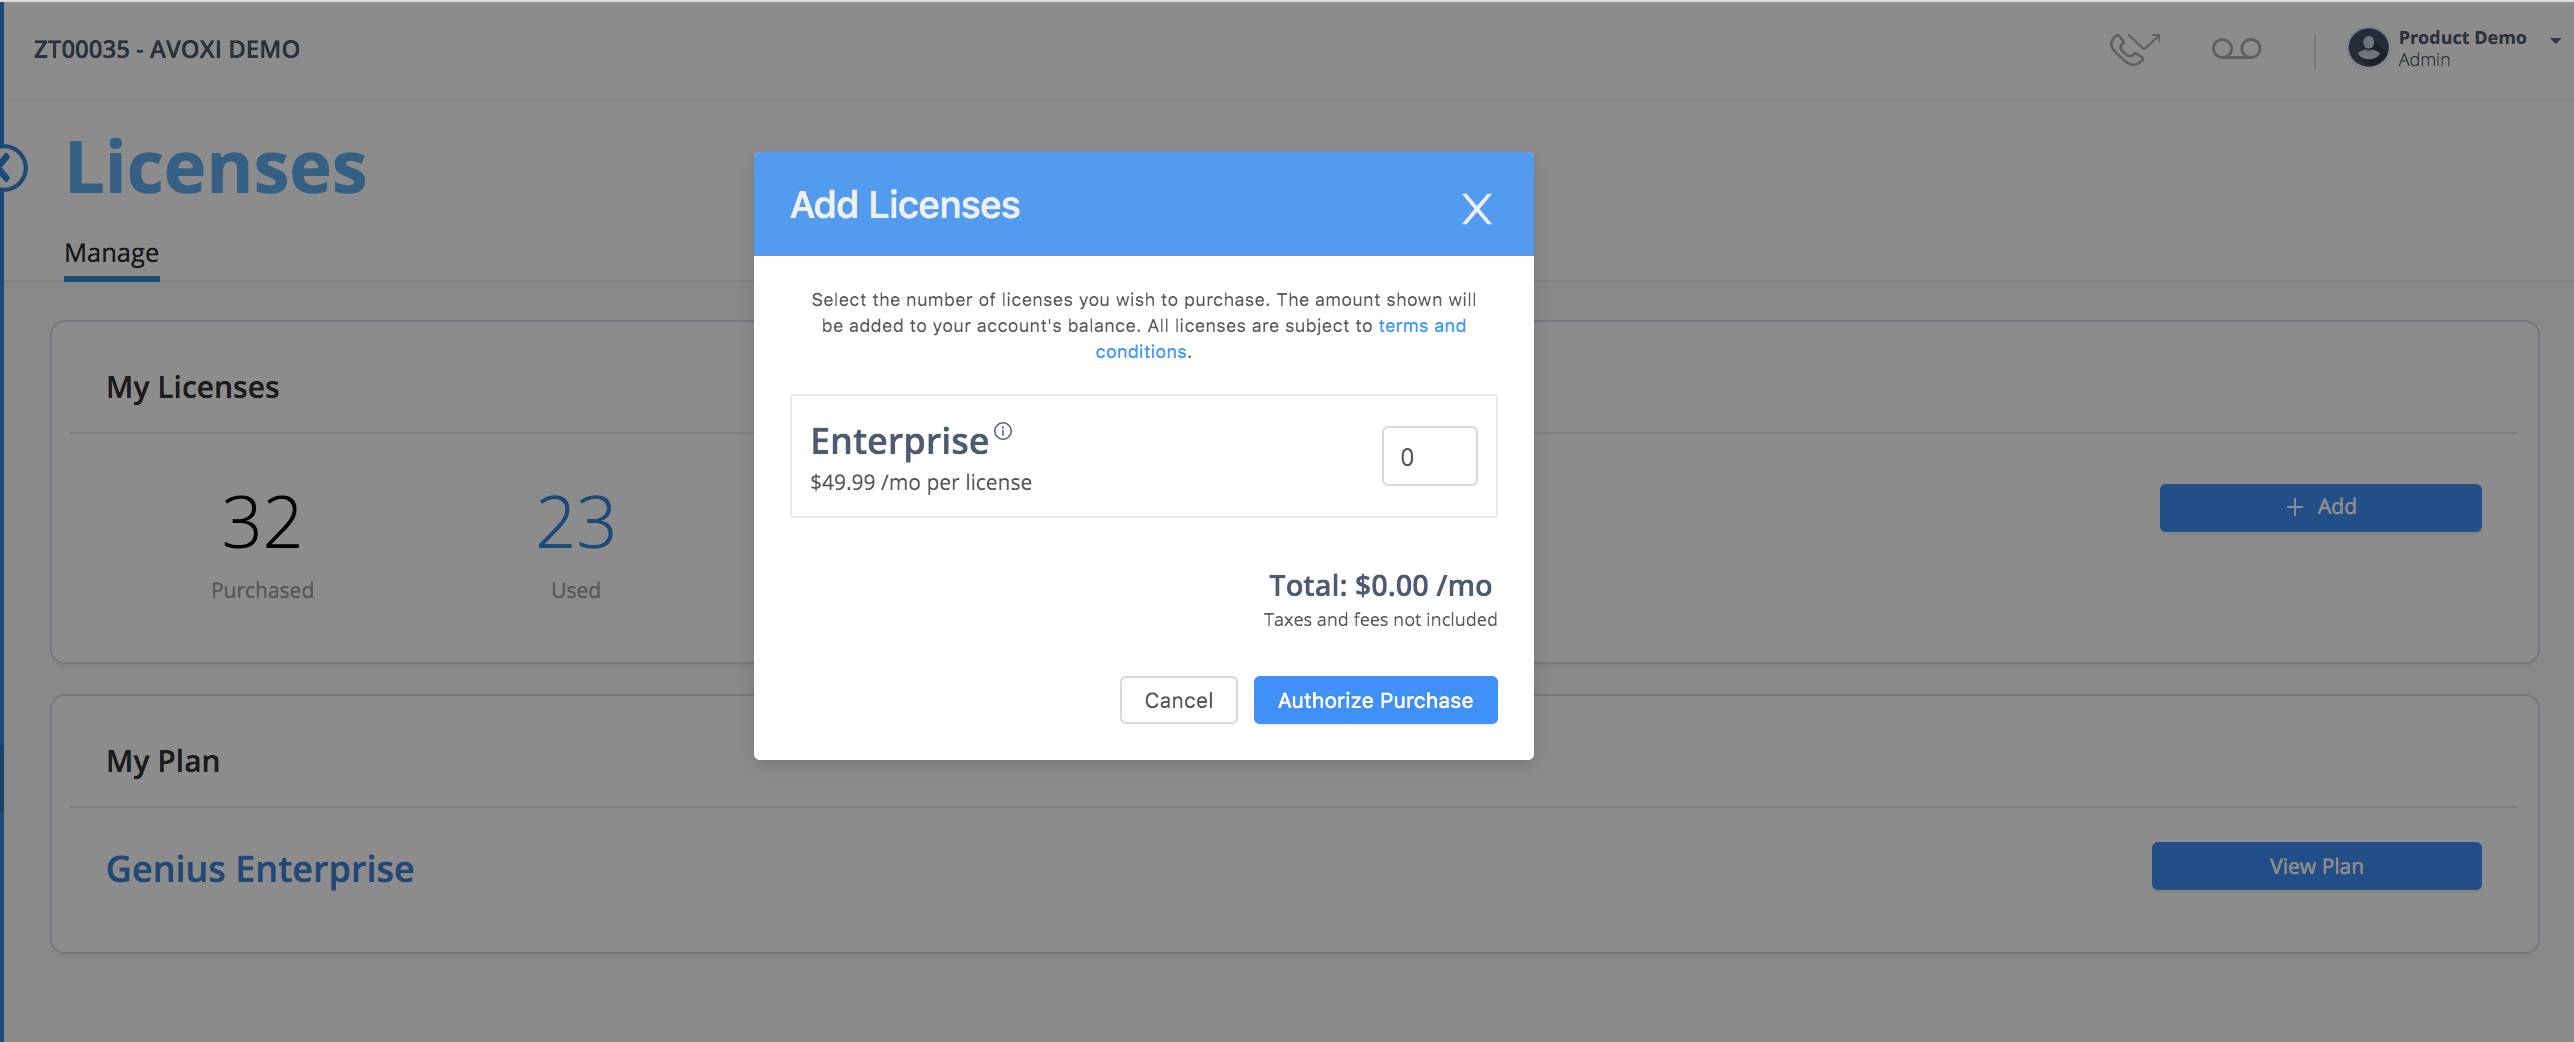
- To purchase additional licenses, simply select the +Add button on the right-hand side of the Licenses page in the My Licenses box.
- Enter the number of Contact licenses to be added.
- Review the Terms and Conditions, total monthly cost, and select Authorize Purchase.
- The credit card on file for your business account will automatically be used for any authorized purchases.
Assigning / Un-assigning Licenses
Understanding User Roles
Adding Users and Assigning Roles
Configuring Custom User Roles
Managing Agents with Bulk Actions
Contact center supervisors managing multiple agents or large teams must import new users, remove users who have left, update user permission roles, or modify license settings. Administrators can now quickly and effortlessly perform bulk updates to user licenses, roles, and team assignments in only a few clicks. The valuable time-saving tool was designed to help managers efficiently manage their teams.
Use the below steps to select, delete, or modify users’ licenses:
- Selecting Users/Agents
- Bulk Delete Users
- Bulk Modify License
- Bulk Modify Role
- Bulk Password Reset
- Bulk Team Assignment
Selecting Users/Agents
- Ensure you are logged into your AVOXI platform as an Admin
- Select the “User” section located on the left-hand navigation bar
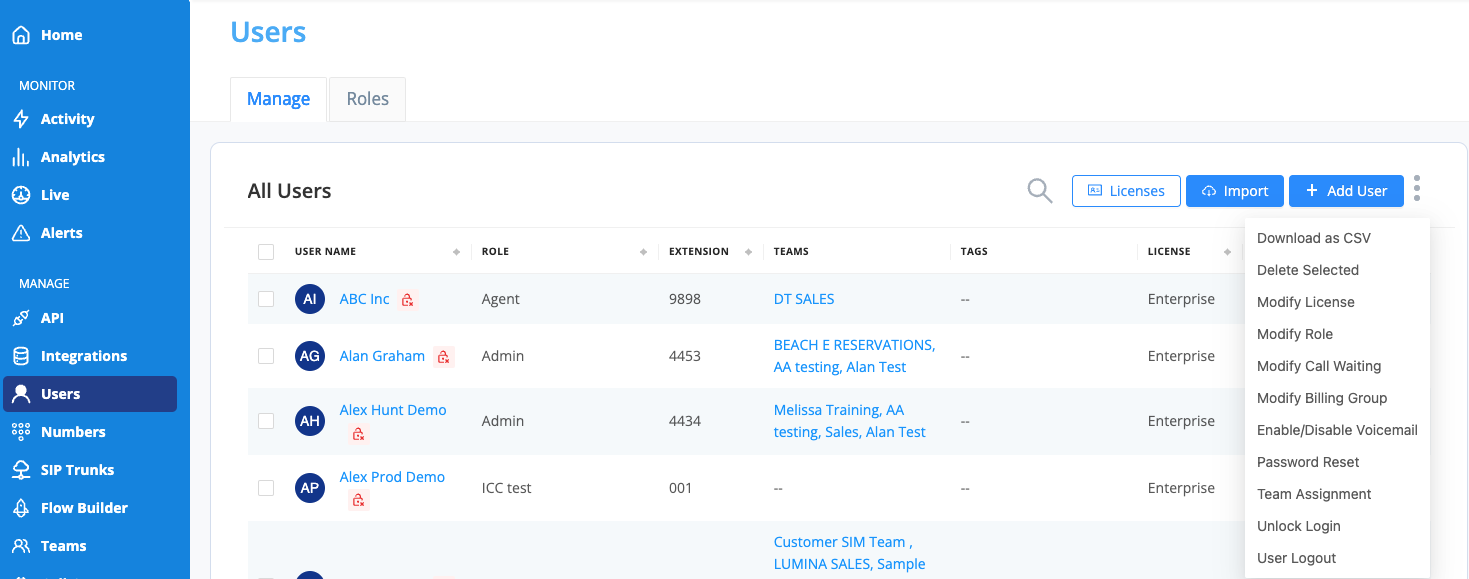
- Select the relevant agents on the “Manage” tab by clicking the checkbox under the User Name column.
- Click the three dots located to the right.
-
Delete Users
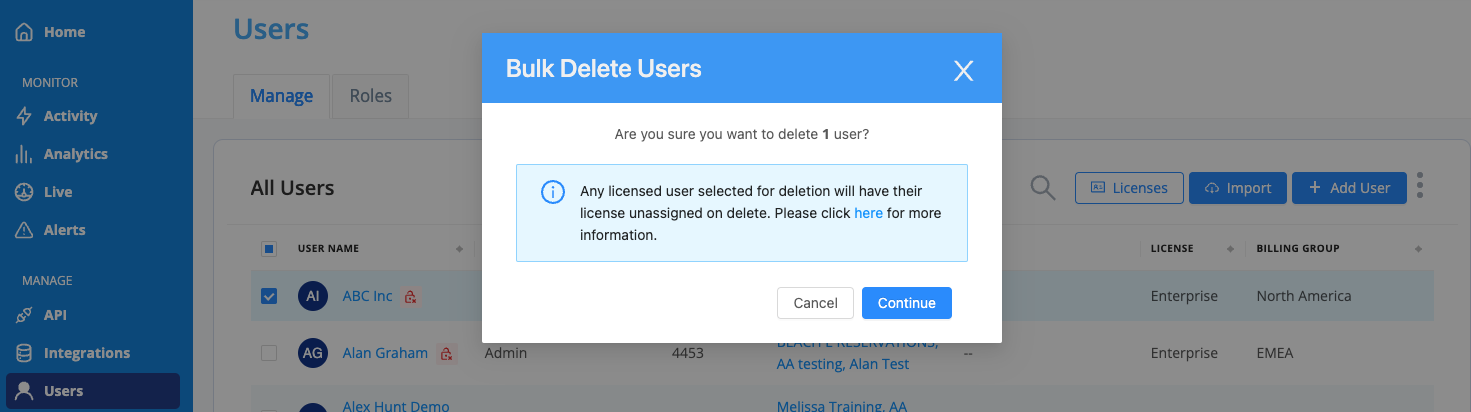
The bulk delete functionality allows Admins to delete one or multiple users simultaneously. If the user(s) have a license assigned to them, this will automatically become available, which you bulk assign to other agents. There are two licenses available, Enterprise and Contact, with a three licenses minimum applicable to both. Learn more about an upgrade here.
- Once you have selected the relevant agents/users, click the three grey buttons next to “+Add Use.”
- Select the “Delete Select” from the drop-down
- Once you are sure you wish to proceed, click “Continue” to complete your changes.
-
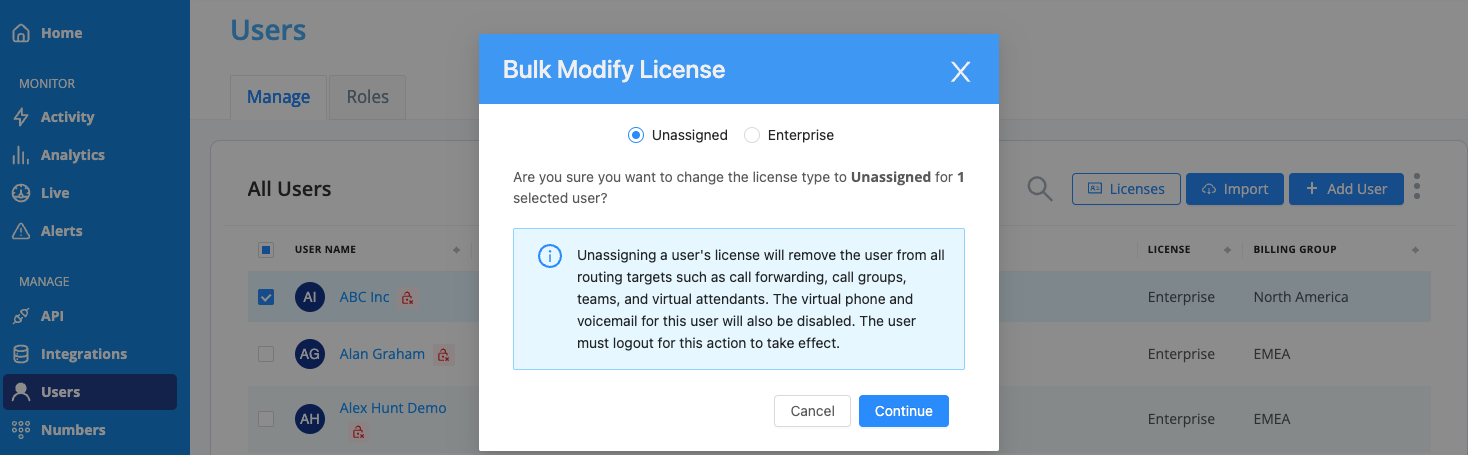
Modify License
The bulk licenses modification functionality allows Admins to assign or unassign licenses to one or multiple users at once. If the user(s) have a license, this will automatically become available. There are two licenses available, Enterprise and Contact, with a three licenses minimum applicable to both.
- Once you have selected the relevant agents/users, click the three grey buttons next to “+Add Use.”
- Click the “Modify License” from the drop-down.
- Select unassing or Contact/Enterprise license (based on your current plan; learn more about an upgrade here.
- When ready, press “Continue” to complete your changes.
-
Modify Role
The bulk role modification functionality allows Admins to update role settings for one or multiple users simultaneously.
- Once you have selected the relevant agents/users, click the three grey buttons next to “+Add Use.”
- Click the “Modify Rol” from the drop-down.

- Using the drop-down on the pop-up window, select the Agent you wish to assign to the select users. This also includes the ability to assign custom roles, which can be created using our Role-Based Access guide.
-
When ready, press “Continue” to complete your changes.

Password Reset
The password reset button will provide the user with only one option, sending the password reset email to all checked users.
- Once you have selected the relevant agents/users, click the three grey buttons next to “+Add Use.”
- Click the “Password Rese” from the drop-down.

- When ready, press “Continue” to complete your changes.
Team Assignment
Bulk Assign/Remove Team will show a drop-down with all available teams; Admins can select one or multiple teams for the users to be added.
- Once you have selected the relevant agents/users, click the three grey buttons next to “+Add Use.”
- Click the “Team Assignment” from the drop-down.
- When ready, press “Continue” to complete your changes.
User Logout
This gives administrations the ability to log out users who have forgotten to log off at the end of the day.
- Select the relevant agents/users, and click the three grey buttons next to “+Add Use.”
- Click the “Bulk User Logout” from the drop-down.

- When ready, press “Continue” to complete your changes.
CONTINUE TO THE NEXT MODULE