New Agents Start Here:
AVOXI Academy for Contact Center Agents
Genius Tips
- Ensure that all agents have only 1 Genius tab open at all times (no duplicate Genius tags)
- Only use the latest version of Google Chrome, Firefox, or Microsoft Edge when logging into Genius
- Make sure agents have their microphones, notifications, and sound settings on ALLOW
How to answer calls on Genius Webphone:
Making and Receiving Calls
IMPORTANT: Before you start, ensure you are using a browser that supports WebRTC
The webphone is a 100% web-based application, with no software or additional equipment required to make it work. It's available to all License holders and all user "roles" (Agent, Admin, Supervisor, Billing Admin, Limited Agent, and Inbound Agent). Virtual numbers only customers are required to purchase a license to make use of the webphone functionality.
Making an Outbound Call
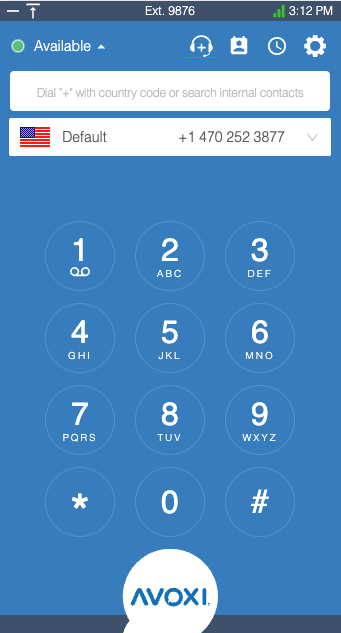
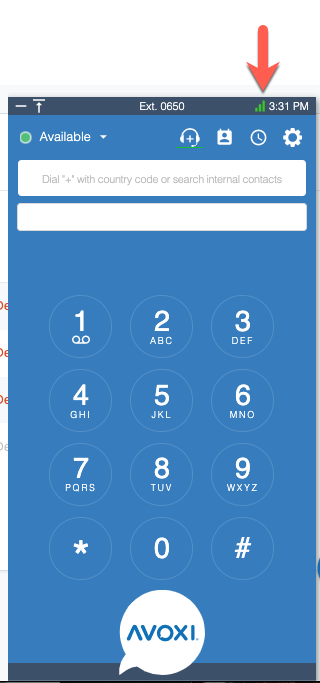
Locate your web phone in the lower right corner of your screen. Then select the + sign to maximize the phone’s display.
Type “+” and then select the dial pad numbers to dial the phone number you wish to call.
Next, press the phone icon![]()
Making a call to someone outside of your organization? Be sure to dial “+” followed by the country code and number (no spaces or dashes).
Making a call to an internal extension? Just dial that extension number, no “+” needed.
Tip: If you wish to use your computer’s keyboard to enter the number you wish to dial, make sure to click on the phone’s screen first to reveal the cursor and then use your keyboard’s keypad to enter the phone number.
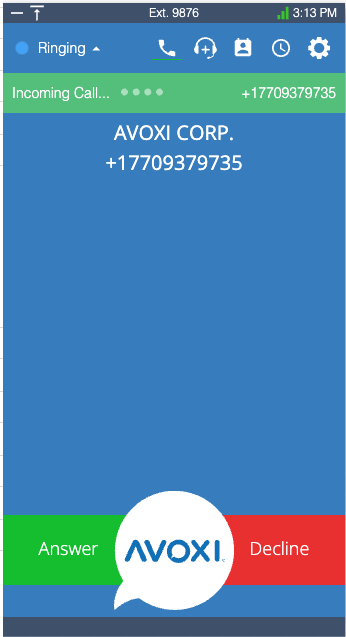
Receiving Inbound Calls
When you are receiving an incoming call, you have the option to Answer or Decline the call.
Make sure your volume is turned up so that you are able to hear your call coming in.
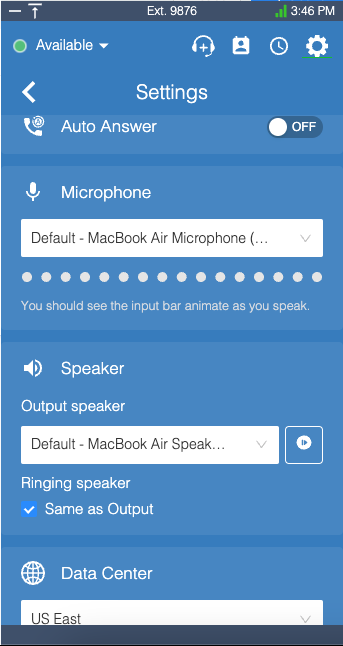
Understanding your Phone Settings
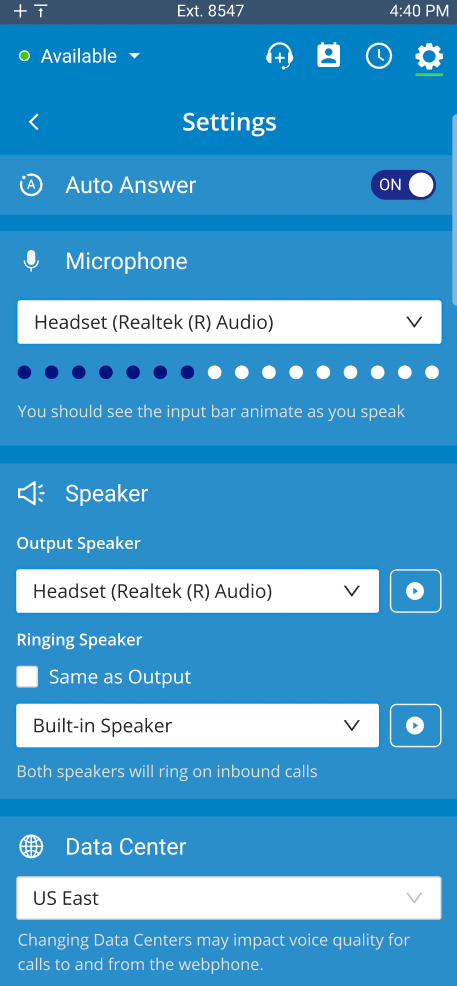
Select the "Settings" icon  to view and update the following:
- Auto Answer: TO set your webphone to auto-answer, simply click the toggle to "ON"
- Microphone: Choose your microphone settings and then speak to test it's working.
- Speaker: Choose your speaker and then use the test button to ensure it's working.
- Data Center: Choose the data center to route your calls through
Understanding Your Webphone:
Understanding your Webphone
Your browser does not support HTML5 video. The AVOXI Webphone is available to all
The AVOXI Webphone is available to all License holders and gives agents the ability to make phone calls without the need for a physical telephone. Calls can be made over the internet using a device with a mic and speaker, including computers, tablets, and mobile devices.
AVOXI's webphone allows your team to handle calls from their computers or make outbound calls and customize their caller ID. Functionality and features include the following:
- Browser-based webphone - Easily take calls from your computer browser from any location without needing physical phones.
- Click-to-call - Drive agent productivity with the click-to-call browser plugin and auto-dial any number presented through a webpage on the AVOXI webphone.
- Global outbound dialing - Make outbound calls to any location worldwide with customizable caller IDs.
- CRM integrations with screen pop - Take advantage of Help Desk and CRM integrations to give your agents more context during customer calls.
- Network Indicator in Webphone - AVOXI is a browser-based application that requires a network connection to successfully receive and make phone calls. The strength of the network connection can also impact the quality of these calls. The Network Indicator in the webphone is available to provide a quick reference to the user's network strength.
- Selecting your audio device - As an AVOXI user, you have the ability to configure which audio device is used when receiving calls via your AVOXI webphone.
Below is a breakout of the Call Controls within your Webphone:
- Agent Status
- Contact name and number
- Hold and Mute
- Call Transfer (Warm and Blind transfer to Agents)
- Pause Call Recording
- Three-way calling
- Adding call participants to an existing call
-
Network Indicator
Agent Status
It will also show the "agents status" so you know who is available to take a call. Learn more here!
Contact name and number
Using CRM integration the screen pop will automatically display customer information from the CRM platform to your AVOXI webphone for queue calls with a matching CRM caller-id. This feature is only available to AVOXI Enterprise Licenses holders and gives Admin users the ability to save their credentials within the AVOXI platform to enable the connection. They can also enable or disable the screen pop functionality for specific queues to determine which agents can see the CRM information when a queue call comes in. Learn more here!
Hold and Mute
Click the mute button to mute a call. When your call is on mute, you can hear the caller, however, the caller cannot hear you.
To place a call on hold, select the hold button. When your call is on hold, you can not hear the caller and the caller can not hear you but will instead hear the hold music.
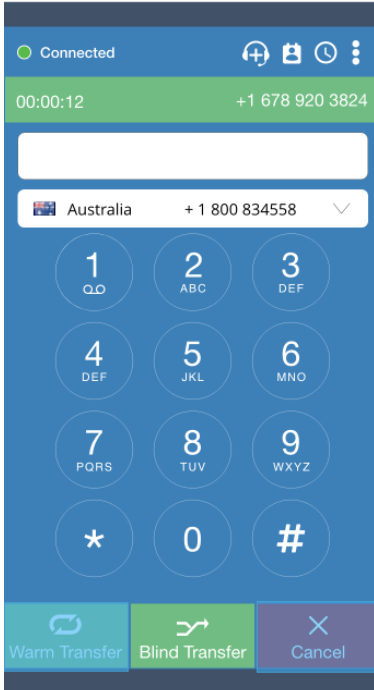
Call Transfer (Warm and Blind transfer to Agents)
When transferring calls you have two options: warm and blind transfer.
With a warm transfer, agents can speak to each other to prepare them with the relevant information before transferring a caller. This feature was designed to enhance the customer experience and also, reduce the call time.
With a blind transfer, agents can transfer callers to a ring group or another agent without speaking to the new agent first. This option is best when you are transferring the call to a queue that has a long wait time.
Pause Call Recording
If call recording is activated all calls will automatically be recorded. Users have the option to "Pause Call Recordings" within the webphone application.
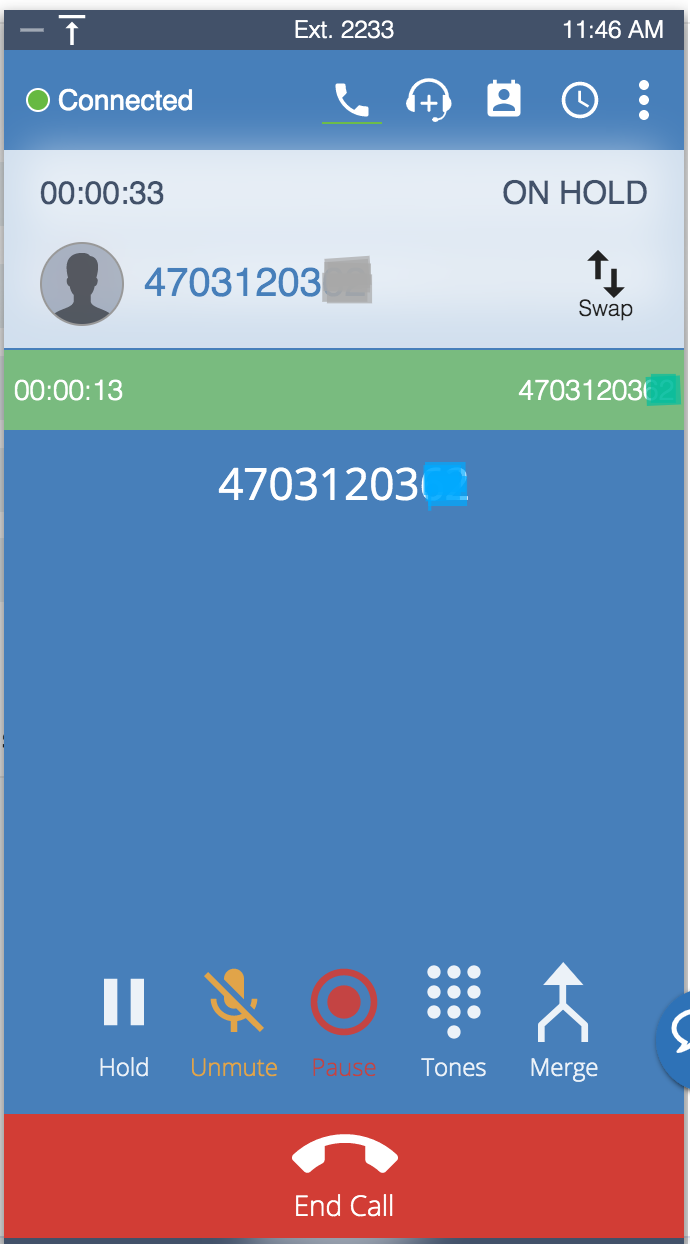
Three-way calling
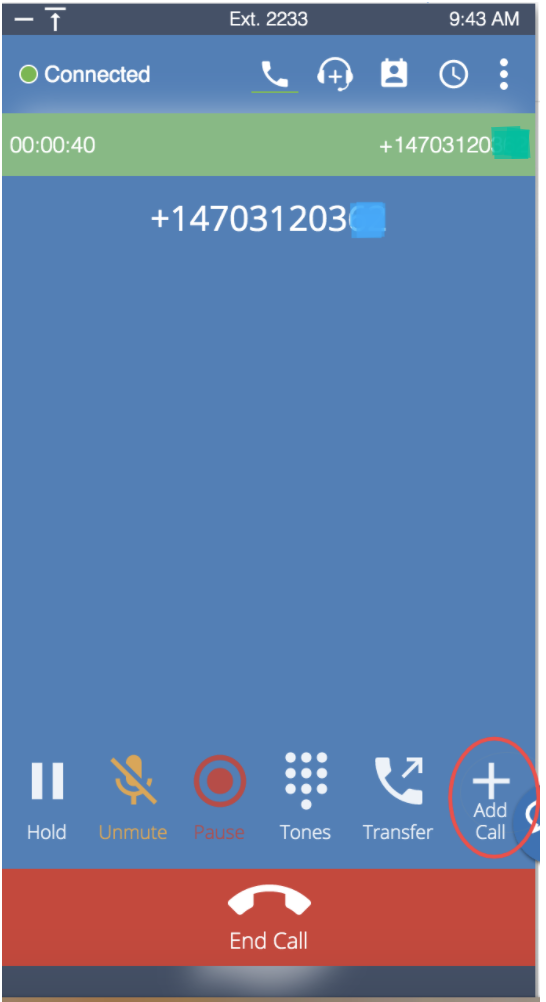
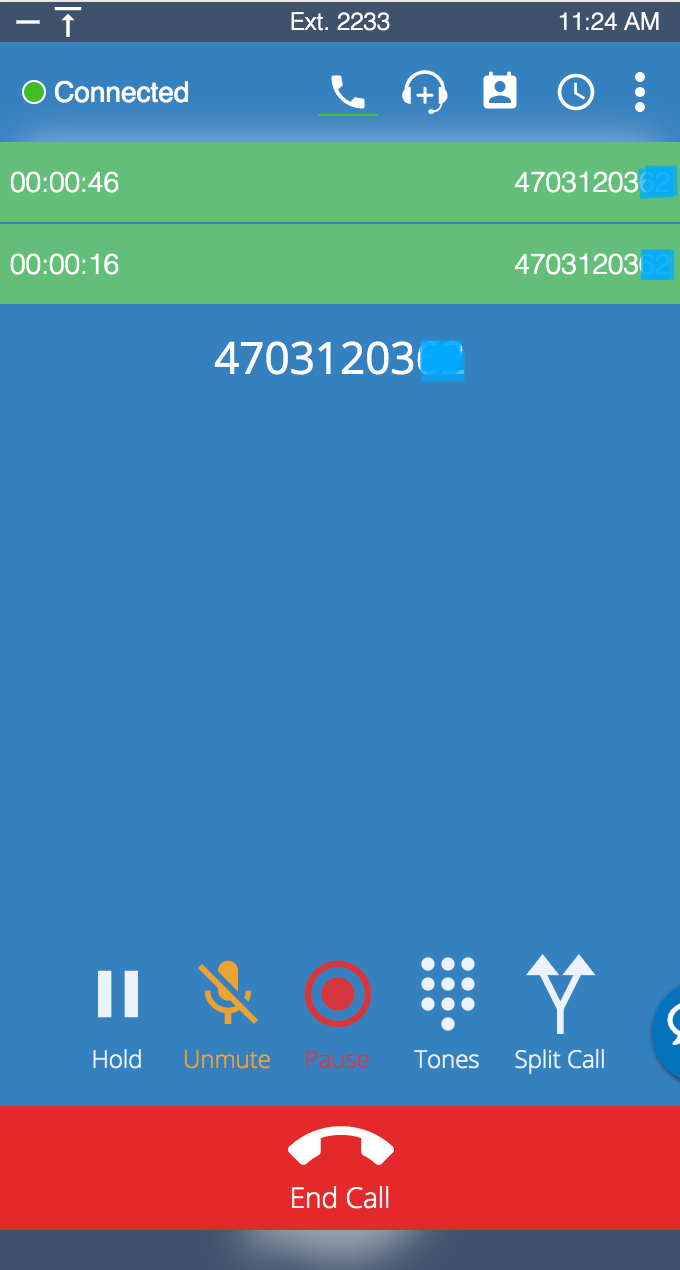
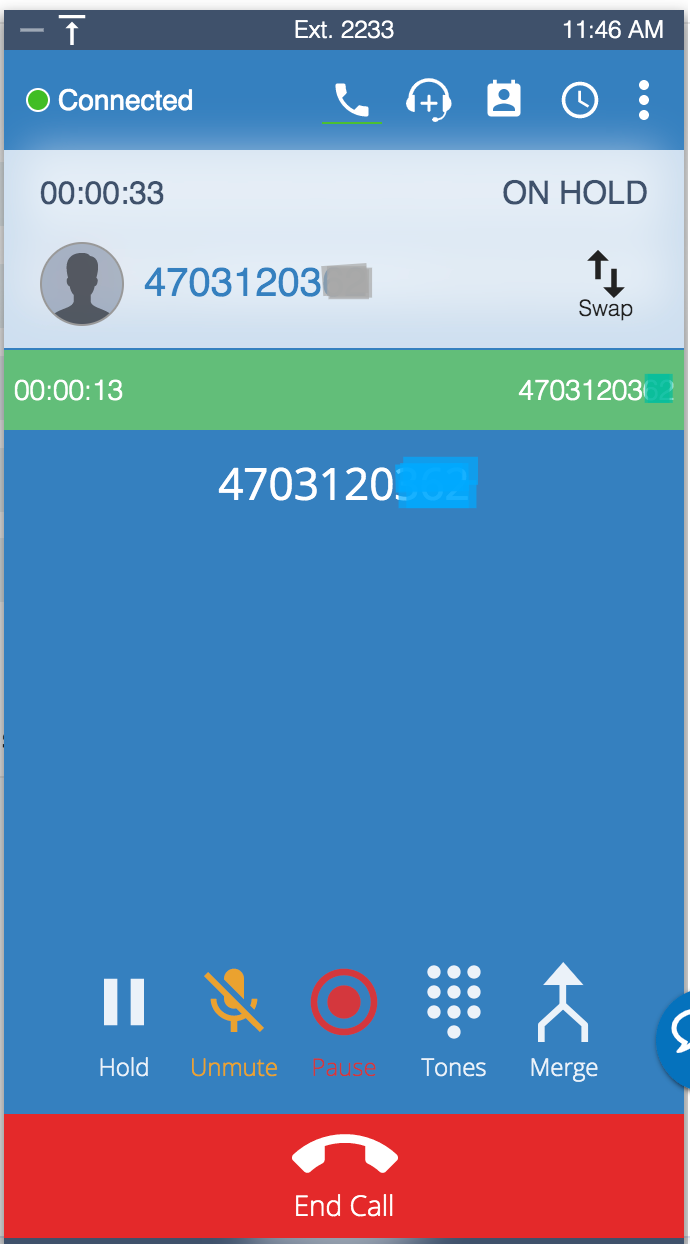
3-Way calling gives Genius License holders the ability to instantly add a call participant to an existing inbound or outbound calls. As the call creator you can: To add an agent or external phone number to your call, simply click "Add Call" located on the bottom right-hand side of your webphone. Add an agent or manager to the call using the contact list or by typing the relevant name/extension number into the search bar. Add them to the call by clicking the " Genius Tip: Agents that are available will have a green dot next to their name. If the agent has a blue or red dot next to their name are unavailable to join the call. To add an external number, simply type "+" and then select the dial pad number to dial the phone number you wish to add. Genius Tip: Be sure to dial “+” followed by the country code and number (no spaces or dashes). Once the call is accepted, the new agent or external participant will automatically be added to the call. All participants can now converse. If the call creator ends the call while the call is split, the active call participant will be disconnected and the remaining call participant will automatically be taken off hold. When the call creator ends the call, all participants will automatically be disconnected.
Add an external phone number
Add an Agent
 " icon located next to their name.
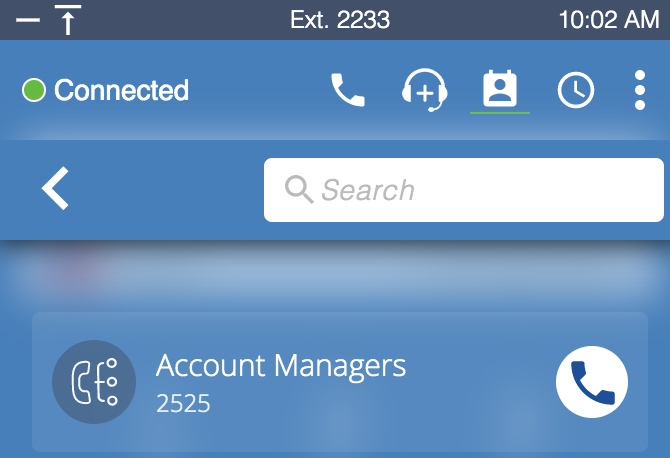
Adding an External Number

Merge Now
Call Participants
Call First
Split Call
Ending the Call
Network Indicator
AVOXI is a browser-based application that requires a network connection to successfully receive and make phone calls. The strength of the network connection can also impact the quality of these calls. The Network Indicator in the webphone is available to provide a rough estimate of the user's network strength.
There are three network strength results that can be represented by the indicator. These results are determined by the Bandwidth and the Round Trip Time of the network and are detailed below.
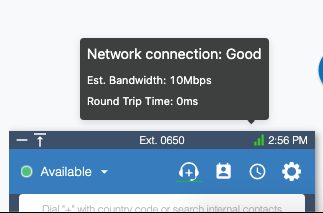
Good
Indicated by three green bars, a Good connection exceeds the network requirements. Bandwidth is above 0.2 Mbps and Round Trip Time is 100 ms or less.
- Bandwidth: 0.2 Mbps or more
- Round Trip Time: 100 ms or less
Fair
Indicated by two yellow bars, a Fair connection meets network requirements. Bandwidth is between 0.1 - 0.2 Mbps and Round Trip Time is between 100 - 150 ms.
- Bandwidth: 0.1 - 0.2 Mbps
- Round Trip Time: 100 - 150 ms
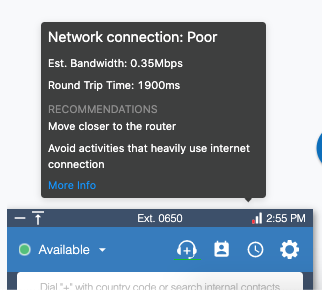
Poor
Indicated by a single red bar, a Poor connection is below network requirements. Bandwidth is below 0.1 Mbps and Round Trip Time is above 150 ms.
- Bandwidth: less than 0.1 Mbps
- Round Trip Time: more than 150ms.
Hovering over the indicator will provide the corresponding Bandwidth and Round Trip Time for the current network strength. An example Good network connection is below:
When the network strength is Poor, the network details will be provided along with recommendations for improving the network strength. More information on these recommendations can be found at the following link: Network and Connecting Issues
An example of a Poor network connection is below:
Selecting your Webphone Audio Device
As an AVOXI user, you have the ability to configure which audio device is used when receiving calls via your AVOXI webphone.
Microphone Settings
- To get started simply select the setting icon located in the top right-hand corner of your webphone.
- Using the dropdown under the "Microphone" select one of the available options.
- Once selected you should see the input bar animate as you speak.
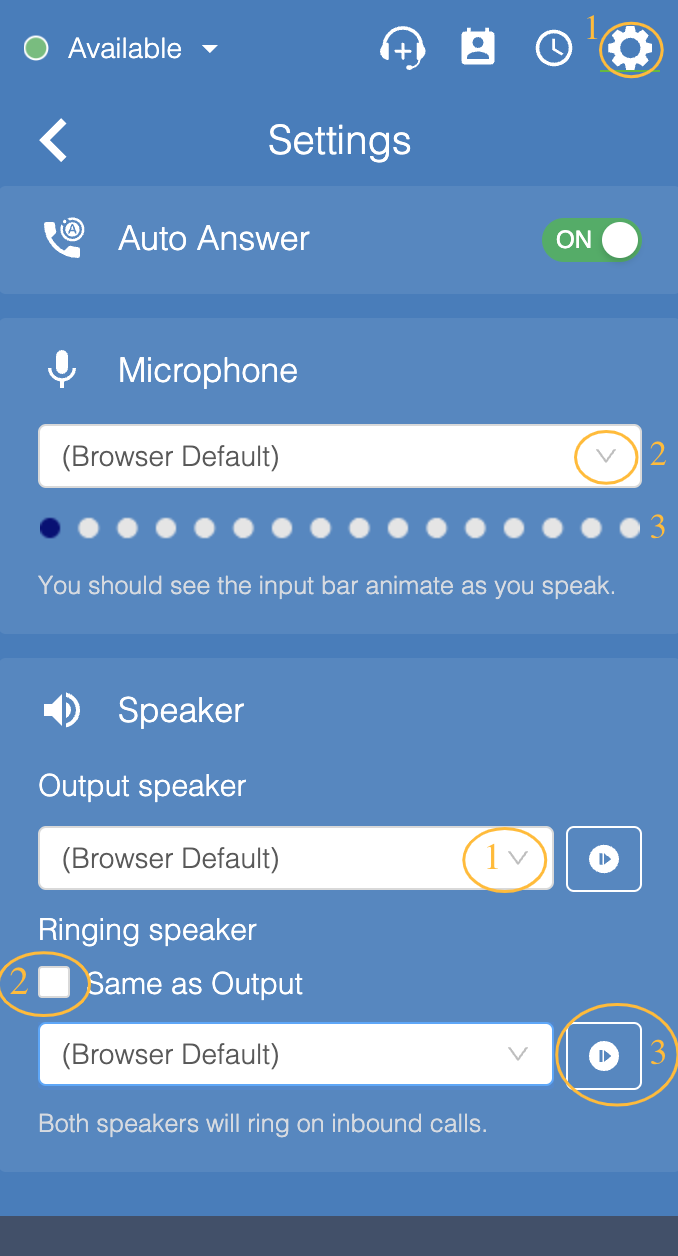
Speaker Settings
- Under the "Output speaker" use the dropdown to select one of the available options.
- The "Ringing speaker" has a checkbox for "Same as Output" which is checked by default. To adjust this setting, simply uncheck the “Same as Output” box and select a different device. When a different device is selected, calls will ring on both the Output speaker and the Ringing speaker.
- There is a "Test" button located next to each drop-down to test the "Output speaker" and if applicable the "Ring speaker".**
**The webphone must be docked to the AVOXI application to test the speakers. If the webphone is undocked or 'popped out' of the browser, the settings can still be updated and will work as configured but cannot be tested until the phone is docked.
Webphone Recent Calls
By selecting the Recent Calls icon in your web phone, you can see calls that were recently made or received. This includes:
- Answered Direct Inbound Calls
- Missed Direct Inbound Calls
- Answered Direct Outbound Calls
- Missed Direct Outbound Calls
- Internal (ext-to-ext) Calls
Team calls do not show in your Recent Calls in the web phone. If you would like to see Team Calls, please provide the Limited Team Activity permission to allow your Agents to see a limited version of the Team Activity page including their Answered Inbound calls.

Updating the Data Center on the Webphone
- Sign in to your Genius account at genius.avoxi.com
- Select the setting on your web phone by clicking the cog icon on the upper right.
- Select the appropriate Data Center in the dropdown
- NOTE: Changing the Data Center during an active call will result in the call dropping
Genius Best Practice Guide:
Best Practices and Troubleshooting Checklist
Use our tips, tricks, and troubleshooting steps below to ensure the best results
Use our tips, tricks, and troubleshooting steps below to ensure the best results and overall experience when using AVOXI and its features.
- Are you using a preferred browser?
- What are the minimum requirements to use AVOXI?
- Are you using the latest version of Google Chrome?
- Are you logged into AVOXI on more than one browser tab?
- Have you allowed access to your microphone and notification on your Chrome browser setting?
- Have you cleared your cache and cookies?
- Have you refreshed your browser?
- Have you performed a hard refresh by holding down the Shift key and pressing the Refresh button on your browser?
- Have you logged out and logged back into your AVOXI account?
- Have you tried logging into your AVOXI account using another laptop or desktop?
- Are you using a desktop or laptop?
- Do you have an internet connection? (Can you open another browser tab to a different website?)
- Are you using a VPN or a shared server/Remote Desktop, such as Citrix, Microsoft, etc, to access Chrome? (Please get in touch with your internal IT Support).
- Are you experiencing issues with your web phone? If so, please refer to our Webphone and Audio Troubleshooting guide.
- How to collect your call logs.
Click to Call Extension:
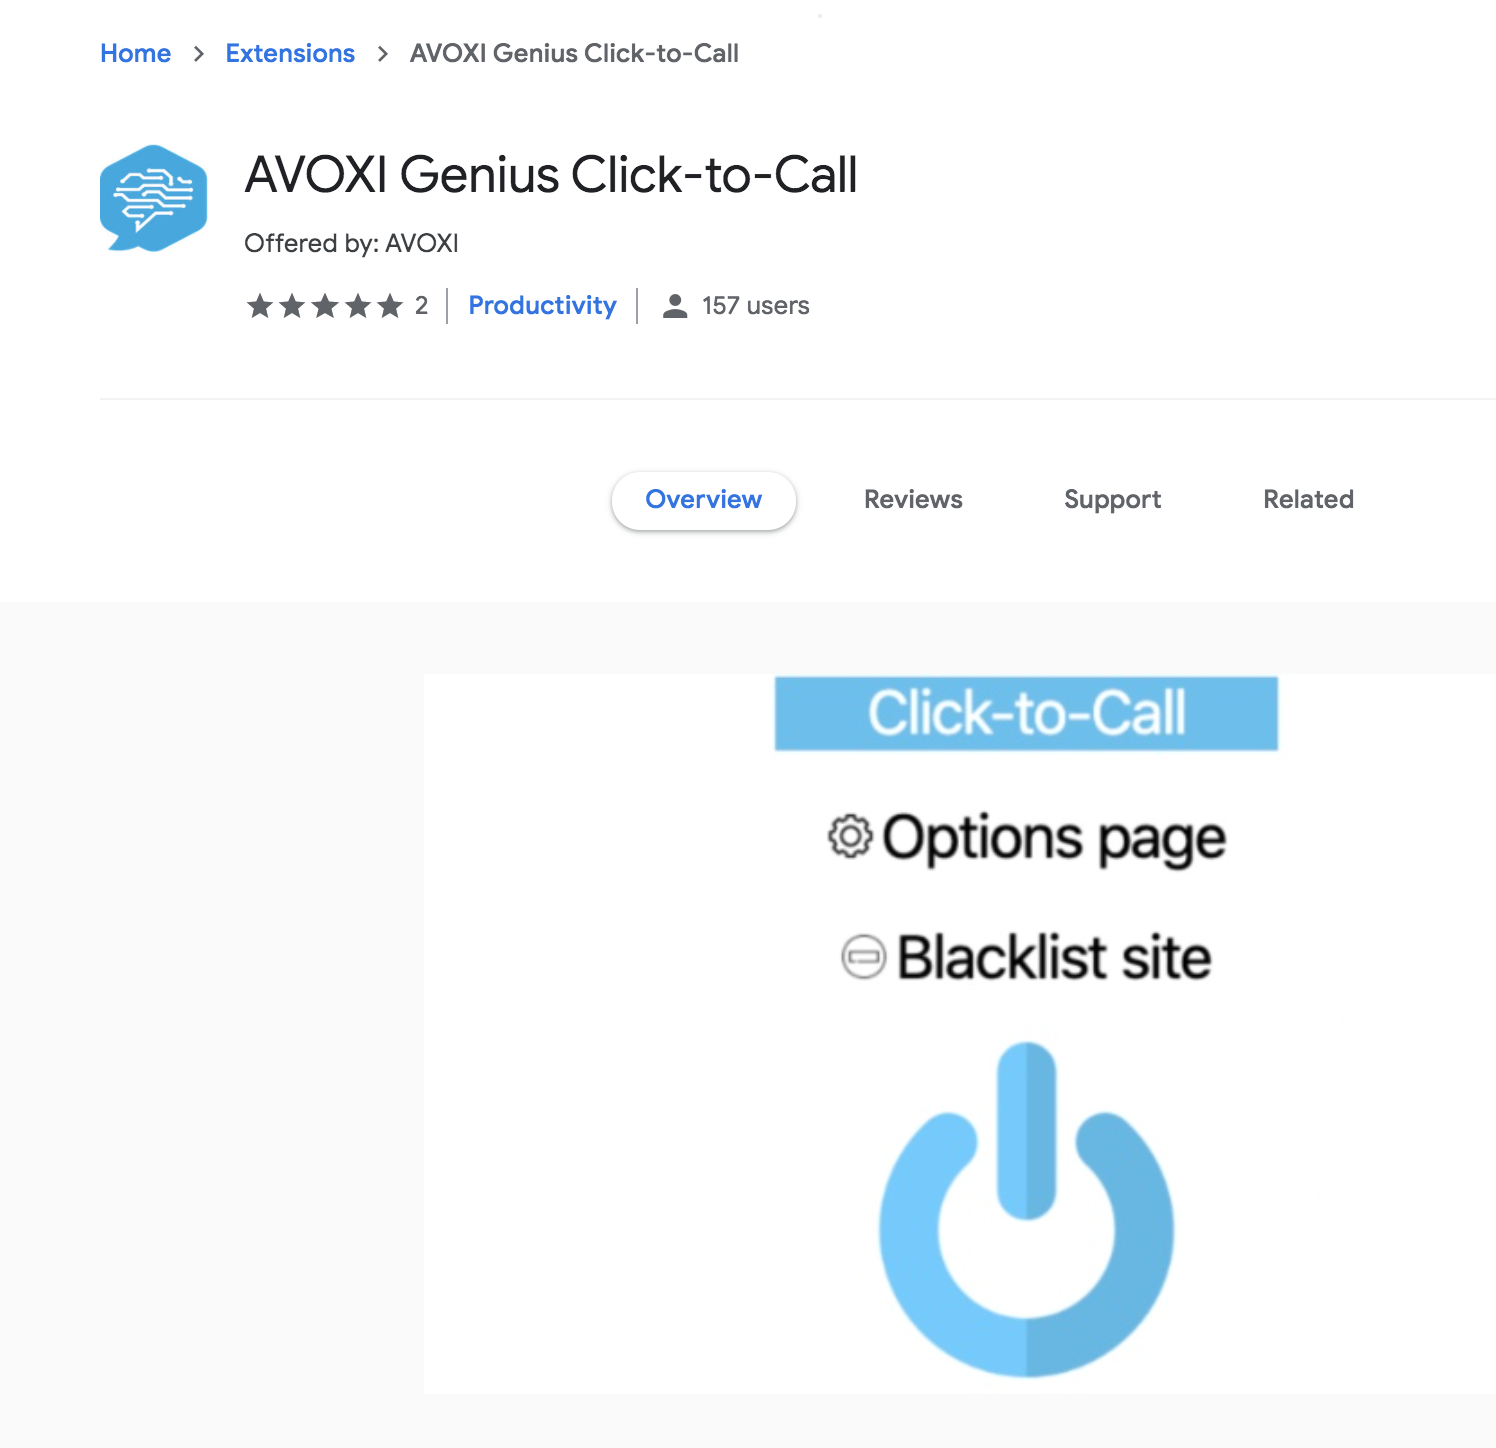
AVOXI Click to Call
AVOXI Click to Dial also is known as Click2Call is a web-based form of communica
AVOXI Click to Dial also is known as Click2Call is a web-based form of communication that allows a person to click a call button, image, text, or hyperlink to immediately connect with another person in real-time. Click to Dial functionality uses a browser plugin that gives agents the ability to auto-dial any number presented through a webpage on their Genius webphone. Available to all Genius Licenses holders (3 minimum license applies), it's suited to any Genius user requiring outbound dialing on both local North American and international numbers.
Using AVOXI Click to Dial with Salesforce, Hubspot, Zendesk, Zoho or another CRM integration gives agents an instant screen pop, which provides them contextual details associated with a contact on all inbound or outbound calls.
Use the below quick links to get started:
Installing Click-to-Call
Click to call is available to all Genius Contact and Enterprise Licenses holders at no additional cost. A web-based form of communication, the click to dial functionality uses a browser plugin that allows users to auto-dial any number presented through a webpage on the Genius softphone. It's suited to any Genius user requiring outbound dialing on both local North American and international numbers.
The Avoxi Genius Click-to-Call feature is compatible with Google Chrome, Edge, and Firefox browsers.
Genius Tip: Avoxi Genius Click-to-Call will be unavailable outside of the Chrome, Edge, or Firefox browser. This also excludes native applications such as spreadsheet and word processing programs.
AVOXI Click to dial is available to all Genius Contact and Enterprise Licenses holders at no additional cost. A web-based form of communication, the click to dial functionality uses a browser plugin that allows users to auto-dial any number presented through a webpage on the AVOXI softphone. It's suited to any Genius user requiring outbound dialing on both local North American and international numbers.
Installing AVOXI Click to Dial Chrome Extension
The AVOXI Click to Dial extension is available on the Chrome Webstore as an extension.
- Using the "Search Bar" on the top of the navigator located on the left-hand side of the screen to search for AVOXI Genius in the web store.
- Next click the blue "Add to Chrome" button highlight in orange below:
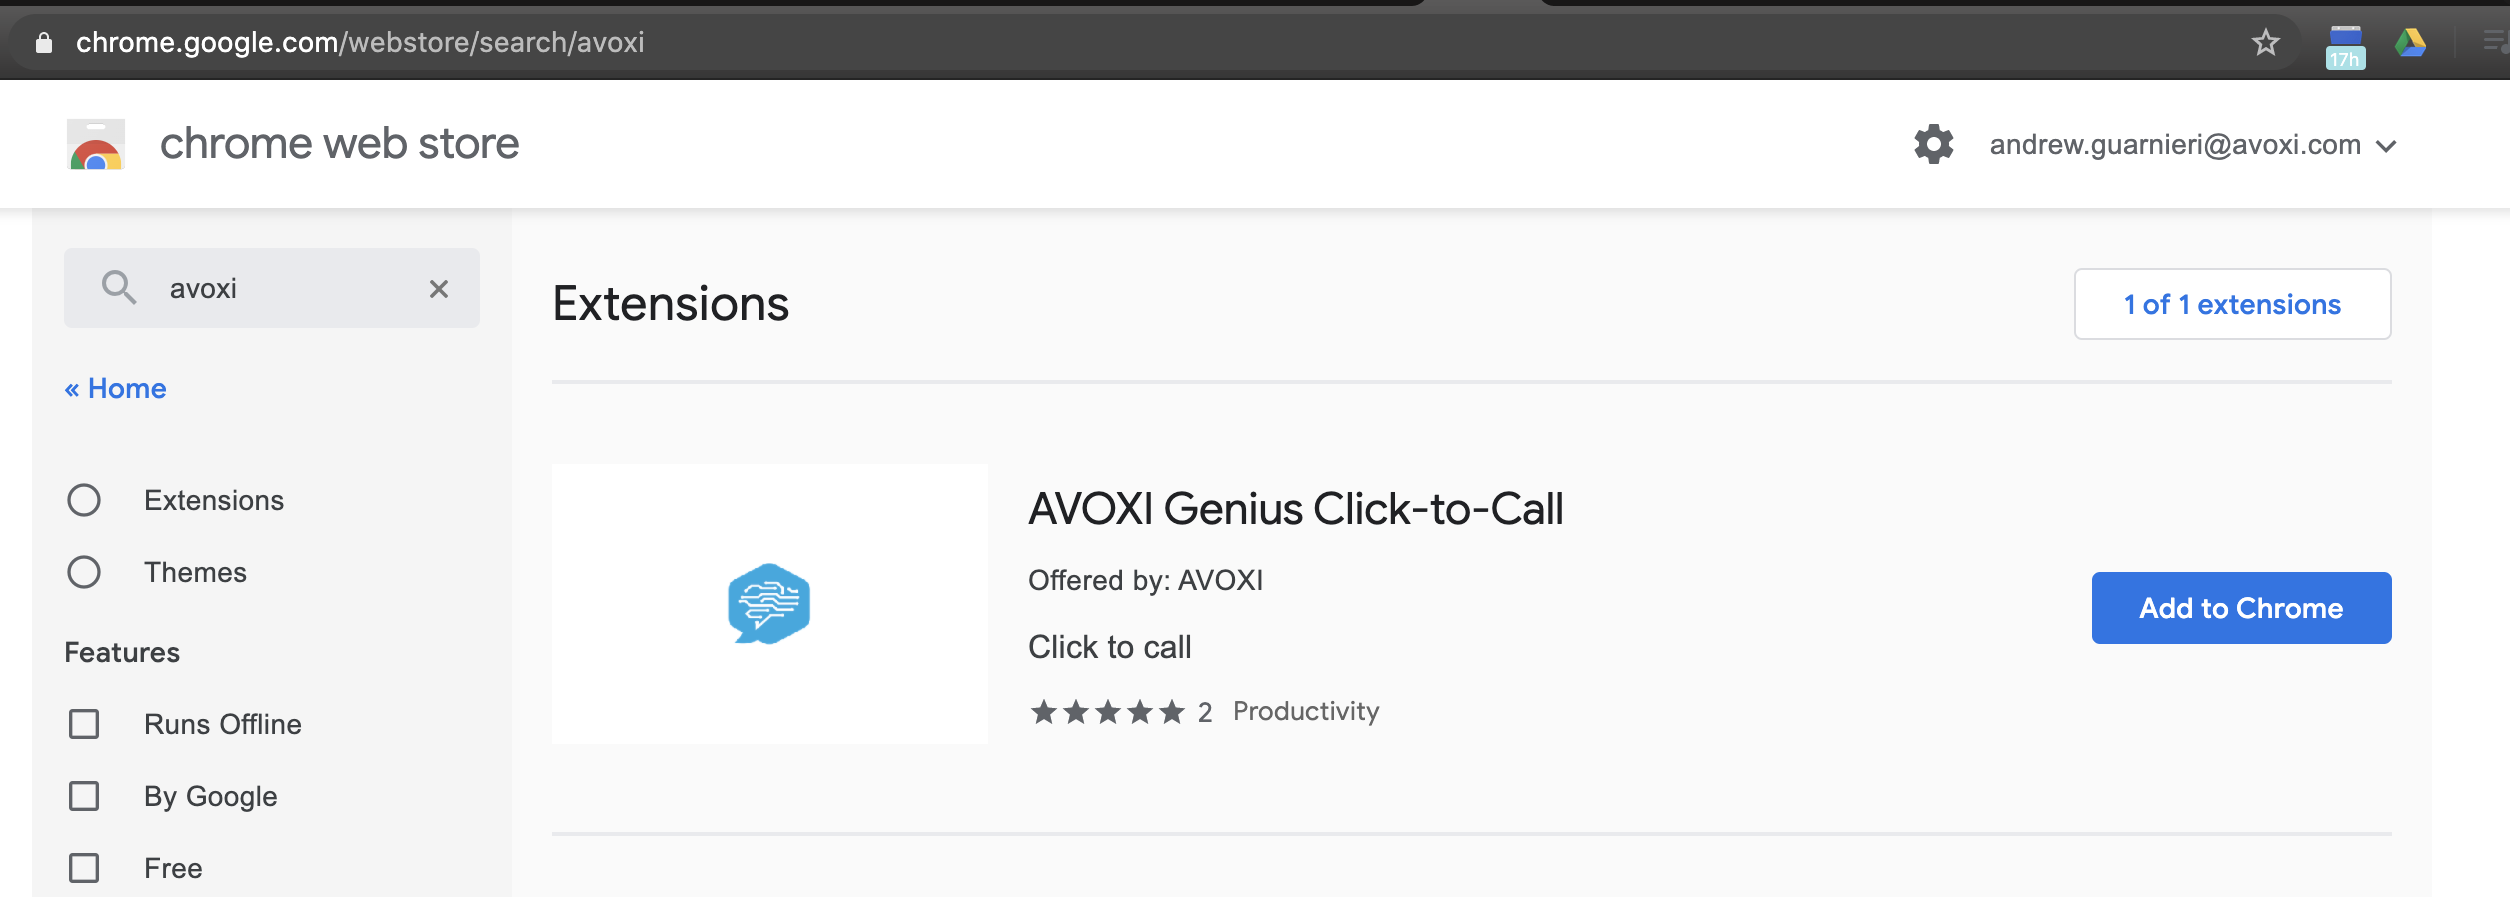
- The extension will install automatically!
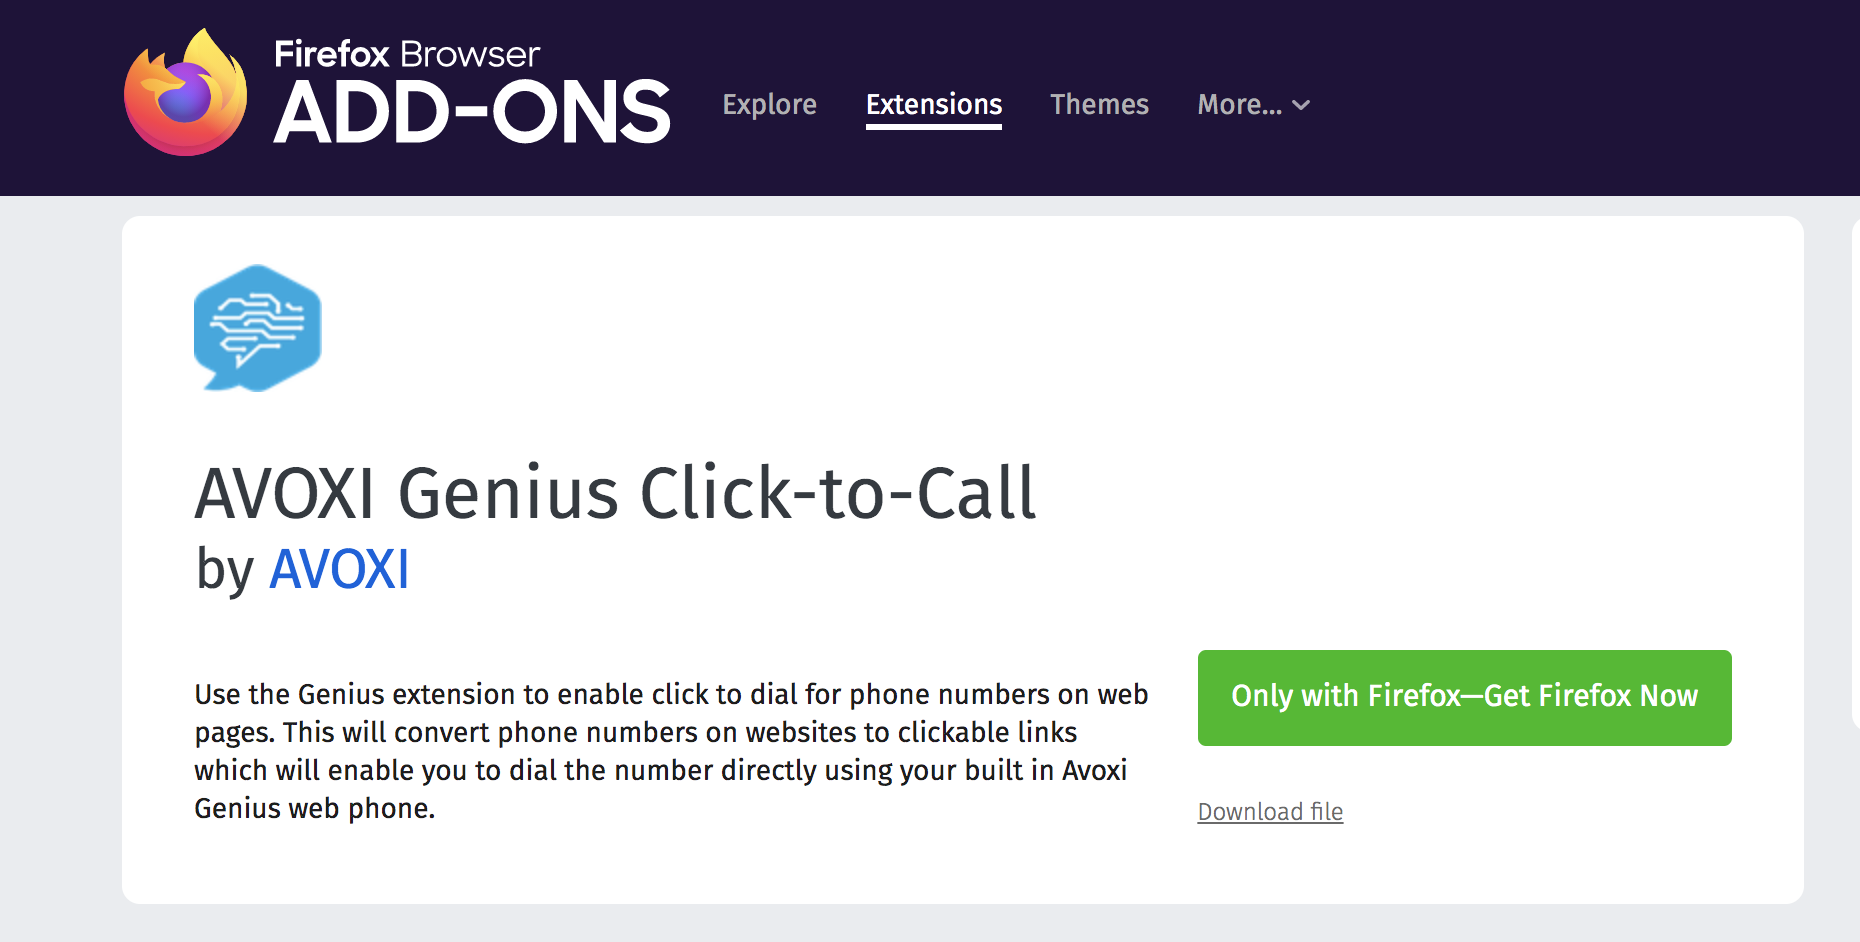
Installing AVOXI Click to Dial Firefox Extension
AVOXI Click to dial is available to all Genius Contact and Enterprise Licenses holders at no additional cost. Use the Genius extension to enable click to dial for phone numbers on web pages. This will convert phone numbers on websites to clickable links which will enable you to dial the number directly using your built-in Avoxi Genius webphone.
The AVOXI Click to Dial extension is available for free in Firefox Browser Add-Ons as an extension.
Installing AVOXI Click to Edge Extension
AVOXI Click to dial is available to all Genius Contact and Enterprise Licenses holders at no additional cost. Use the Genius extension to enable click to dial for phone numbers on web pages. This will convert phone numbers on websites to clickable links which will enable you to dial the number directly using your built-in Avoxi Genius webphone.
The AVOXI Click to Dial extension for Microsoft Edge is available for free in Chrome Webstore as an extension.
Using Click to Call
- After installing Click to Call as a browser extension, you will have an Avoxi Genius icon in your sidebar that is highlighted blue.
- That means the click to call extension is "ON"

- While the extension is on, all phone numbers in your google web browser will be highlighted as a hyperlink with a blue phone icon.
-
To place a call, ensure your genius application is open in Chrome, and click a highlighted phone number.

- Genius Tip: Click-to-call will not dial out a number if you are already on a call. There will be an option to be able to toggle on/off Click-to-Call functionality during calls in the future.
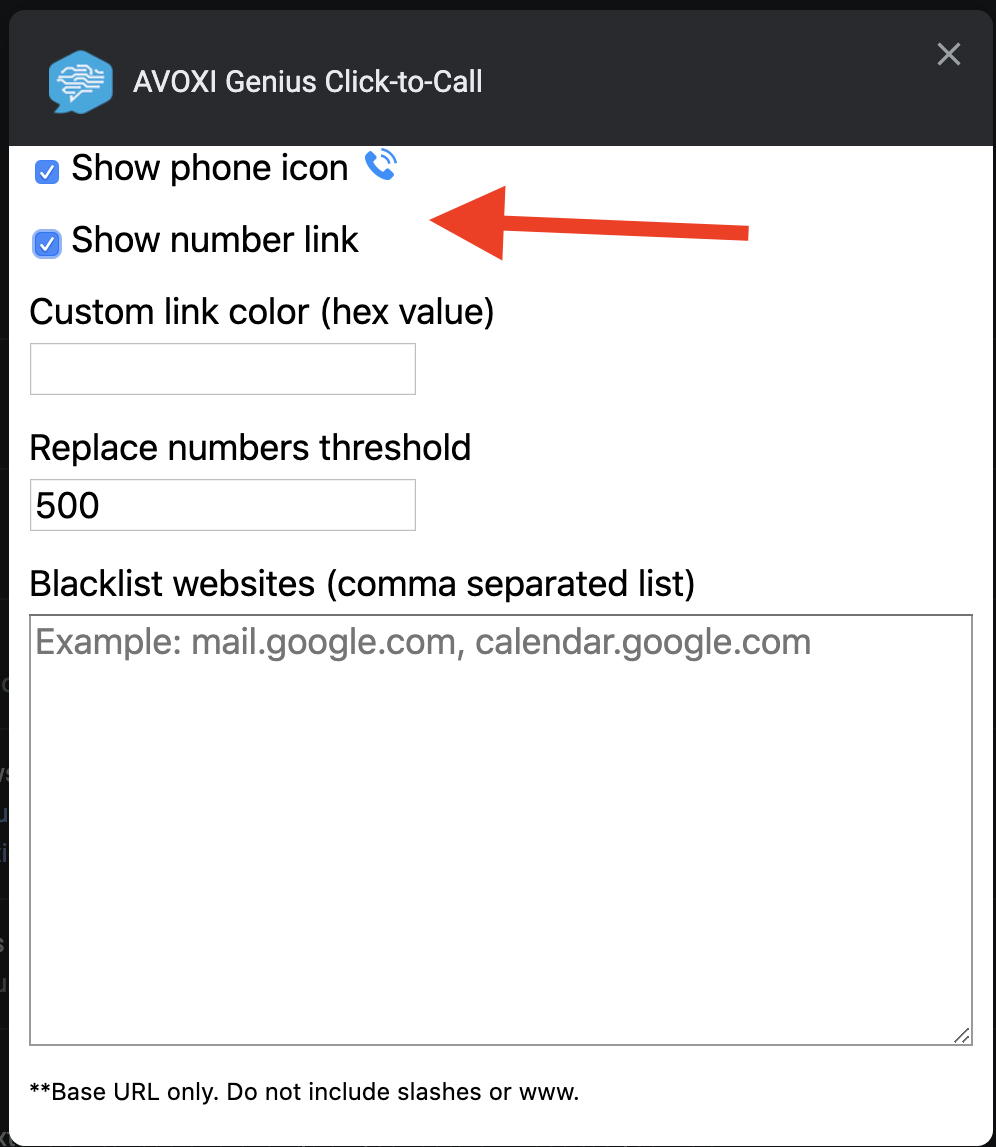
Click to Call has multiple configurable options including:
- Show the phone icon: check the box to have the icon viewable and clickable. Uncheck the box to have the phone icon disappear
- Show number link: check the box to have the number be highlighted and clickable. Uncheck the box to unhighlight the phone number.
-
Custom link color: to change the color of the link, insert a hex value for the color desired. Refer to this site for an easy guide to hex color values https://www.w3schools.com/colors/colors_picker.asp
Blacklisting Websites
-
AVOXI Click to Dial has the ability to blacklist websites per customer configuration.

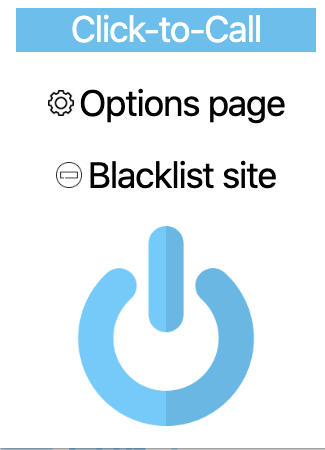
- If you would like to blacklist the website you are currently on, click the "Blacklist site".
-
This automatically adds the site to the Blacklist on the Options page.
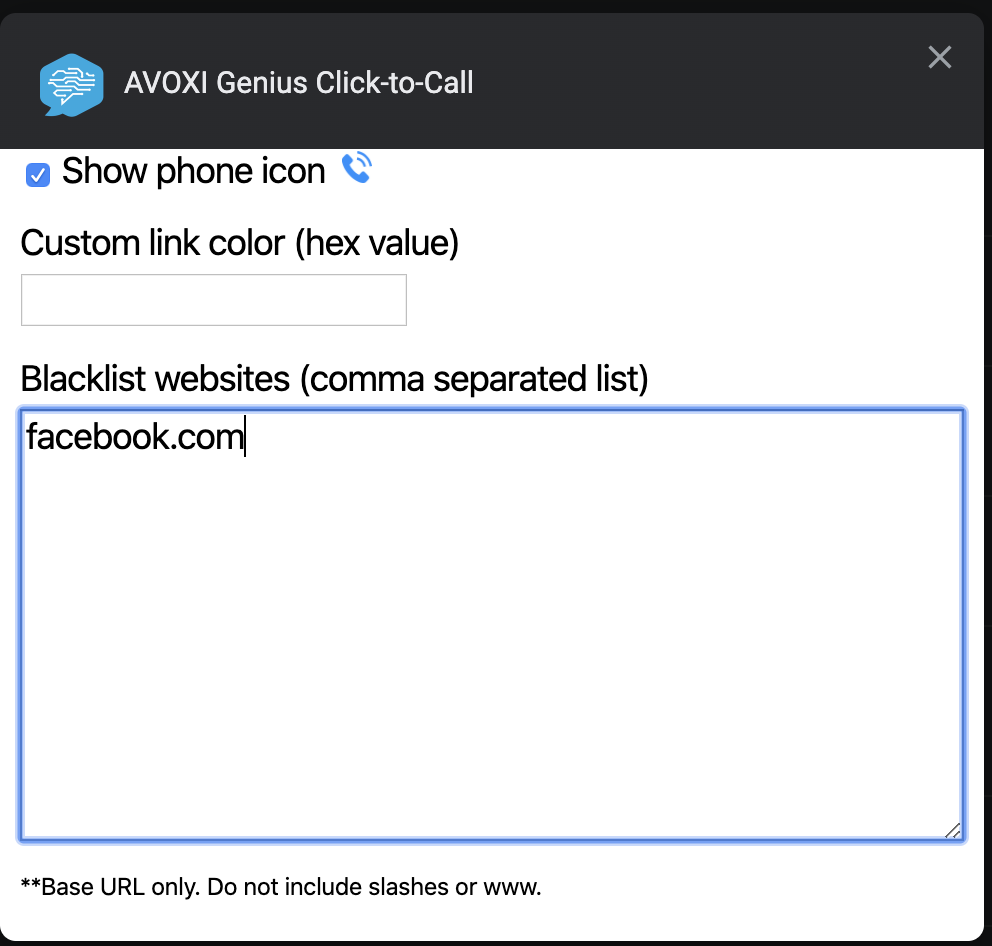
- If you would like to manually blacklist a site, navigate to the Options page and manually type in the website URL you would like to block. If there are multiple sites, separate the URLs with a comma.
- Note: For international numbers, click to call expects E.164 number formatting which requires a country code with a maximum of 3 digits, and the following subscriber number with a maximum of 12 digits. For more information regarding E.164 formatting, please follow the link https://en.wikipedia.org/wiki/E.164
Disabling Click to Dial
Yes, the ability to disable Avoxi Genius' Click-to-Call functionality is easy and intuitive.
- Navigate to the right of your browser address bar, and click the Genius icon to pull up the Click-to-Call Settings tab
- Click the blue power button to toggle functionality on (blue) and off (grey
Installing Genius Mobile Apps:
Android Mobile App Installation
Genius Self Troubleshooting Guide:
Genius Self Troubleshooting Guide
Agent Training Videos:
English Agent Training Video: