To get the most out of your numbers, you must set them up correctly. In this guide, we give you detailed instructions on how to set up your virtual number. Use the below quick links to skip ahead to the relevant section:
- Navigate to your Numbers
- Setup Your Call Forwarding
- Setup Your Voicemail
- Create Virtual Attendants (IVR)
Navigate to your Numbers
All users can view all Toll-Free, Local (DID, DDI), Mobile, and TrueLocal AVOXI virtual numbers associated with your company's account on the Numbers Dashboard of your AVOXI online platform.
View your numbers
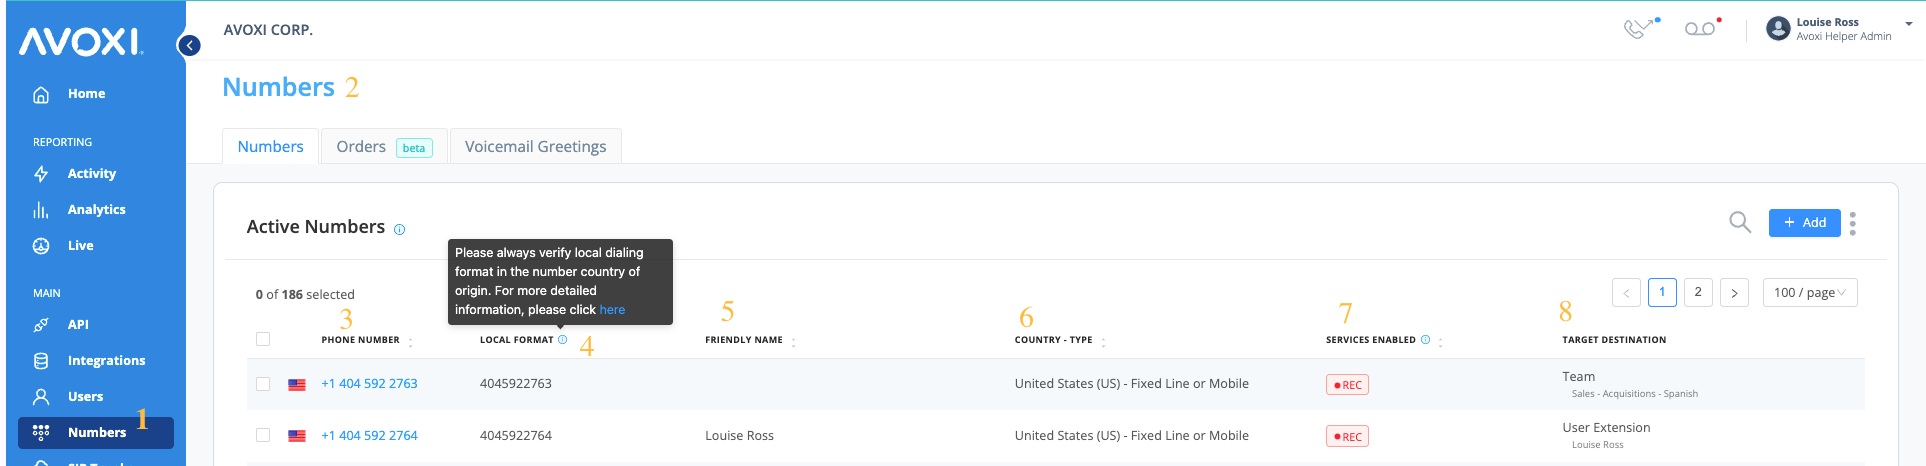
- Select the "Numbers" section in the left-side navigation bar to view your numbers.
- You can now view all numbers associated with your account on your organization's "Number Dashboard" under the "Manage" tab.
- Phone Number: Under the "Phone Number" column, you can view a list of all active phone numbers.
- Local Format - Always verify the local dialing format in the number country of origin; more information can be found here
- Friendly Name - This allows admins to assign user-friendly labels to numbers.
- Country & Number Type - Toll-Free, Mobile, or Fixed Line.
- Services Enabled - This column will show which services are enabled on that particular number (for example, Voicemail / Call Recording / SMS/TrueLocal).
-
Target Destination - How incoming calls to a specific number will be answered (example: forward to an external number/voicemail/extension/SIP Forwarding/MS Teams) and to who the number is assigned.

-
Setup Your Call Forwarding
The AVOXI Call Forwarding feature allows businesses and individuals to forward incoming calls to other destinations. Users can automatically route inbound calls to another platform, such as a mobile phone, alternative office number, location, or PBX. Using pre-set rules, users can set calls to route to different numbers at different times of the day.
The “active time” functionality allows you to conduct business and maintain your professional image, regardless of your office location or time zone. Active times help companies worldwide run smoothly and stay in touch with essential contacts, customers, or suppliers.
Get started using the below links to our step-by-step guides
- Setup Call Forwarding on a Number
- Apply Forwarding Rules to Route Your Calls Properly
- Forwarding Calls To (Routing Calls)
- Important Tips & Tricks
Configure your Call Forwarding
- Begin by logging in to your AVOXI Account.
- Once successfully logged in, click the Numbers tab on the left-hand navigation bar.
- Then, select the phone number for which you wish to set up your Call Forwarding.
-
Tips & Tricks: You are forwarding calls from your business phone line or any other primary contact phone number where you receive incoming calls.
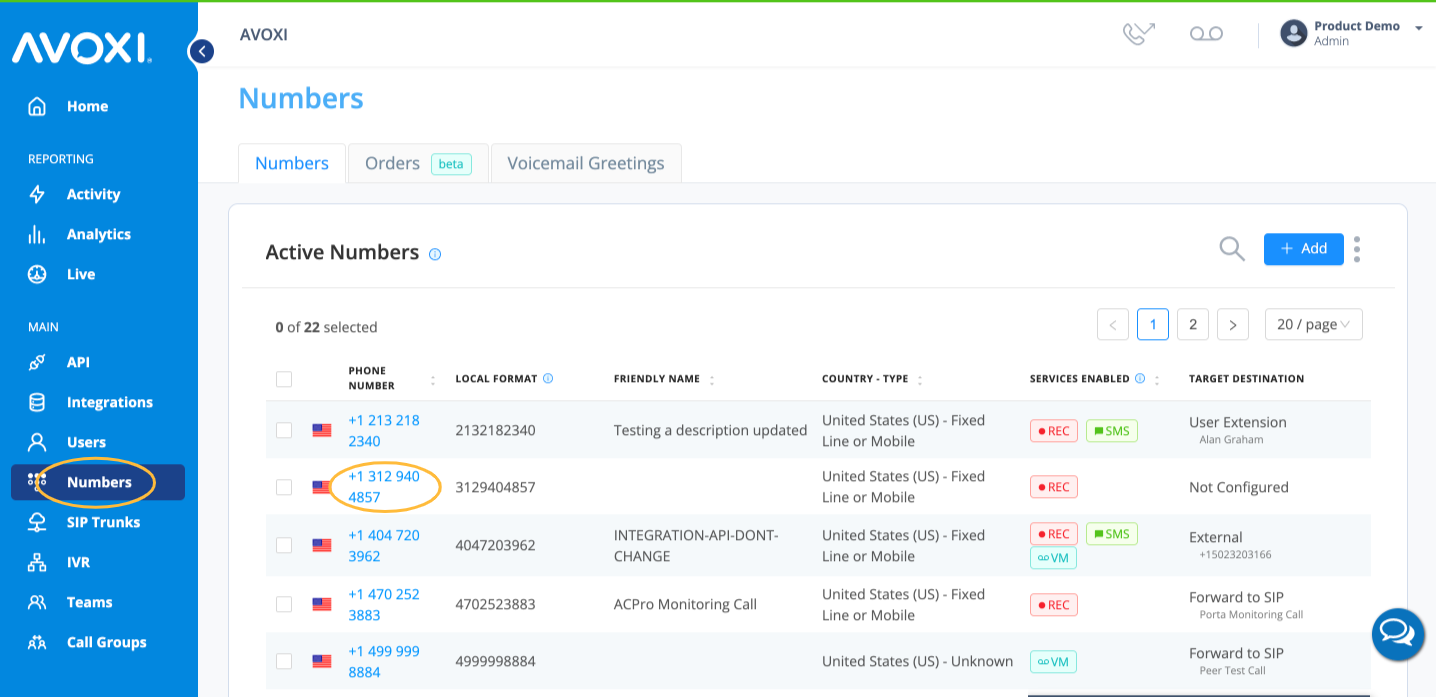
- You will now be directed to the number profile and configuration menu.
- Next, click the “Forwarding” tab located above the configuration menu.
Apply Forwarding Rules to Route Your Calls
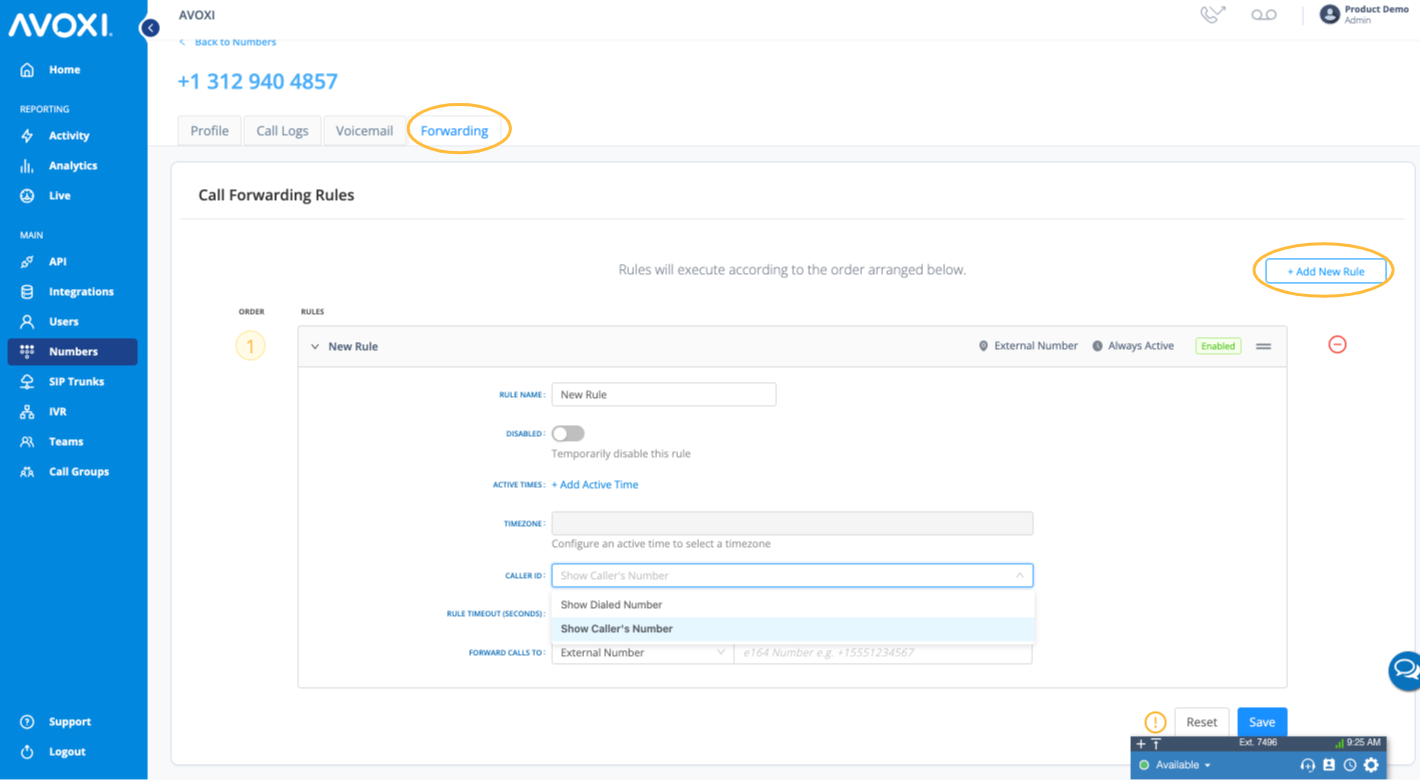
- Click “+Add New Rule,” located on the right-hand side of the screen.
- To create your forwarding “rule, click the pencil icon.
-
Rule Name
- Start by giving your new rule a descriptive name to help you identify it later.
-
Disabled
- Toggle ON to temporarily disable this forwarding rule or toggle OFF to keep the rule active.
-
Setting Active Times
- As an advanced feature, you can set specific active times for when the rule should apply.
- Select the start date for when the rule should begin and end.
- To apply the rule indefinitely, set the end date to never. “Active Days” and “Time” allow you to select specific days and times when the rule should be active.
-
Caller ID
- Next, decide how you’d like incoming calls to display on your phone’s screen.
- “Show Dialed Number” will display the number that the call is being forwarded from.
- “Show Caller’s Number” will display the incoming caller’s number.
-
Rule Timeout (Seconds)
- Set how many seconds the call should ring before the following rule is applied or the call is diverted to an alternate destination such as a voicemail (as a rule of thumb, 5 seconds is one ring. We recommend at least 30 seconds for optimal configuration).
- Tips & Tricks: Zero (0) will set the rule to never timeout. This timeout will NOT be considered when forwarding to a Call Queue or a Virtual attendant.
Forwarding Calls To (Routing Calls)
You can send incoming calls to the new receiving phone number or device. During this step, you’ll select the destination to which you want to forward your incoming calls.
- Using the dropdown menu, choose your forwarding destination. Your choices include external number, user extension, team, virtual attendants, voicemail, and SIP Forwarding.
- When forwarding calls to an external number, ensure you enter the plus sign followed by the country code before entering the number.
Forward Calls to Voicemail
- To set the number directly to voicemail, set the timeout to 1 sec and put the “Forward calls to” section to voicemail. (Note: Voicemail cannot be enabled in a Call Forwarding rule until configuring the voicemail feature. Use the following guide to set up your voicemail.)
- On completion, select the Save button.
Forwarding Calls to Virtual Attendant
- To set the number to go directly to an IVR, set the timeout to 1 sec and set the “Forward calls to” section to “Virtual Attendant” (Note: Before forwarding calls to your Virtual Attendant, ensure you configure a Virtual Attendant.)
- On completion, select the Save button.
AVOXI Tips & Tricks
- Rules can be arranged in the order of preferred execution.
- You can add several rules with different active times to cover multiple time zones.
- Be careful of time conflicts; if two rules have conflicting active times, you may encounter an error that will prevent your call from reaching its final destination. To avoid forwarding conflicts, make sure none of your busy times overlap.
- Ensure these are set up before selecting extensions, call groups, call queues, or virtual attendants.
- Voicemail cannot be enabled in a Call Forwarding rule until the voicemail feature has been configured.
- AVOXI does not offer simultaneous forwarding. However, rules can be set with overlapping active times; if the first action doesn’t answer, the call will be routed to the second.
- You can edit your rule anytime by clicking on the pencil icon.
- You can turn rules on and off anytime using the toggle beneath the rule name.
- To delete the rule entirely, click on the trash can icon.
-
Setup Your Voicemail
Available with your AVOXI account, the "Voicemail to Email" feature delivers voicemail messages directly to your inbox as an MP3 audio file and offers unlimited voicemail storage.
Use the below step to configure your voicemail settings on a number via your AVOXI online portal.
- To get started, log in to your AVOXI account.
- Select the "Numbers" icon located on the left-hand navbar.
- Next, select the "Phone Number" to set up the voicemail.

- Next, click on the "Voicemail" tab.

- Next, Click on "Edit Voicemail Greeting"

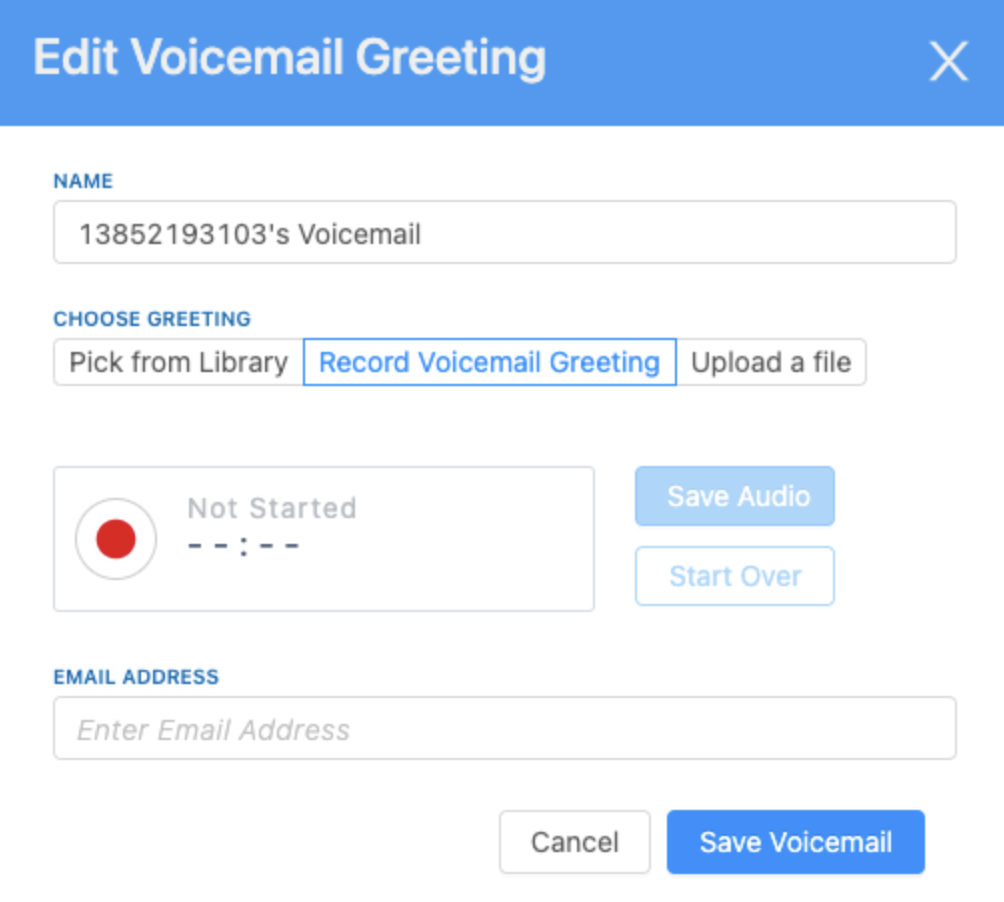
- On the "Edit Voicemail" popup, you can now create your voicemail.
-
Name - Enter a Voicemail Name for future reference.
-
Choose Greeting - For your voicemail greeting, you have three different options:
- Pick from Library: Click the dropdown arrow and the "Save Voicemail" button to select one of our preloaded recordings.
- Record Voicemail Greeting: Record your greeting. Select the record button to start recording. Once finished, select the stop button.
-
Upload a File: You can upload a file your company already has by dragging and dropping it or selecting upload, then choosing Save Voicemail.

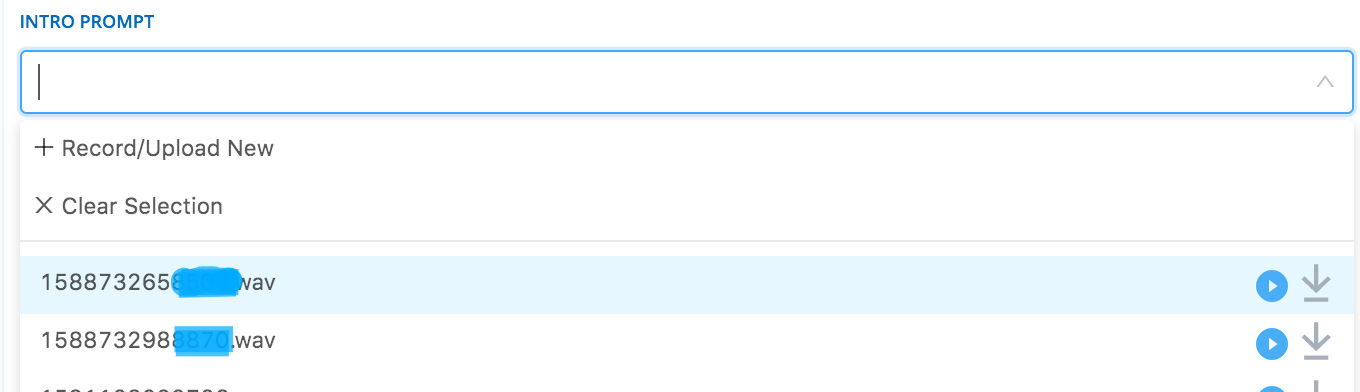
- Tips & Tricks: In the audio file dropdown, you can preview and download a file by pressing the blue play button and the grey download button.
- Finally, set the email address to which you would like your voicemails routed. If no email is entered, the greeting will not be saved.
- Lastly, click "Save Voicemail" to confirm your settings
-
Name - Enter a Voicemail Name for future reference.
Tips & Tricks: Remember to include your voicemail in your call forwarding rules; use our guides to update an existing voicemail or download your voicemails.
-
Create Virtual Attendants (IVR)
-
AVOXI IVR (Interactive Voice Response) is a feature that allows organizations to create automated greetings and audio prompts. IVR gives callers instant access to the customer’s business with essential product or service information before speaking to an operator. Callers are promptly transferred to the desired department or agent through an interactive voice reaction program or virtual attendant, which is favorable to both the client and the business.
Using AVOXI IVR, you can quickly and easily configure self-service menu options to direct callers to the right agent or department the first time, such as:- Record your greeting, upload a new file, or choose from pre-existing recordings.
- The menu prompt lets callers choose from various options in your recording.
- The timeout prompt is the recording that will play if the caller does not take any action.
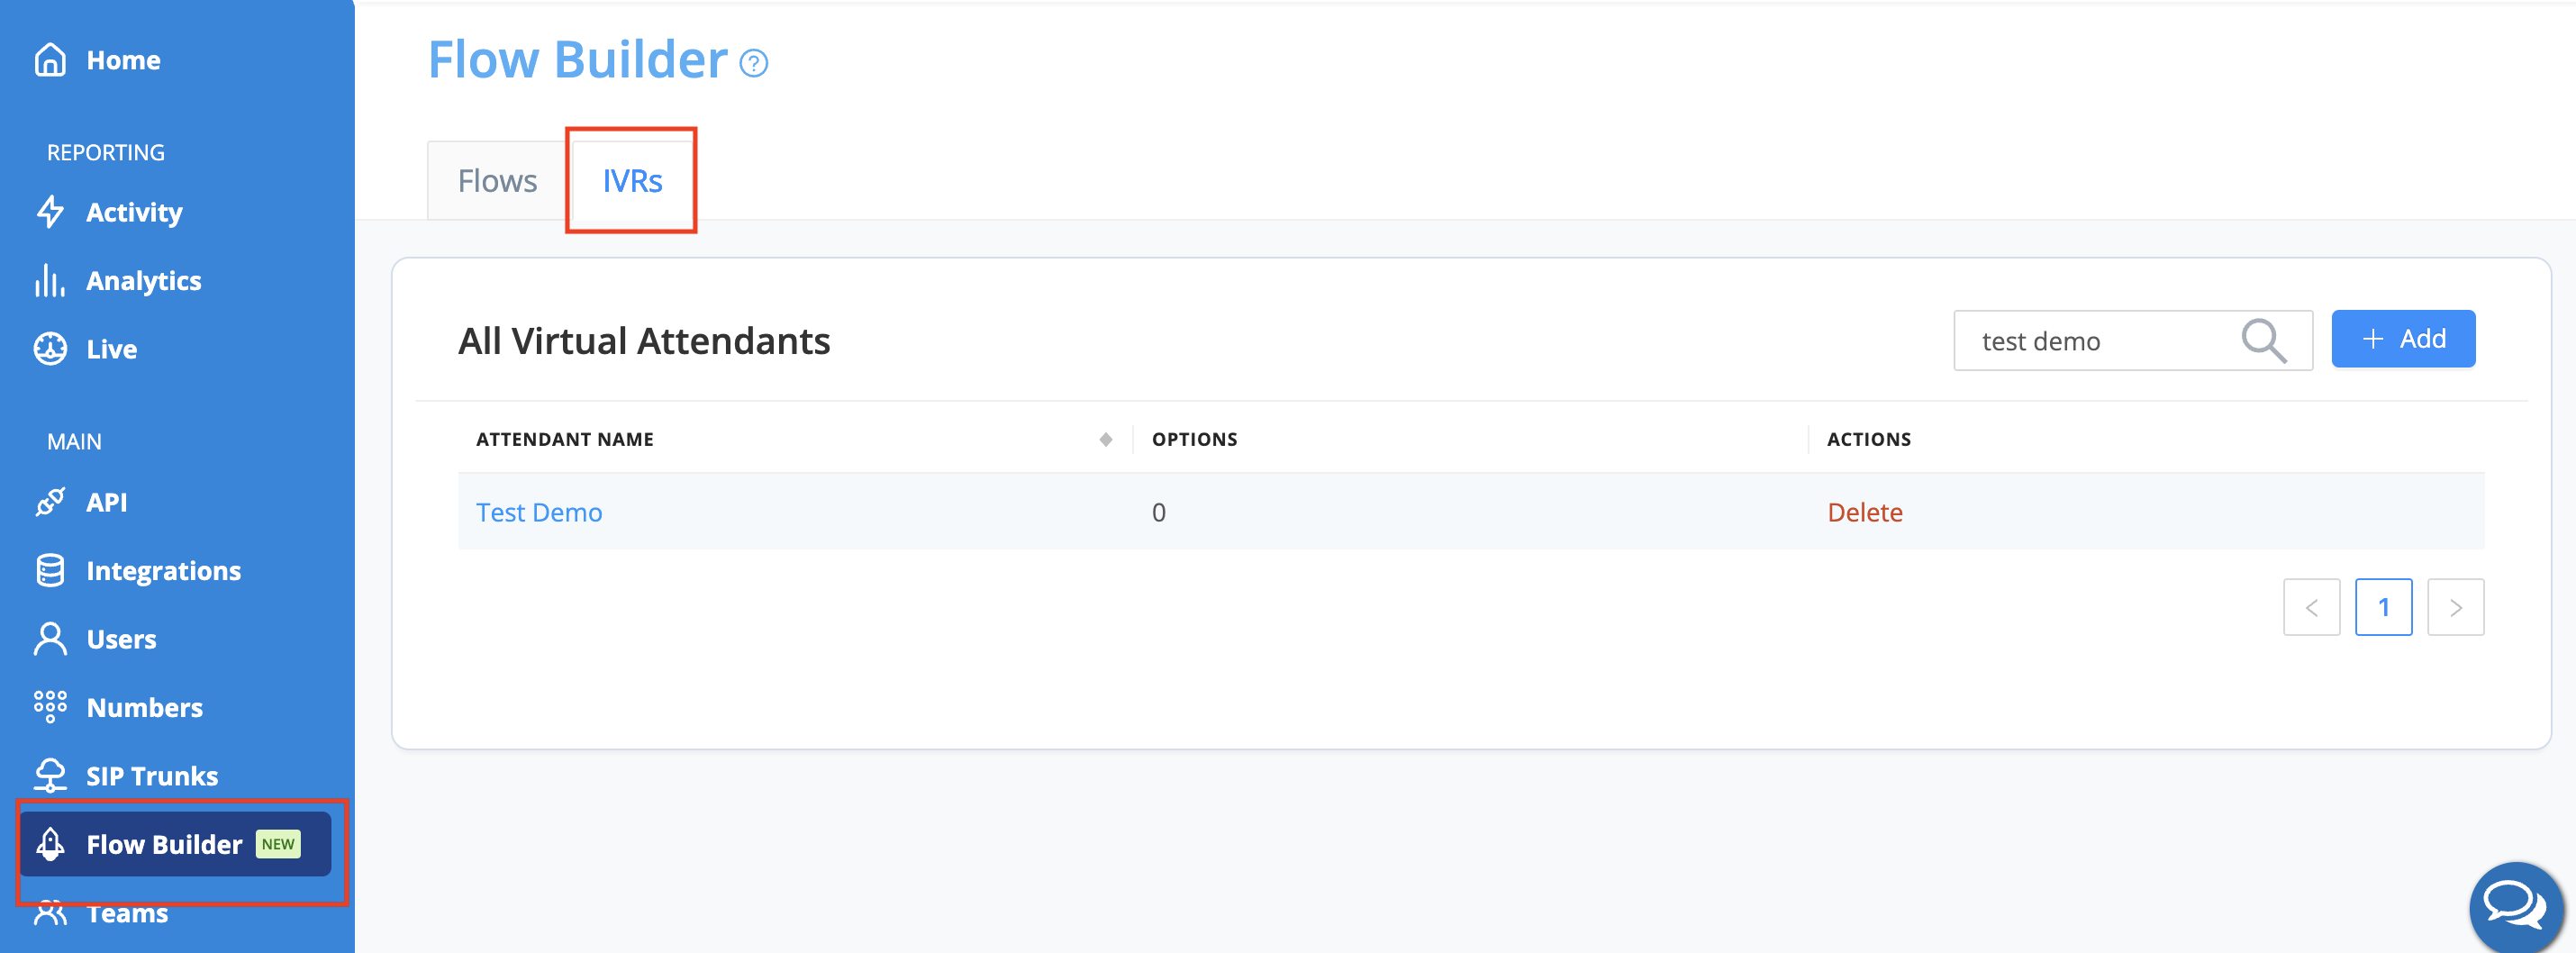
Creating a Virtual Attendant (IVR)
Select the “Flow Builder” section on the left-hand side navigation, and go to the “IVRs” tab to create a virtual attendant.

Select +Add in the top right-hand corner.
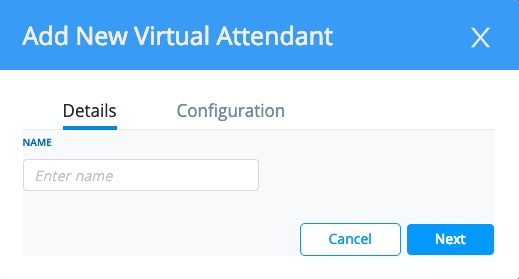
Enter a name for your new virtual attendant and select Next.
Configure the voicemail settings for your virtual attendant. Choose an existing voicemail or create a new voicemail.
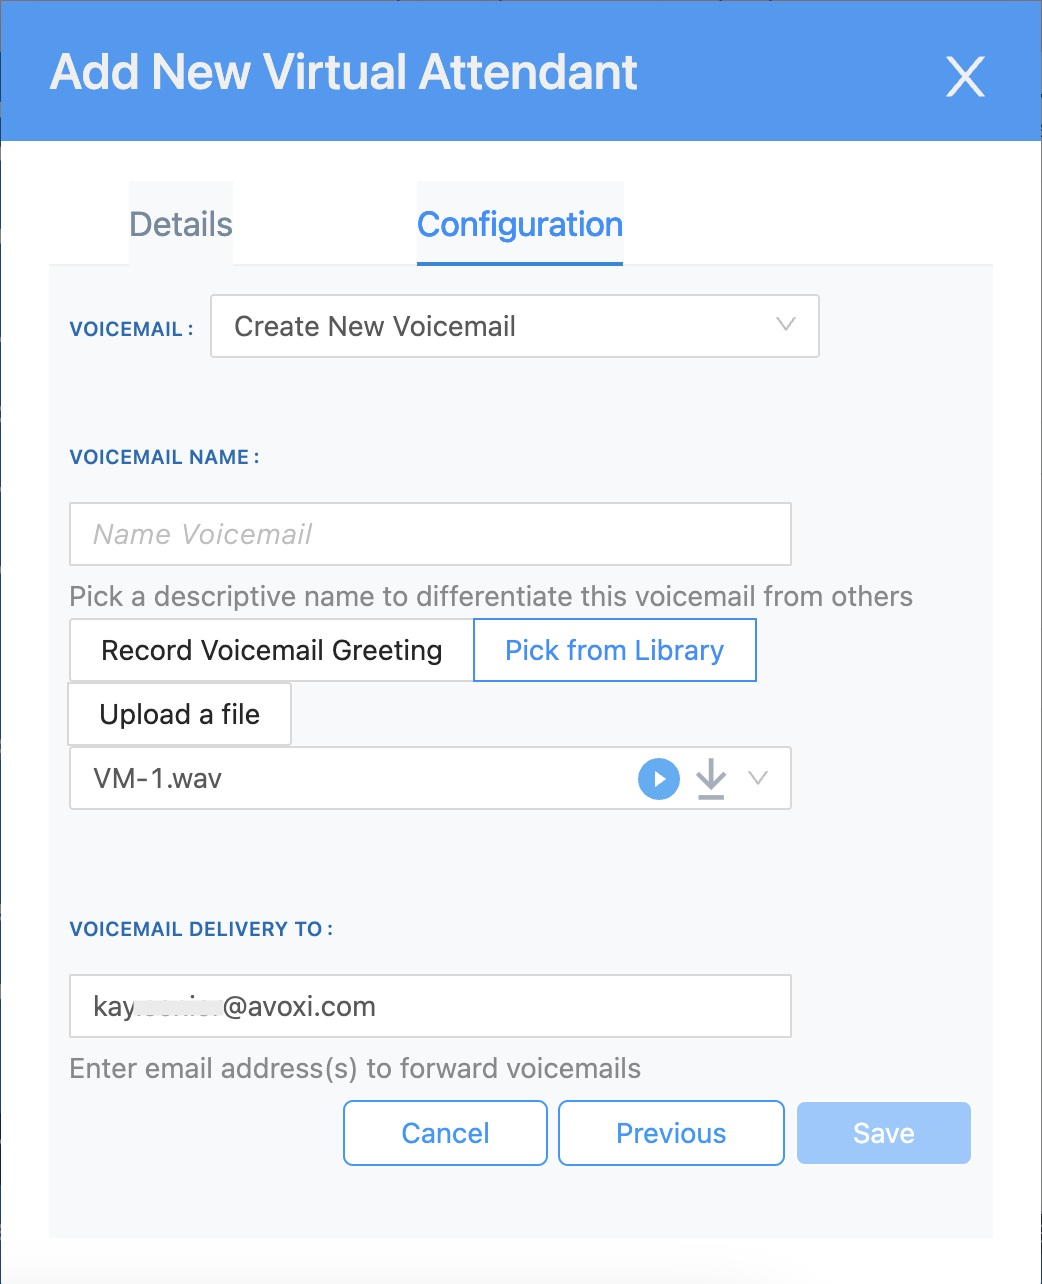 Record Voicemail Greeting - Record your greeting (see the below guide)
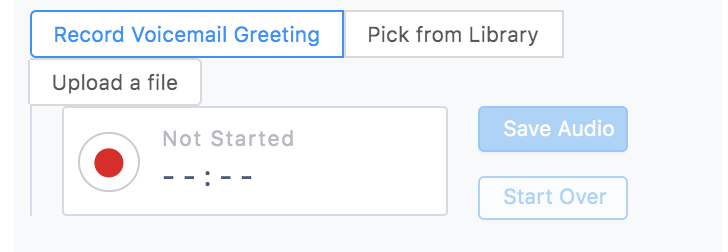
Pick from the Library - Choose one of our preloaded recordings.
Upload a File - Upload a File your company already has.
Enter the email address to which you want voicemails sent, and select your timeout. Then choose Save.
AVOXI TIP: Timeout is when the rule will apply before the call goes to voicemail.
Recording personal greetings/prompts
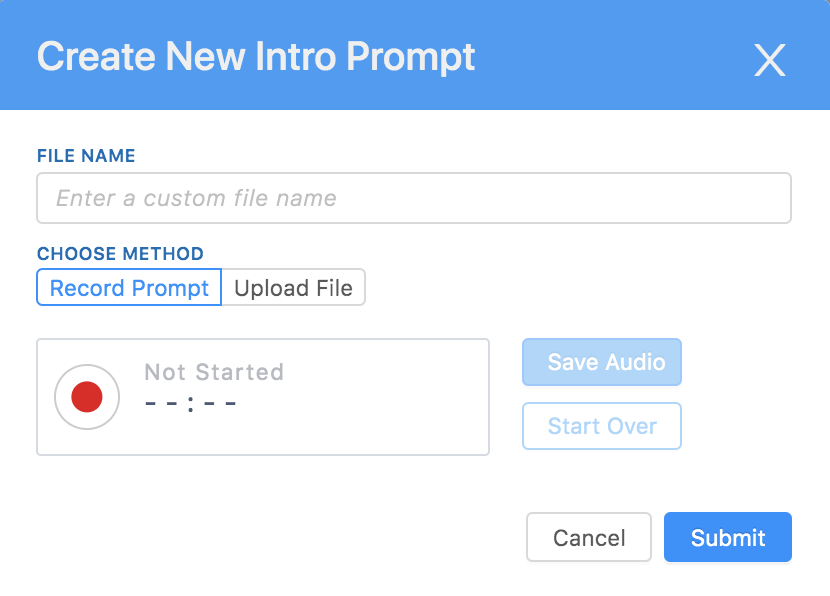
Give your prompt a name, and then select the record button to start recording.
Once finished, select the stop button. Finally, you can playback your recording by selecting the play button.
If you’re happy with the recording, select Save Audio and submit.
Uploading greetings/prompts
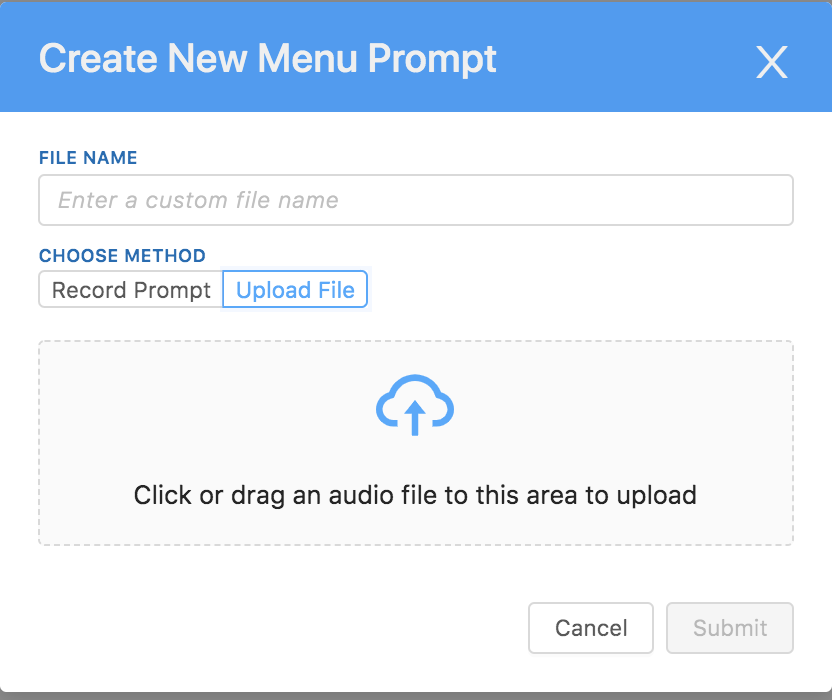
Upload a File—You can Upload a File your company already has by simply dragging and dropping the file or selecting upload. Make sure to give your prompt a name and then select Submit.
AVOXI TIP: Make sure your audio files are saved as .wav
Repeat these steps for each prompt type below and then select Save.
Adding prompts
Next, add your prompts, which are visible under your virtual attendant configuration:
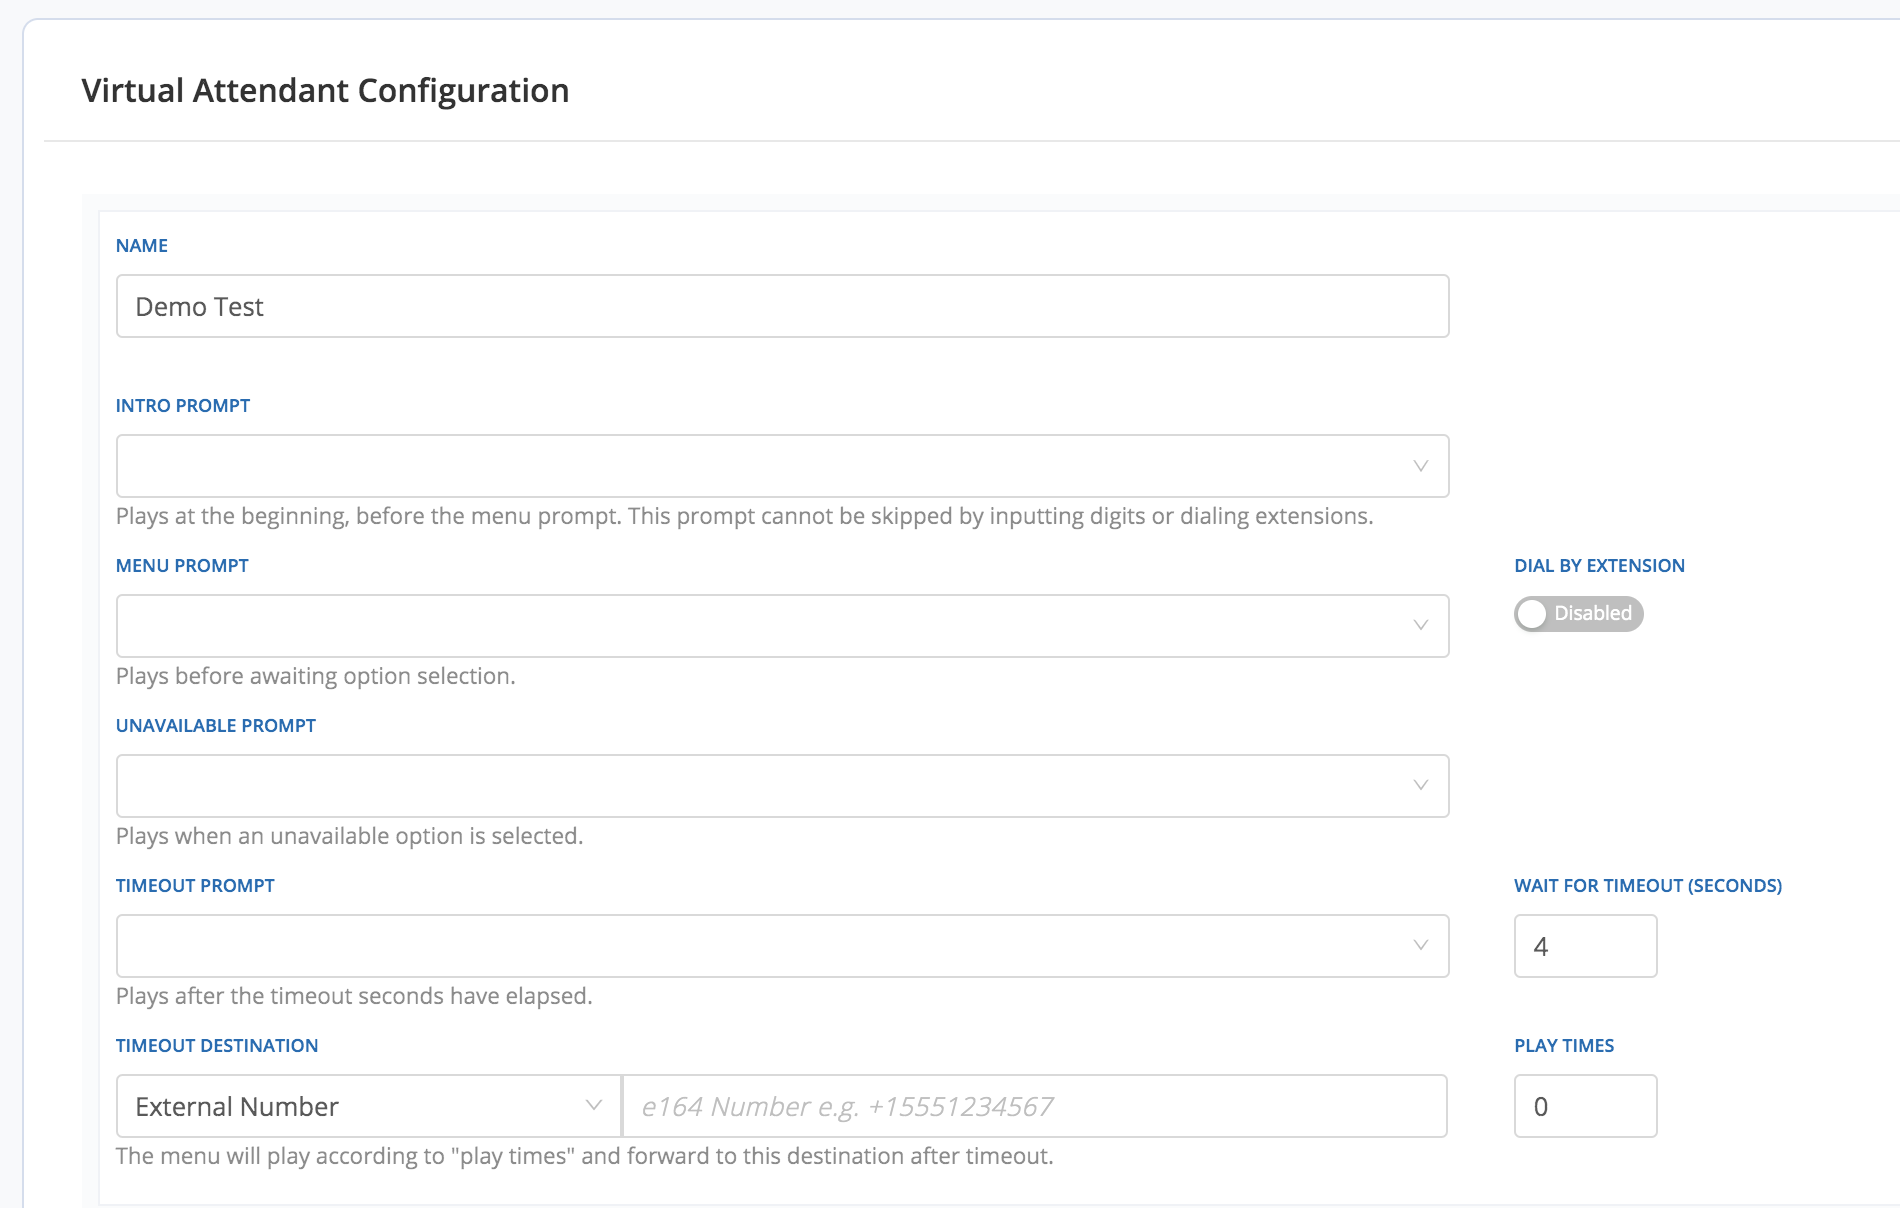
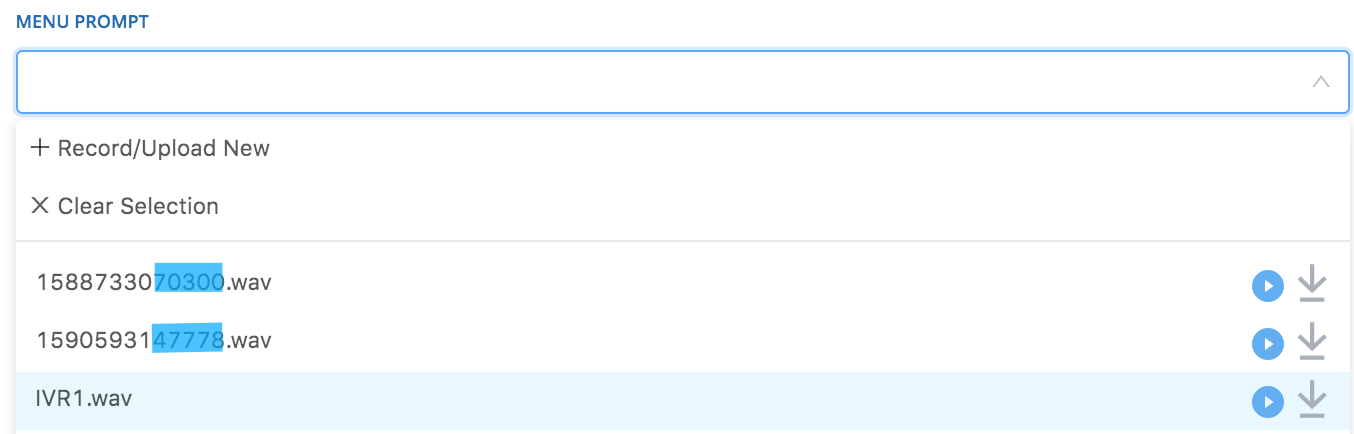
Select the down arrow under each prompt type to choose a prompt, or select +Record/Upload New.
-
Intro Prompt: This prompt plays at the beginning, before the menu prompt. It cannot be skipped by inputting digits or dialing extensions. Moreover, it doesn’t repeat in case of a wrong entry or timeout.
-
Menu Prompt: Plays before awaiting option selection. This can be interrupted by user digits and will repeat.
-
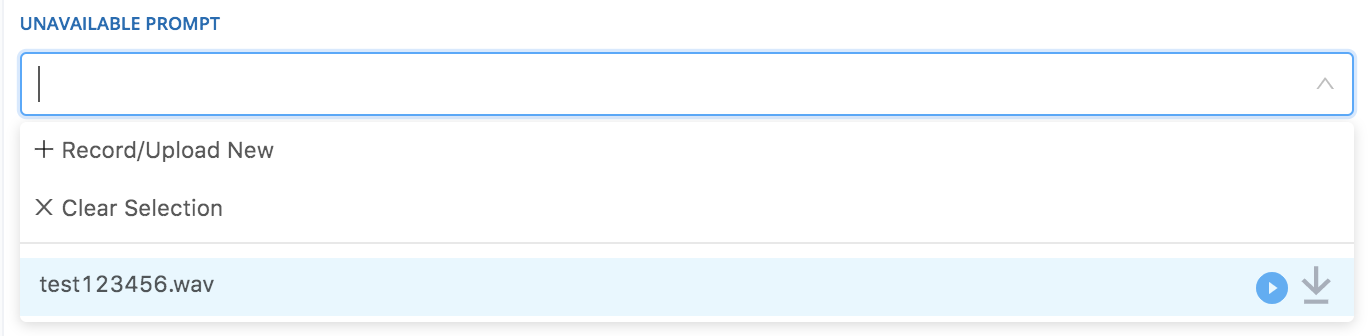
Unavailable Prompt: Plays when an unavailable option is selected.
-
Timeout Prompt: It plays after the timeout seconds have elapsed. Remember to adjust the “Wait for timeout (seconds).”

-
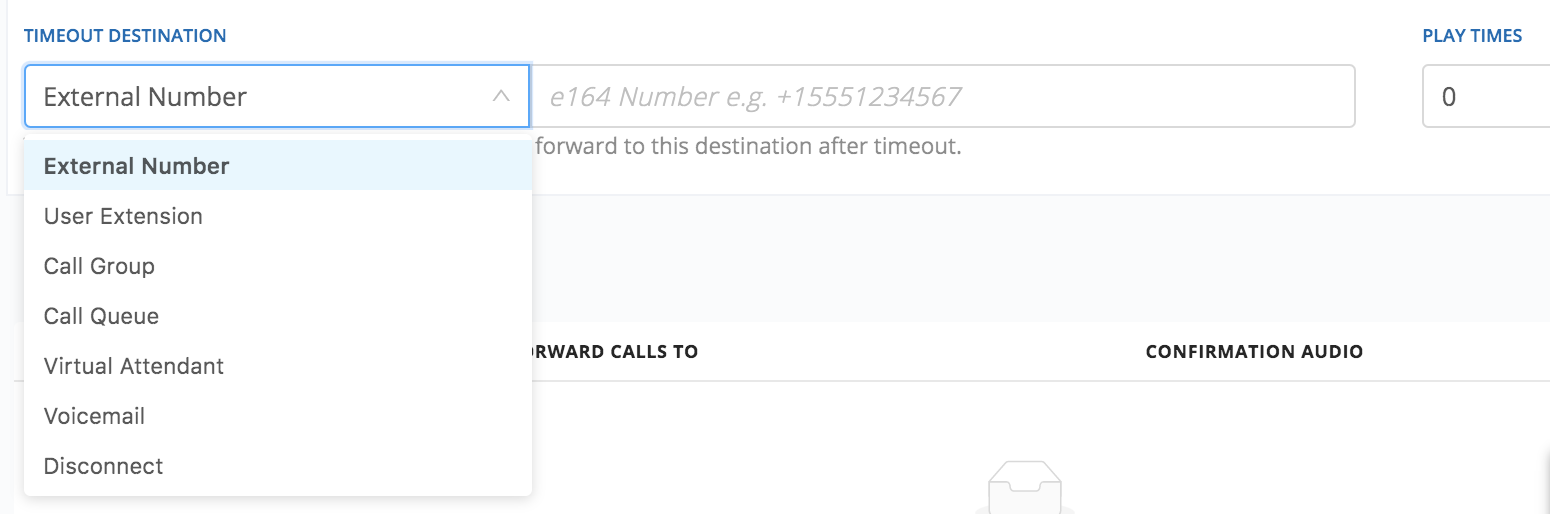
Timeout Destination: The menu will play according to “playtimes” and forward to this destination after the timeout. You also have the option to select a timeout destination - this can be an external number, extension, call group, virtual attendant, or voicemail. Again, the menu will play according to “playtimes” and forward to this destination after the timeout.
Adding User Inputs
Now that you’ve created your virtual attendant and created prompts, it’s time to add user inputs. User inputs are the options that will be available to users when they call your virtual attendant.
- Select the +Add User Input option. You’ll notice under Caller Presses that one is automatically selected. To change this, select the dropdown arrows to select from a selection of numbers and symbols.
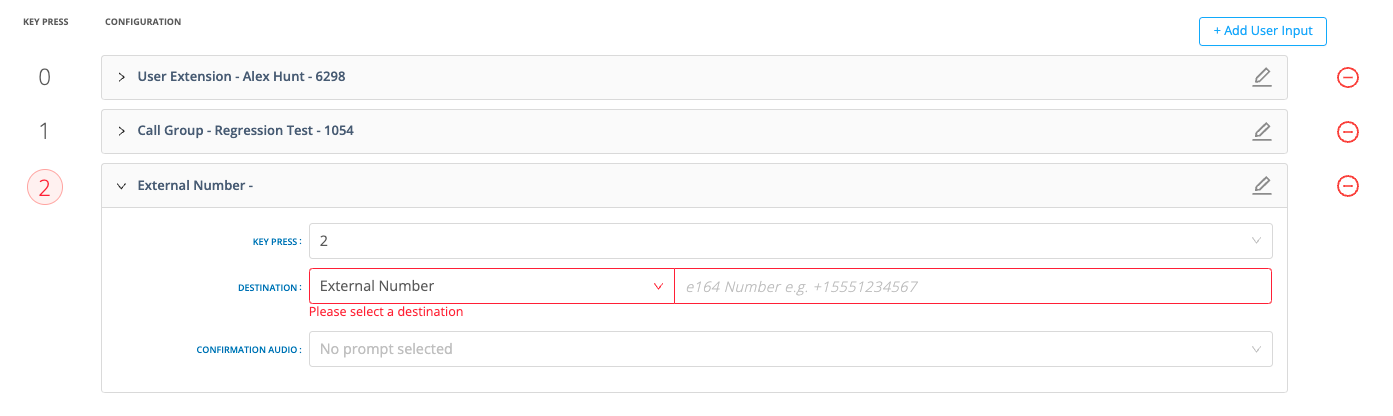
- Then, select an action where the caller is directed - an external number, extension, call group, another virtual attendant, or a voicemail. After selecting your action, select the dropdown under “Forward Calls To” to specify where the calls are going.
- For example, if the action is an extension, the Forward Calls To dropdown will list all active extensions to choose from. If you don’t see an extension listed, you may need to assign a license to that extension. Click here for more info on licensing.
- If you want confirmation audio to play after the caller selects, choose from recorded audio or record/upload a new one under Confirmation Audio.
- Select +Add User Input to keep adding additional inputs. Select Save when you’re finished.
Deleting a Virtual Attendant
Select the “Flow Builder” section on the left-hand side navigation, go to "IVRs" tab. Find the virtual attendant you’d like to delete and select Delete.
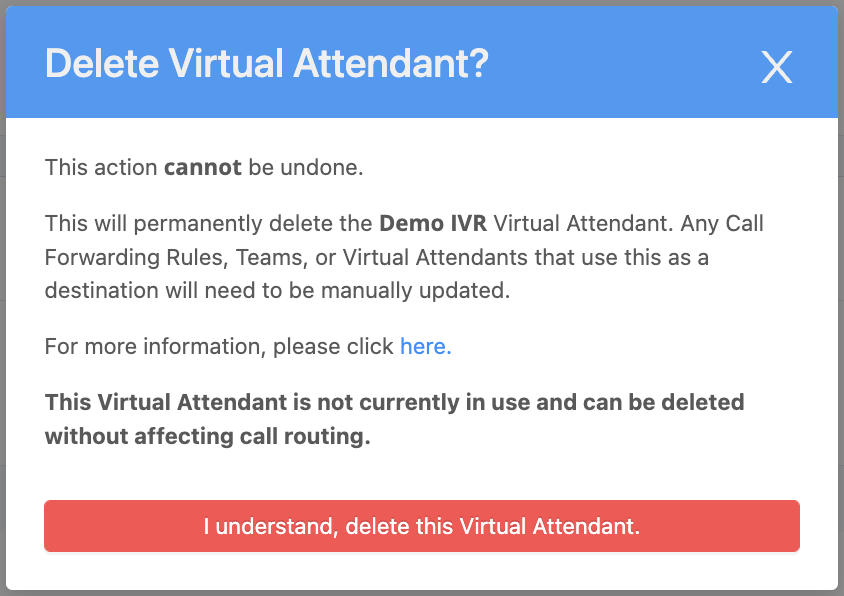
Once you select Delete, you will be prompted to review the IVR deletion warning message and
select the “I understand, delete this Virtual Attendant” button to confirm.