AVOXI IVR (Interactive Voice Response) is a feature that allows organizations to create automated greetings and audio prompts. IVR gives callers instant access to the customer’s business with essential product or service information before speaking to an operator. Callers are promptly transferred to the desired department or agent through an interactive voice reaction program or virtual attendant, which is favorable to both the client and the business.
Using AVOXI IVR, you can quickly and easily configure self-service menu options to direct callers to the right agent or department the first time, such as:
- Record your greeting, upload a new file, or choose from pre-existing recordings.
- The menu prompt lets callers choose from various options in your recording.
- The timeout prompt is the recording that will play if the caller does not take any action.
Creating a Virtual Attendant (IVR)
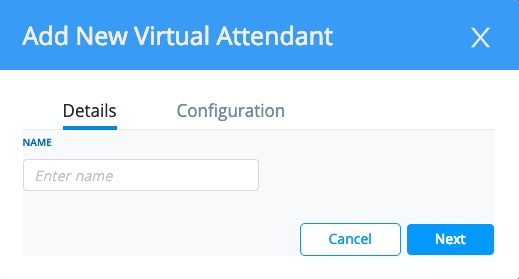
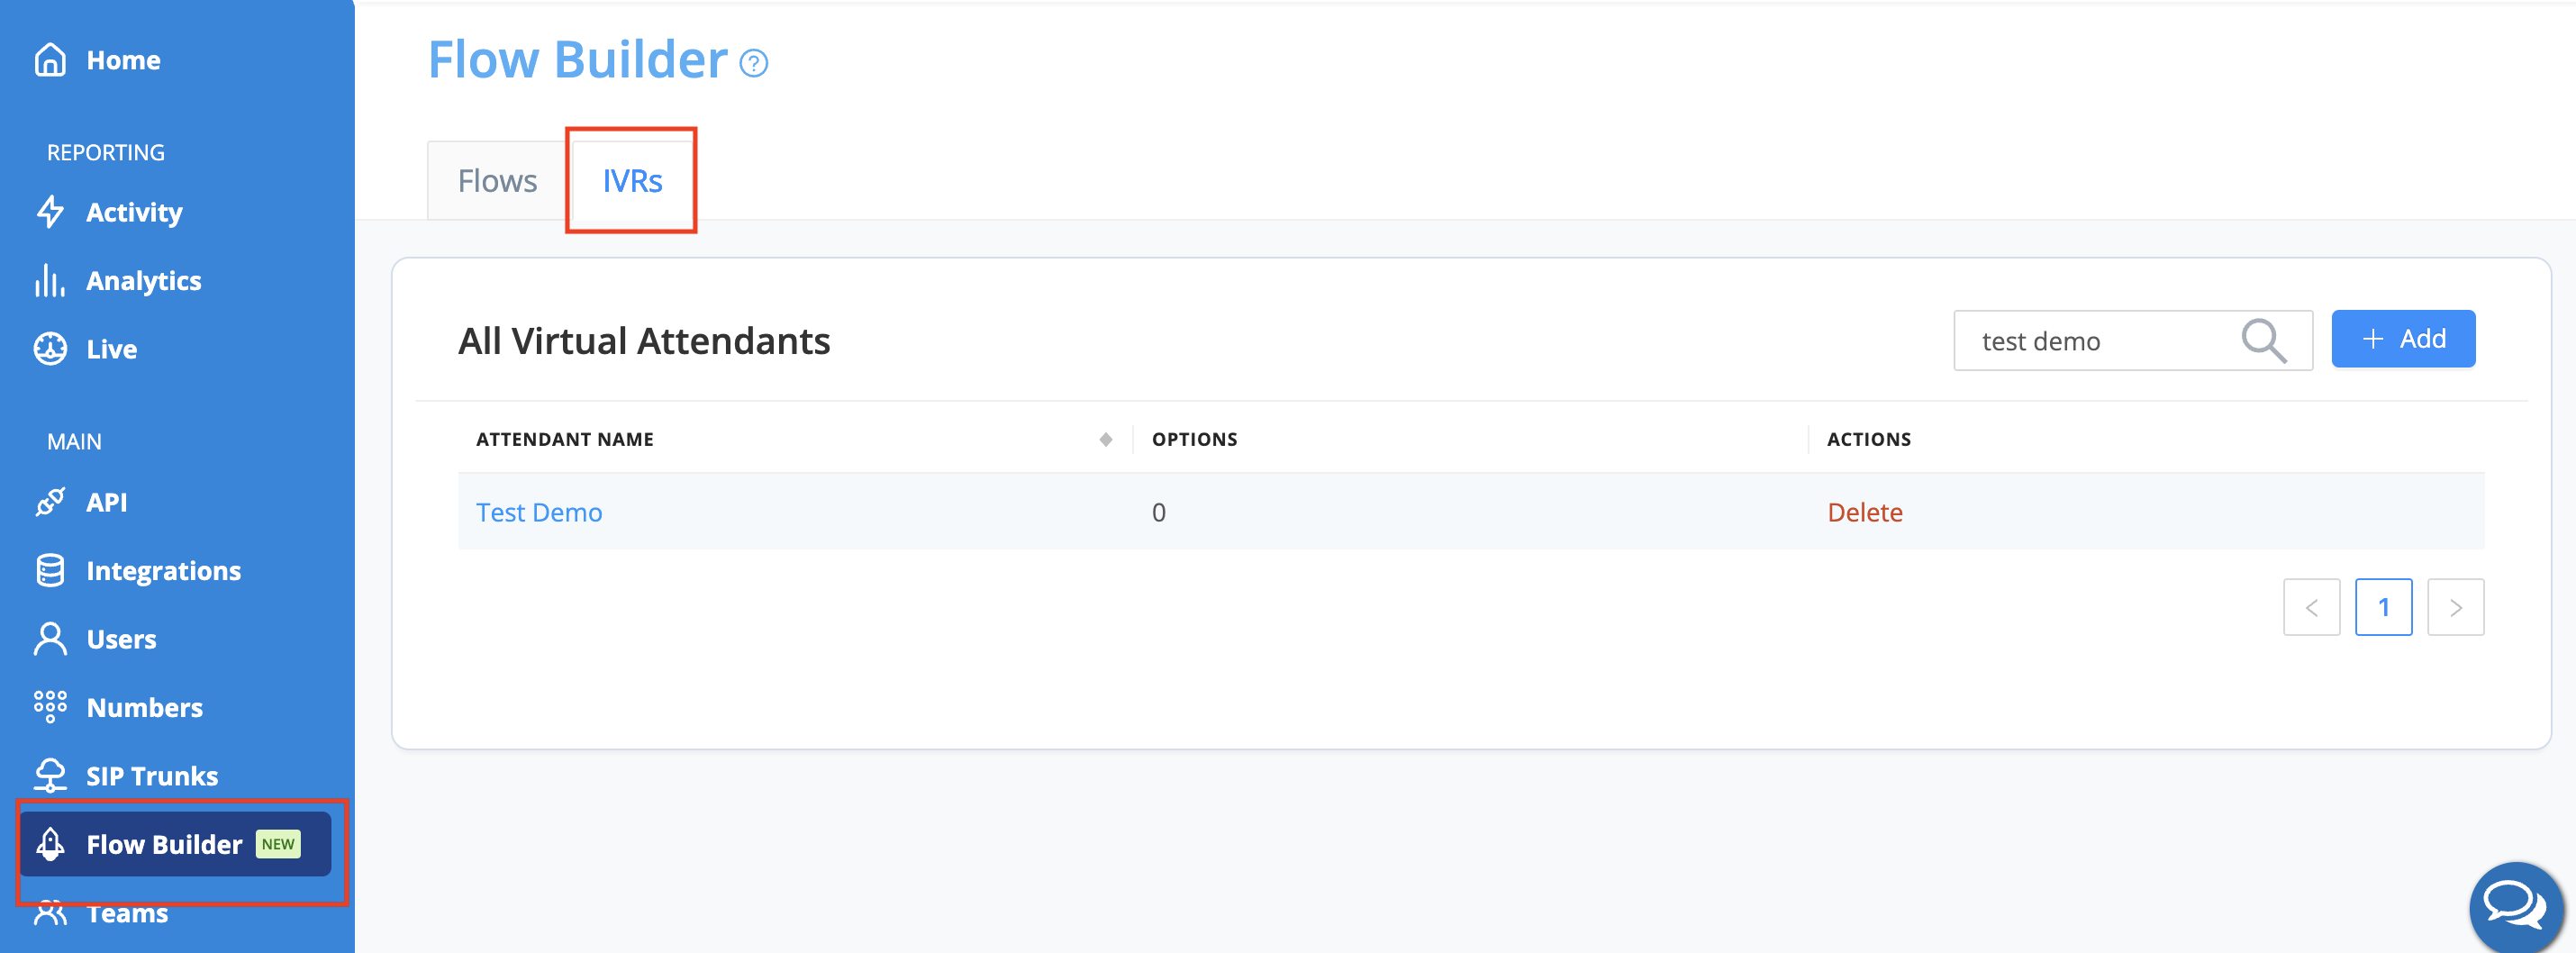
Select the “Flow Builder” section on the left-hand side navigation, and go to the “IVRs” tab to create a virtual attendant.

Select +Add in the top right-hand corner.
Enter a name for your new virtual attendant and select Next.
Configure the voicemail settings for your virtual attendant. Choose an existing voicemail or create a new voicemail.
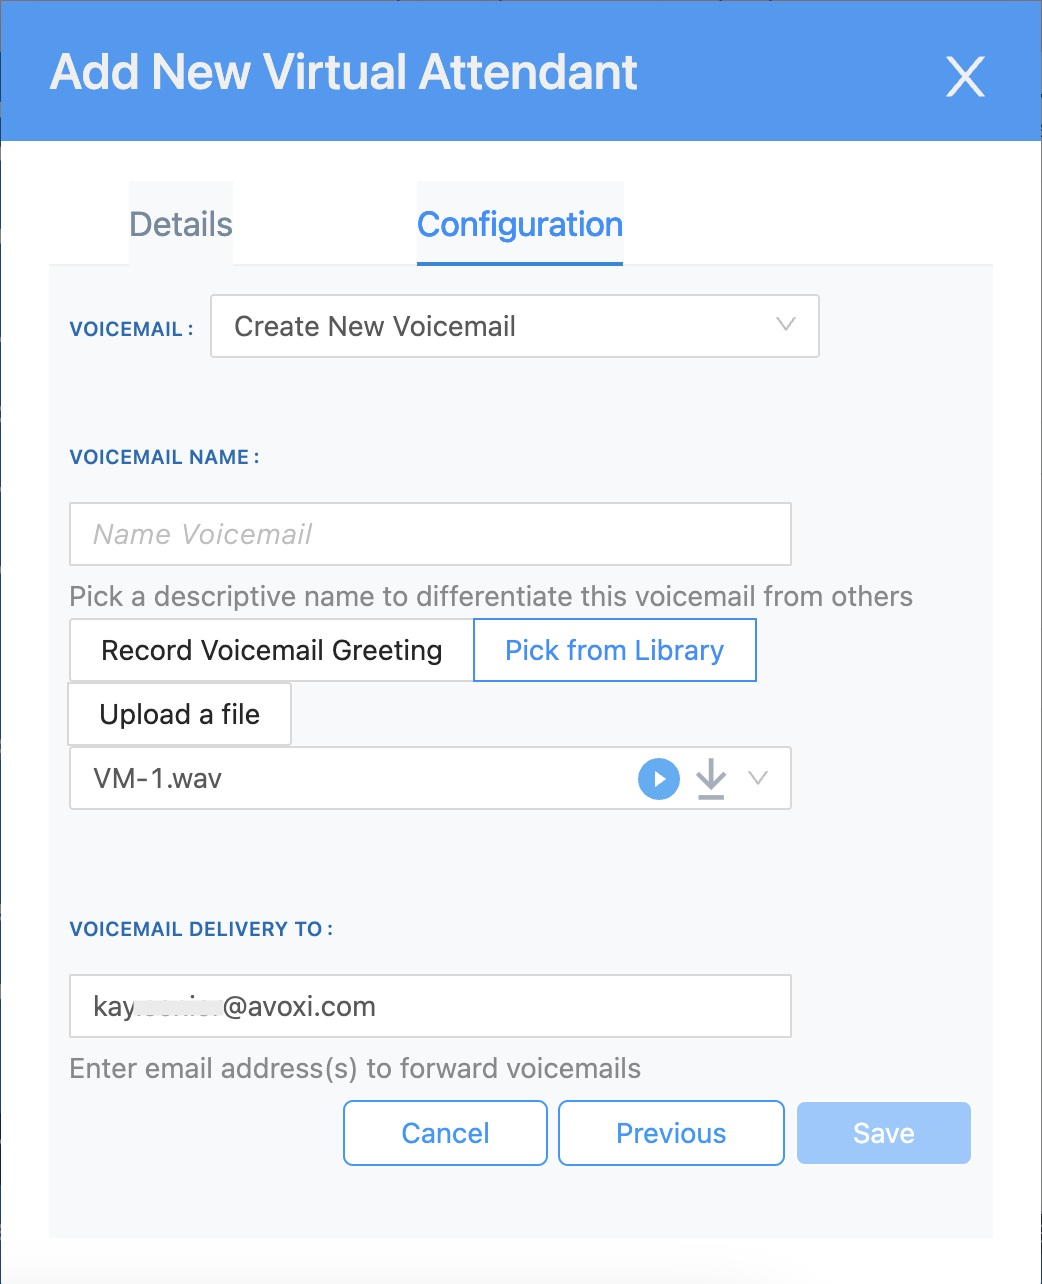 Record Voicemail Greeting - Record your greeting (see the below guide)
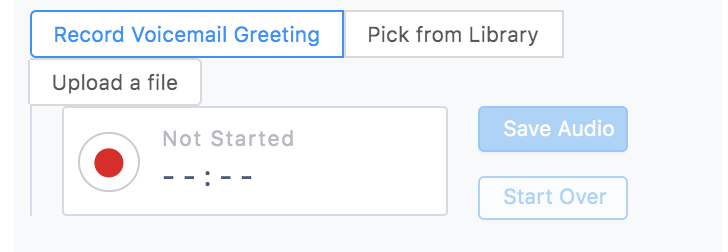
Pick from the Library - Choose one of our preloaded recordings.
Upload a File - Upload a File your company already has.
Enter the email address to which you want voicemails sent, and select your timeout. Then choose Save.
AVOXI TIP: Timeout is when the rule will apply before the call goes to voicemail.
Recording personal greetings/prompts
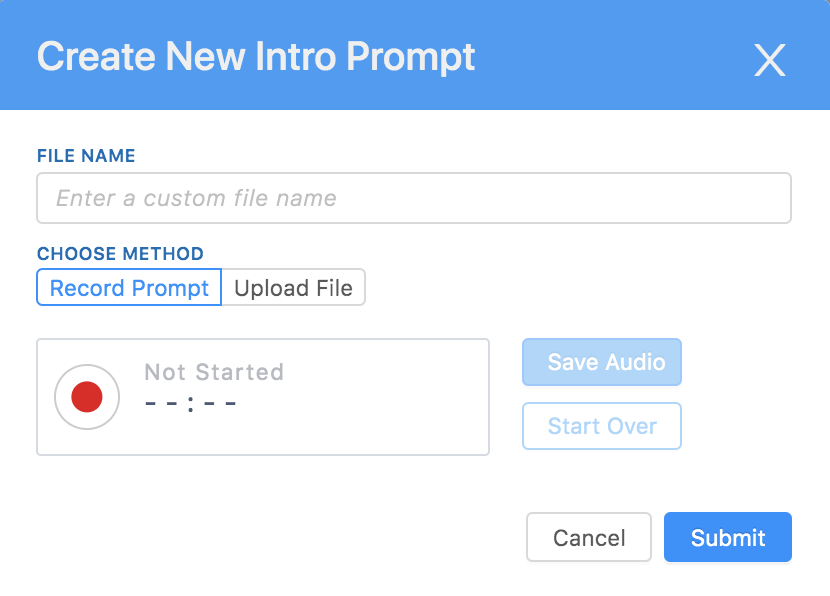
Give your prompt a name, and then select the record button to start recording.
Once finished, select the stop button. Finally, you can playback your recording by selecting the play button.
If you’re happy with the recording, select Save Audio and submit.
Uploading greetings/prompts
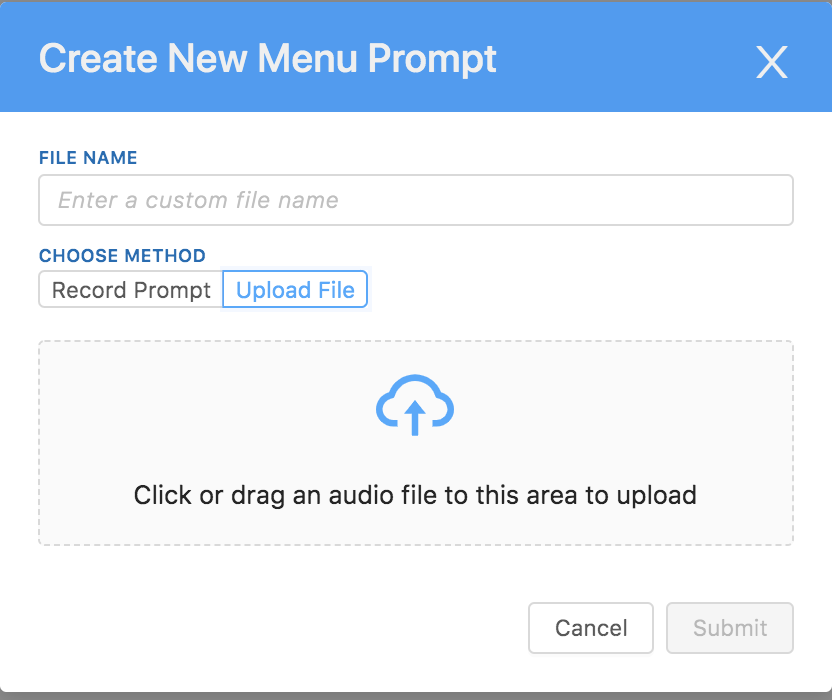
Upload a File—You can Upload a File your company already has by simply dragging and dropping the file or selecting upload. Make sure to give your prompt a name and then select Submit.
AVOXI TIP: Make sure your audio files are saved as .wav
Repeat these steps for each prompt type below and then select Save.
Adding prompts
Next, add your prompts, which are visible under your virtual attendant configuration:
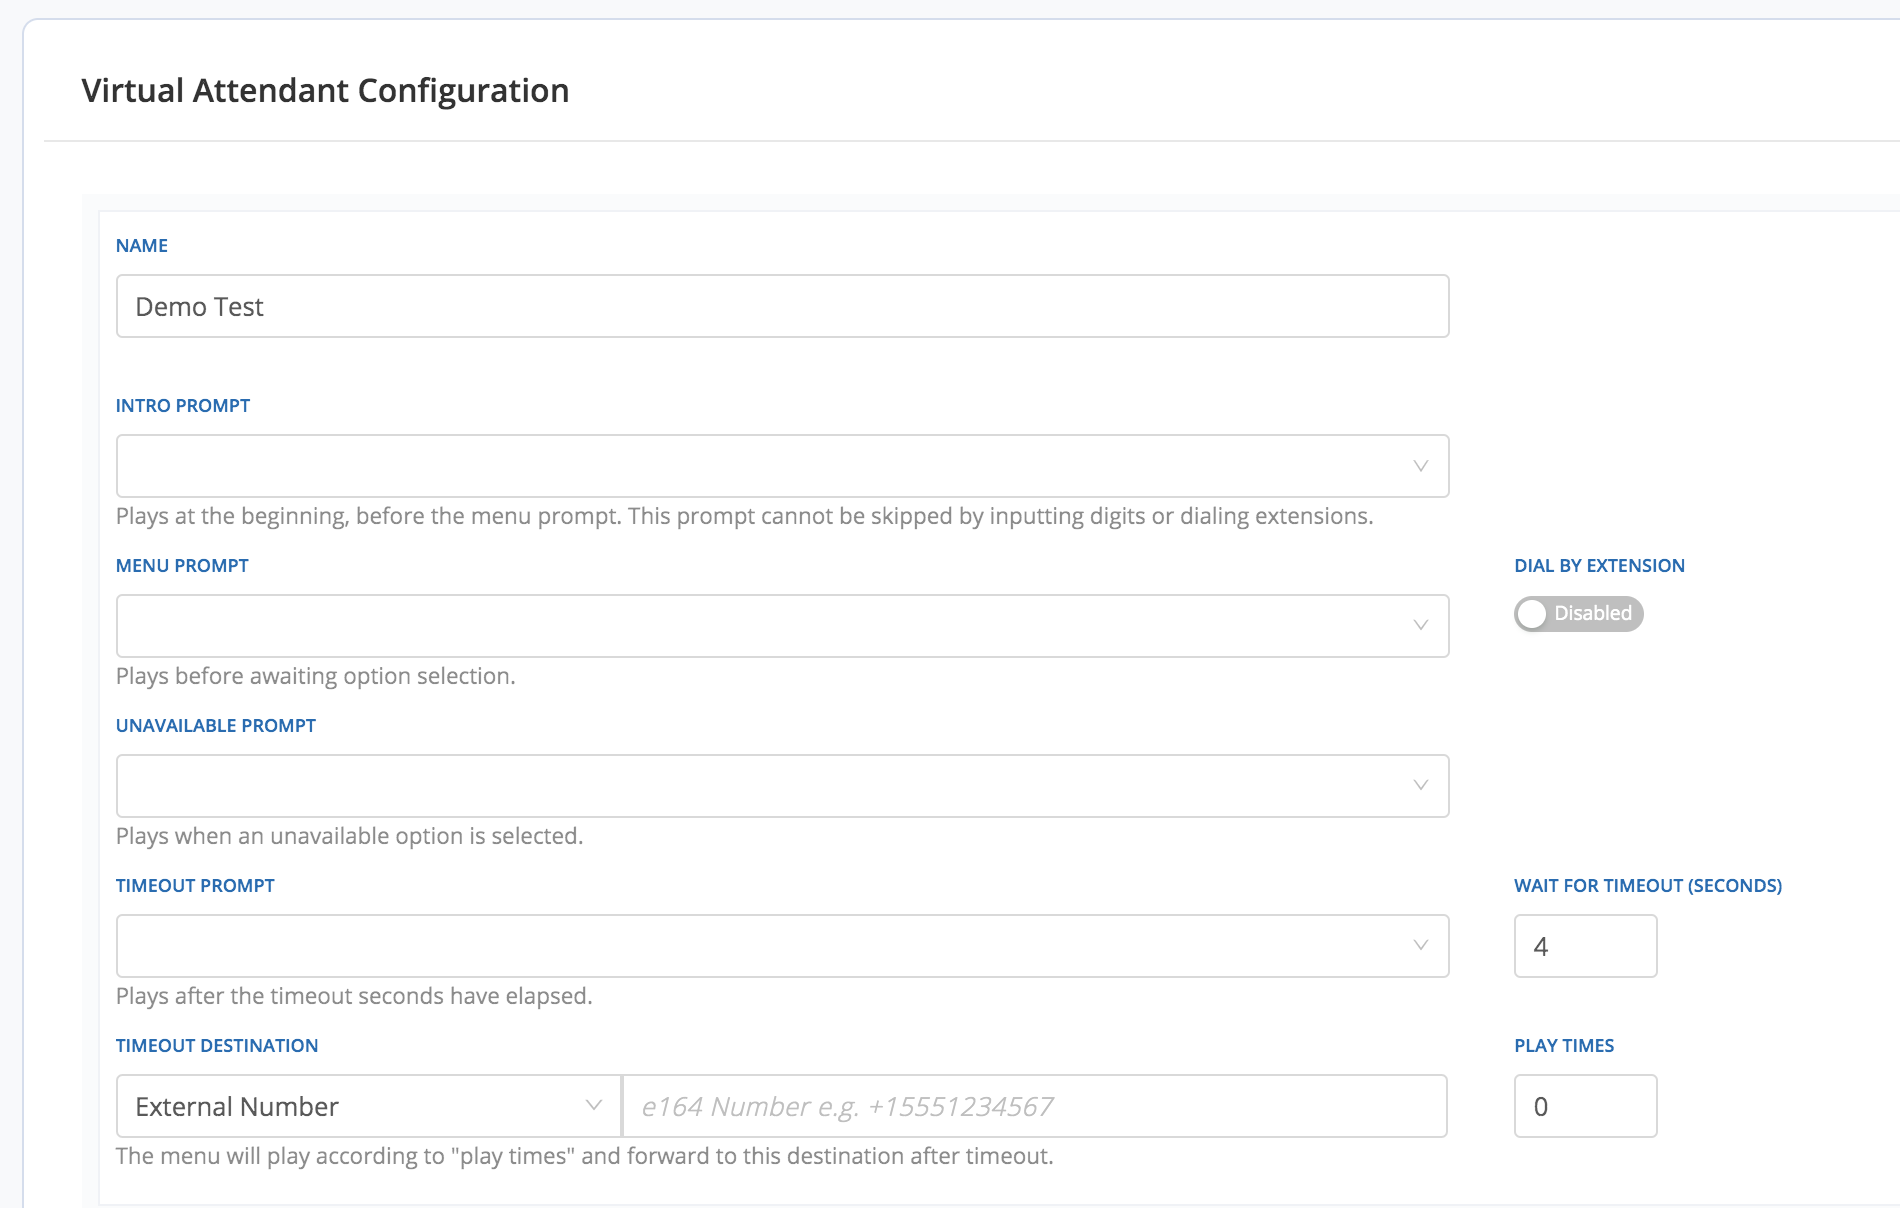
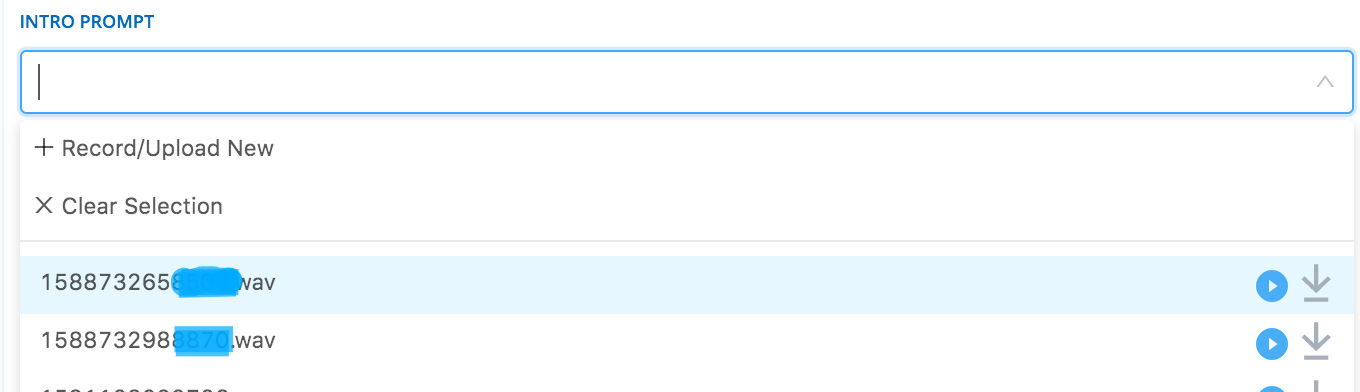
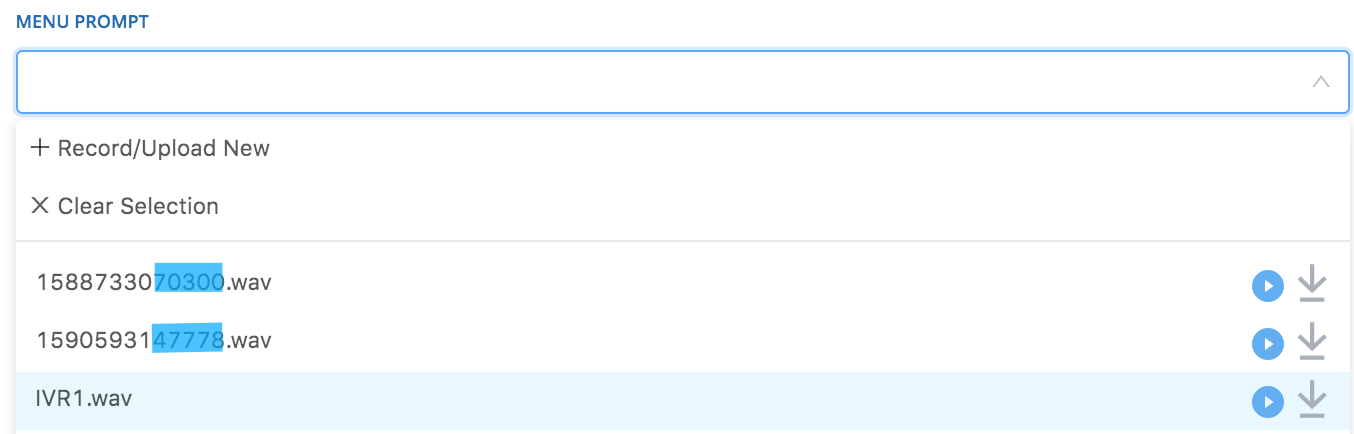
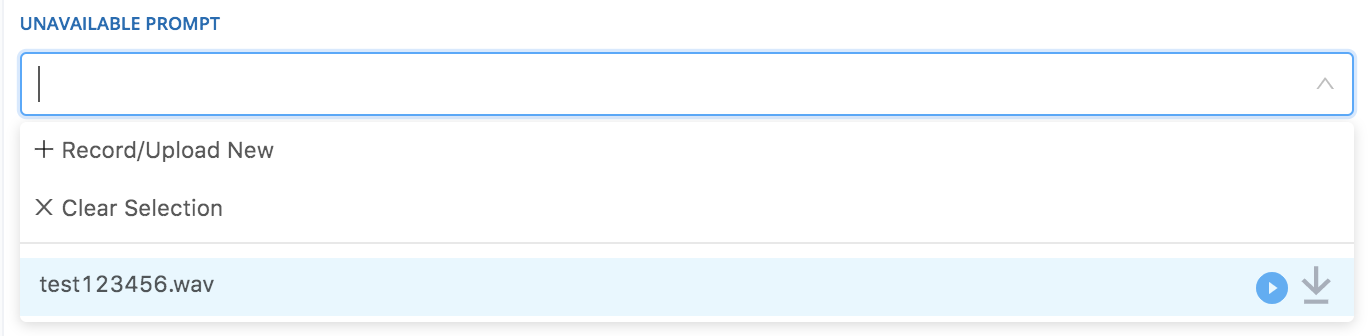
Select the down arrow under each prompt type to choose a prompt, or select +Record/Upload New.
-
Intro Prompt: This prompt plays at the beginning, before the menu prompt. It cannot be skipped by inputting digits or dialing extensions. Moreover, it doesn’t repeat in case of a wrong entry or timeout.
-
Menu Prompt: Plays before awaiting option selection. This can be interrupted by user digits and will repeat.
-
Unavailable Prompt: Plays when an unavailable option is selected.
-
Timeout Prompt: It plays after the timeout seconds have elapsed. Remember to adjust the “Wait for timeout (seconds).”

-
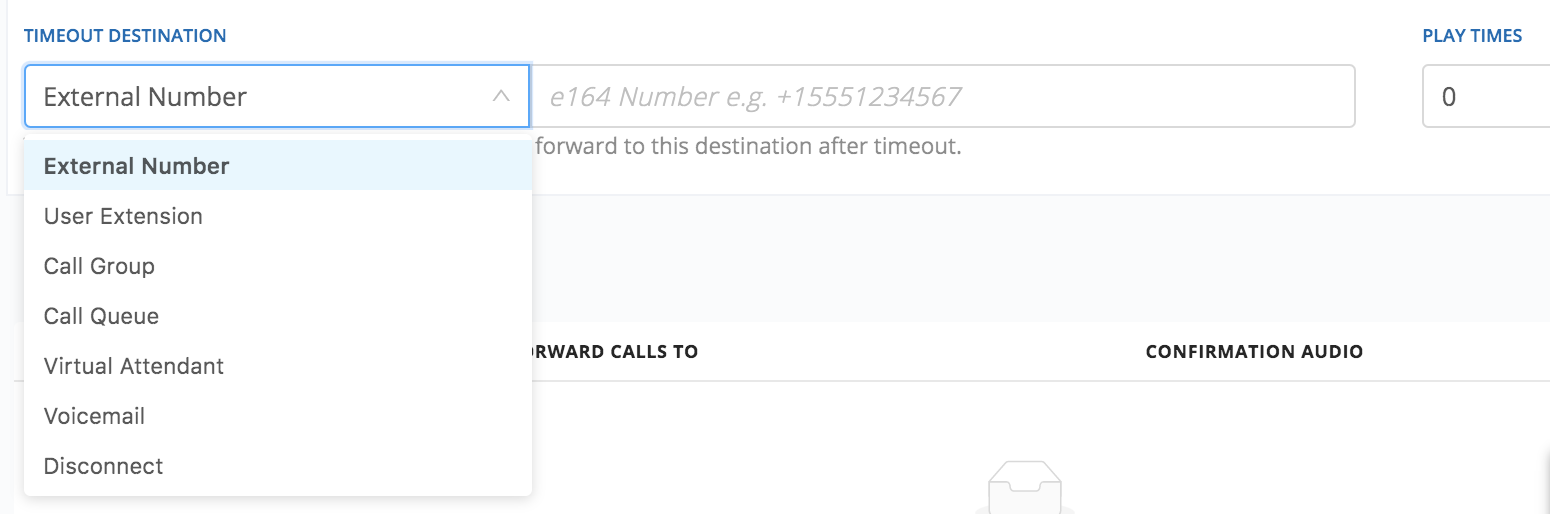
Timeout Destination: The menu will play according to “playtimes” and forward to this destination after the timeout. You also have the option to select a timeout destination - this can be an external number, extension, call group, virtual attendant, or voicemail. Again, the menu will play according to “playtimes” and forward to this destination after the timeout.
Adding User Inputs
Now that you’ve created your virtual attendant and created prompts, it’s time to add user inputs. User inputs are the options that will be available to users when they call your virtual attendant.
- Select the +Add User Input option. You’ll notice under Caller Presses that one is automatically selected. To change this, select the dropdown arrows to select from a selection of numbers and symbols.
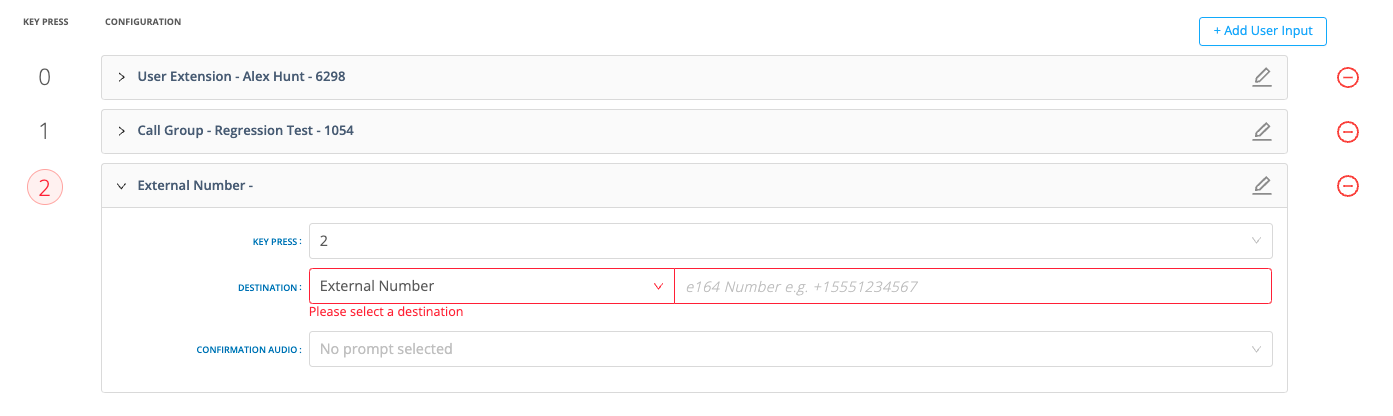
- Then, select an action where the caller is directed - an external number, extension, call group, another virtual attendant, or a voicemail. After selecting your action, select the dropdown under “Forward Calls To” to specify where the calls are going.
- For example, if the action is an extension, the Forward Calls To dropdown will list all active extensions to choose from. If you don’t see an extension listed, you may need to assign a license to that extension. Click here for more info on licensing.
- If you want confirmation audio to play after the caller selects, choose from recorded audio or record/upload a new one under Confirmation Audio.
- Select +Add User Input to keep adding additional inputs. Select Save when you’re finished.
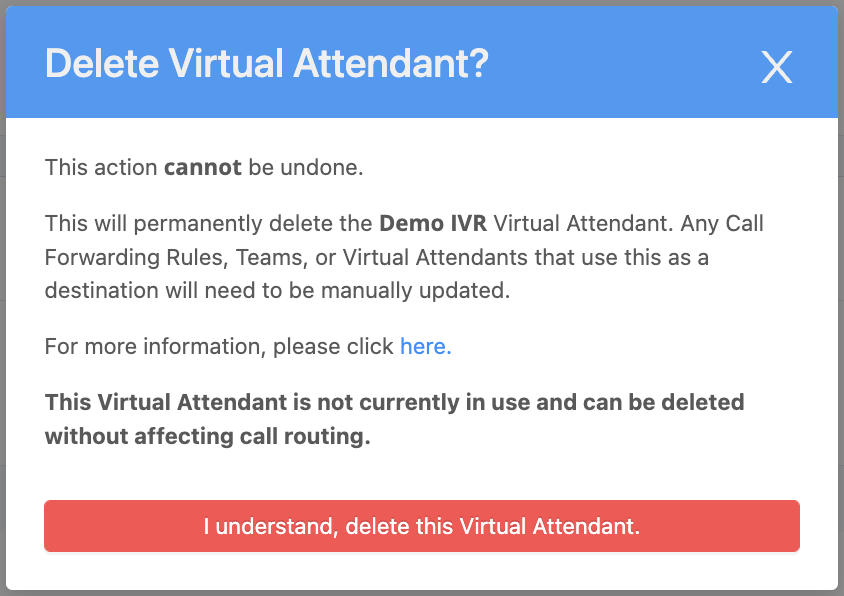
Deleting a Virtual Attendant
Select the “Flow Builder” section on the left-hand side navigation, go to "IVRs" tab. Find the virtual attendant you’d like to delete and select Delete.
Once you select Delete, you will be prompted to review the IVR deletion warning message and
select the “I understand, delete this Virtual Attendant” button to confirm.