Administrators can record or upload custom callback requests, confirmation messages, and agent alert prompts which can be defined/configured at a team level. When enabling the queue callback feature default prompts will automatically be applied.
Use the below guides to customize your Teams callback prompts:
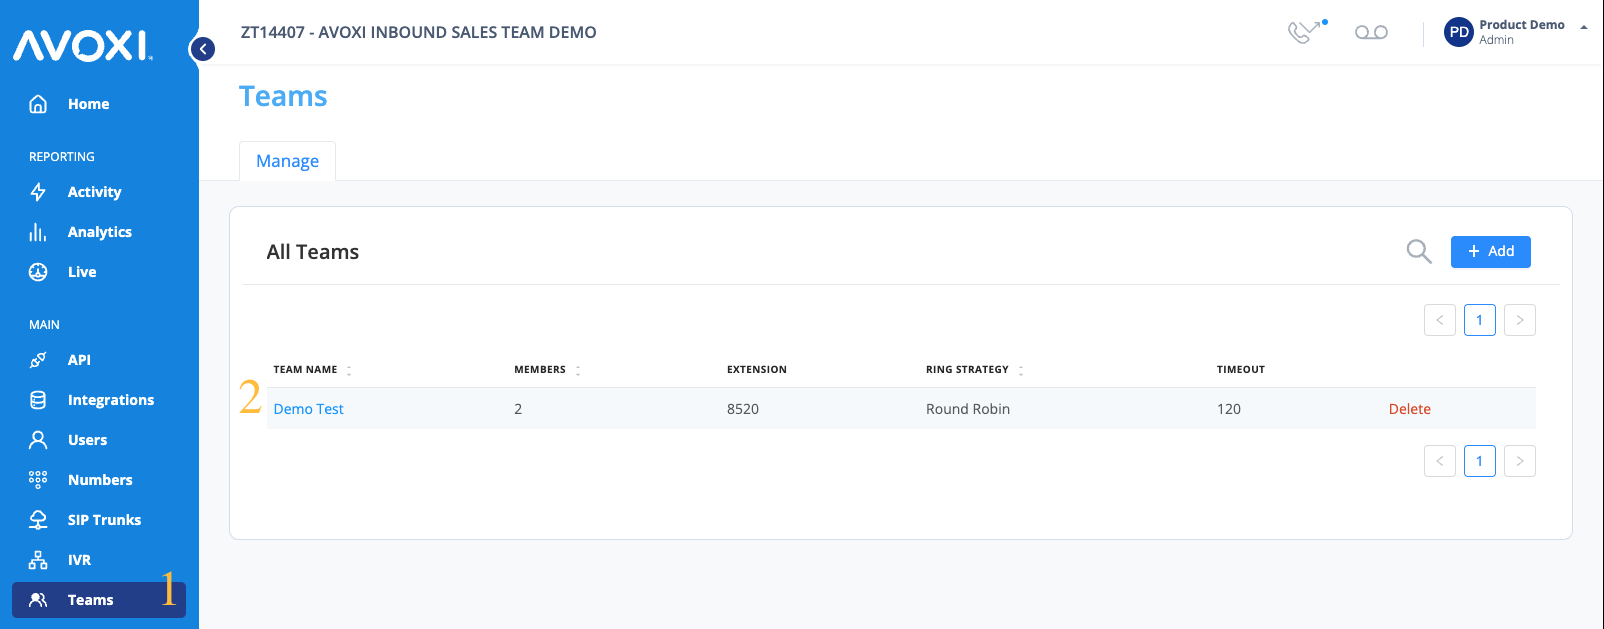
- Login into your AVOXI Genius account as an Admin/Supervisor.
- Click the "Teams" section located on the left-hand navigation bar. (1)
- Under the "Team Name" column select the "Team" for which you wish to activate the Queue Callback feature. (2)
-
Genius Tip: Queue Callback is configured at a team level, not an organization level which gives Admins/Supervisors the ability to configure callback requests prompts, confirmation messages, and agent alerts that are team specific.
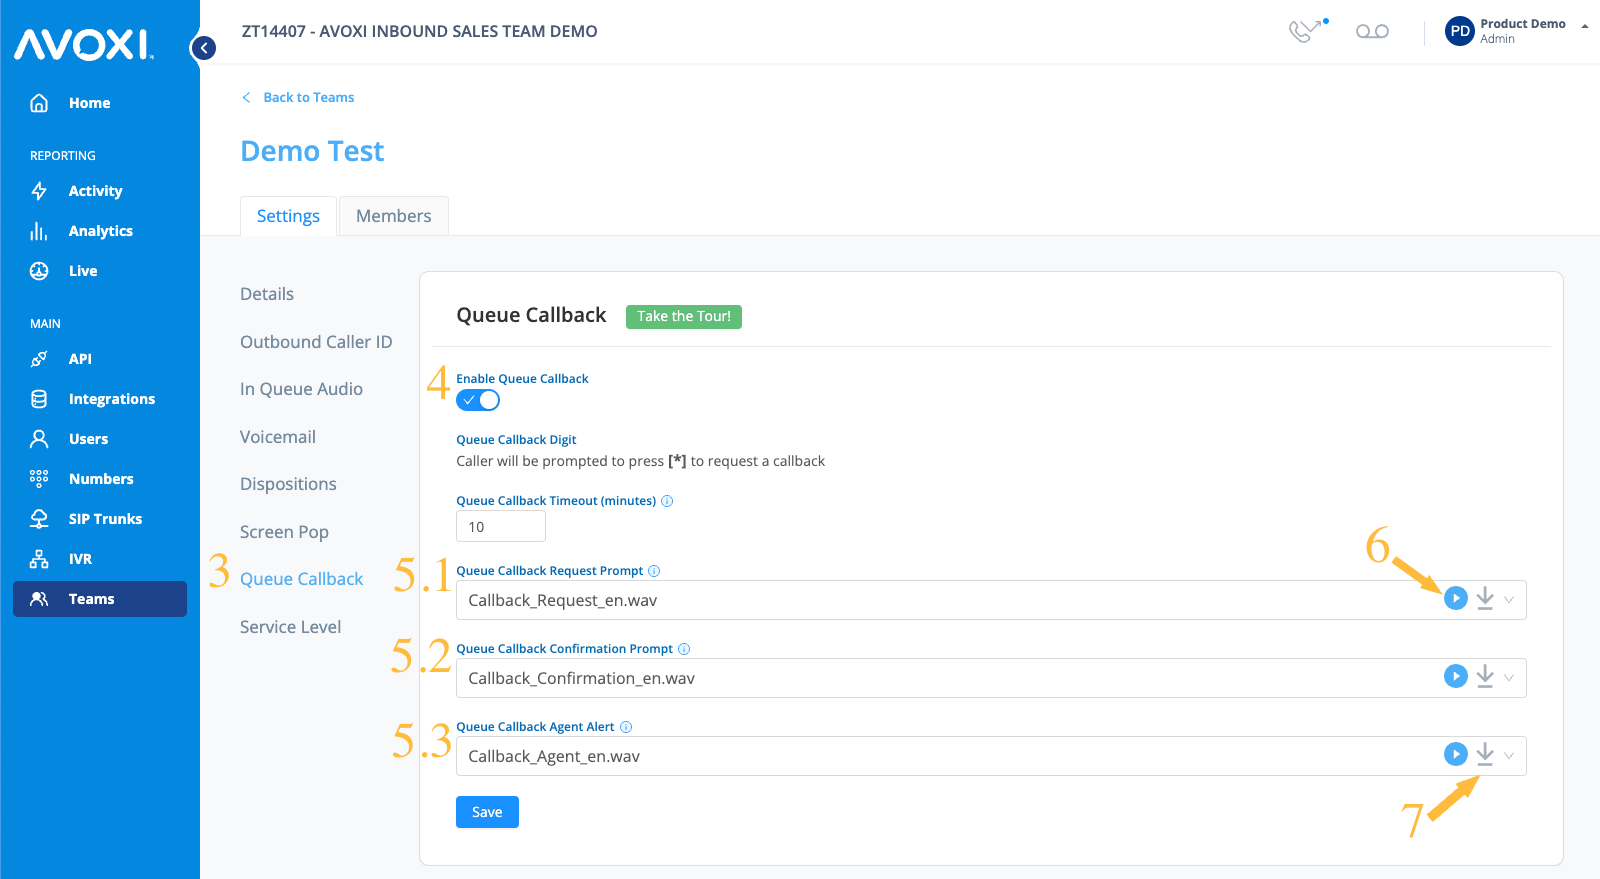
- On the "Settings" page select the "Queue Callback" feature tab. (3)
- Genius Tip: If you are currently a Contact License holder, you can use the following upgrade link and user guide to upgrade now.
- If the Queue Callback feature is not yet enabled, do so by clicking the toggle switch. The toggle shows grey when disabled and blue when enabled. (4)
- Use the down arrow located to the right of the prompt you wish to customize, choose from:
- Callback Request Prompt (5.1): This is the prompt callers will hear (example: Good day all agents are currently busy assisting other customers if you would like to receive a callback please press (*) now, you will not lose your place in the line. Alternatively please hold for the next available agent.)
- Callback Confirmation Prompt (5.2): This is the message callers will hear after selecting the callback option (example: Thank you for requested a callback, the next available agent will call you back as soon as possible. Good Day)
- Callback Agent Alert (5.3): This is the alert message the agent will receive when automatically receiving the queue callback request from the queue (example: This is a callback call, beginning call).
- Click the playback button to hear the current active prompt. (6)
- Use the "down arrow" to download a message/prompt file. (7)
-
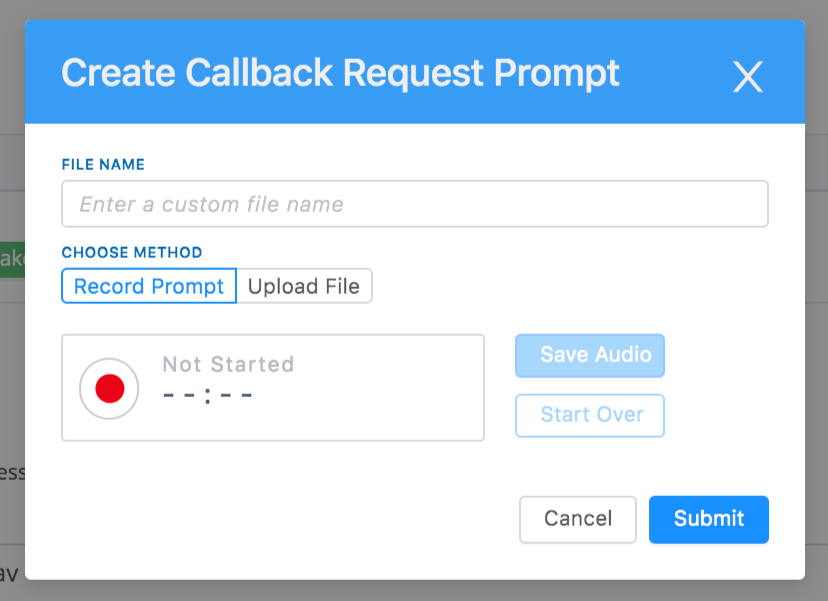
Recording a New Prompt
- Select the "+ Record/Upload New Prompt"
- Give your prompt an easy to remember name.
- Choose Method - Select the "Record Prompt" section.
- When ready click the red record button and record your message.
- On completion select the "stop recording" button.
- Use the "Preview audio" option to play your recording back.
- If you are not 100% satisfied simply select the "start over" button.
- When ready, click the "Submit" button to save your changes
-
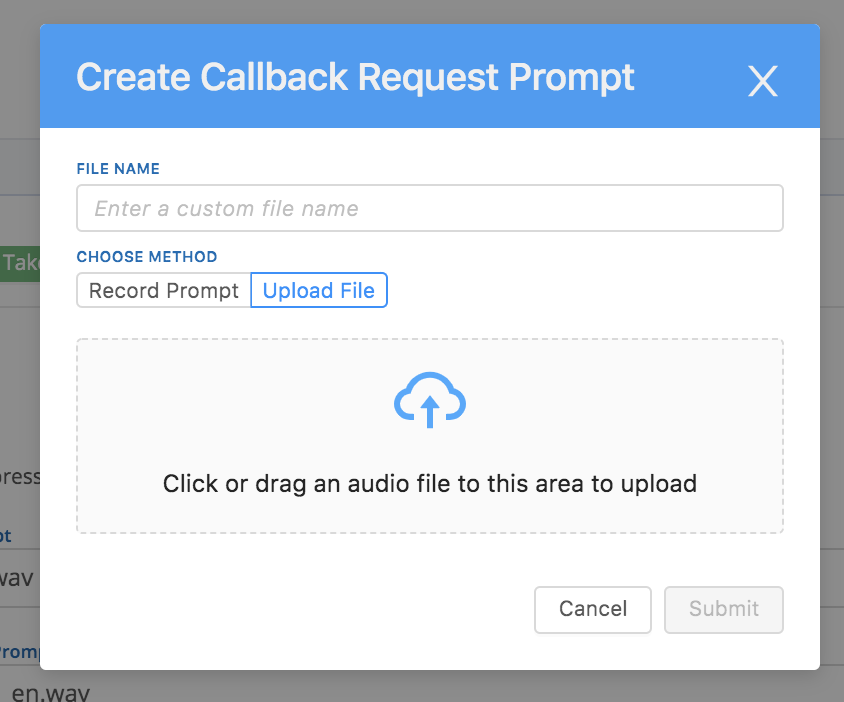
Upload and Existing Prompt
- Give your prompt an easy to remember name.
- Choose Method - Select the "Upload File" section.
- Enter a custom file name and either drag and drop your audio file or select the upload icon.
- Genius Tip: Make sure your audio files are saved as .wav.
- Use the "Preview audio" option to play your recording back.
- If you are not 100% satisfied simply select the "start over" button.
- When ready, click the "Submit" button to save your changes