Recording business calls, incoming and outgoing, is essential to all businesses, regardless of size. Call recording allows you to analyze your customer service interaction and employees and is valuable for important financial or legal transactions. Admins can configure call recording on inbound calls at a number level.
Follow the below steps to manage your recording feature on a specific number.
- How does it work?
- Enable Inbound Call Recording (Number Level)
- Disable Inbound Call Recording (Number Level)
- Managing Inbound Retention Rules
- Download Call Recordings
- Listen to your Call Recordings
- Pausing Call Recordings
How does it work?
- AVOXI call recording is an optional add-on service that gives you the ability to automatically record inbound and outbound calls on all virtual numbers and AVOXI licenses.
- Unlimited Storage: With unlimited call recording storage, businesses can grow their customer base and store calls indefinitely.
- Retention Rules: Easy-to-use administrative controls allow you to set recording retention rules at an organizational, number, or queue level, with the ability to store recordings for 30, 60, 90, or 365 days.
- Deactivate & Pause Recordings: The freedom to turn inbound, outbound, and internal recording ON or OFF at any time. Agents also can pause recordings via their webphones to ensure PCI compliance.
Key Benefits
- A preventative measure to help reduce legal disputes and costly lawsuits.
- Ensures you adhere to federal, industry, and service-level compliance guidelines.
- Monitor agent productivity and identify customer pain points.
- Evaluate and Improve your customer experience with agent/employee quality monitoring.
In short, AVOXI call recording will help propel your operation to the next level, mitigate against potential liability, leverage new training processes, avoid legal headaches, improve customer loyalty, create brand recognition, and reduce your business’s monthly recording costs.
Enable Inbound Call Recording (Number Level)
Follow the below steps to enable your call recording feature on a specific number.
- To get started, login into your AVOXI account as an Admin
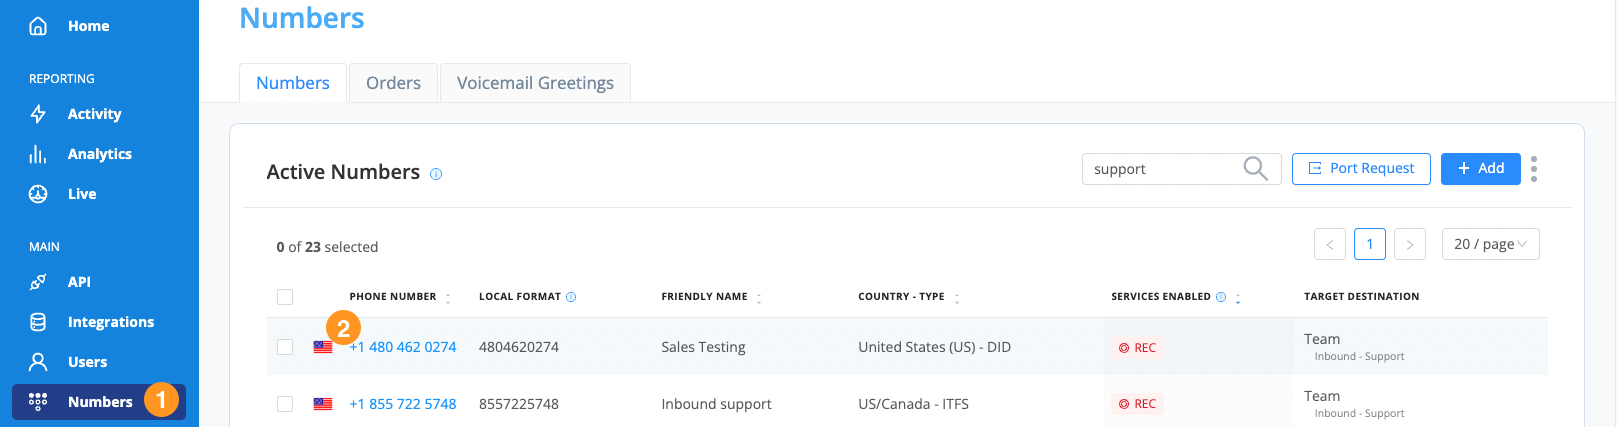
- Select the “Numbers” section located on the left-hand sidebar
-
On the “Numbers page,” select the phone line/number you wish to manage your call recording rules. (REC will appear in the “service enabled” column on all numbers with call recording enabled).

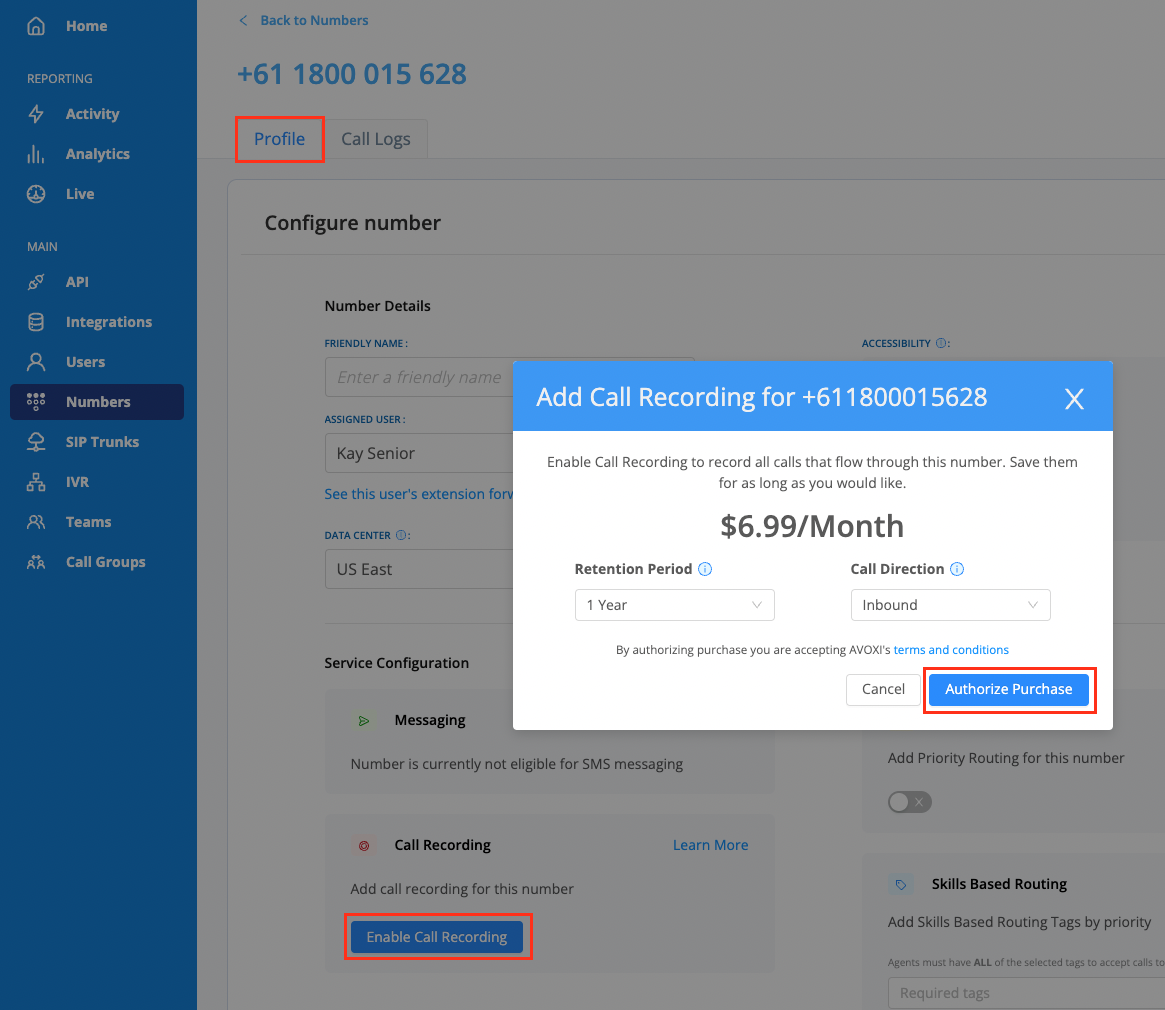
- On the number “Profile” tab, you will find an “Enable Call Recording” button. Click the button to enable call recording on your associated number.
- Use the drop-down to select the appropriate storage package.
-
Then select the desired direction of your call.
- Inbound: Records any incoming call flowing through this number.
- Outbound: Records any outgoing call where an agent has this number as their caller ID.
-
Then click the “Authorize Purchase” button to complete your task.
Important Notes
- Remember also to view your selected retention/storage plan.
- Admins can also view “Call Details” to establish which calls were recorded and the call direction.
- Callers can not opt out / deactivate call recording using an IVR prompt AVOXI. The call recording can, however, be stopped by the Agent.
- Setting the direction of your number call recording to “Outbound” is beneficial to Agents making outbound calls via their webphones and users making outbound calls via sip trunks if the outbound caller ID presented is the number with the call recording package.
Disable Inbound Call Recording (Number Level)
As an Administrator, you can disable the call recording feature on a number at any time. To do so, follow the below step-by-step guide.
NOTE: Agents and Supervisors can only pause or resume call recording on their webphones. Learn more in our roles guide
- Once you have logged into your account, navigate to the “Numbers” section on the left-hand sidebar.
- Select the phone line/number on which you wish to deactivate your call recording feature.
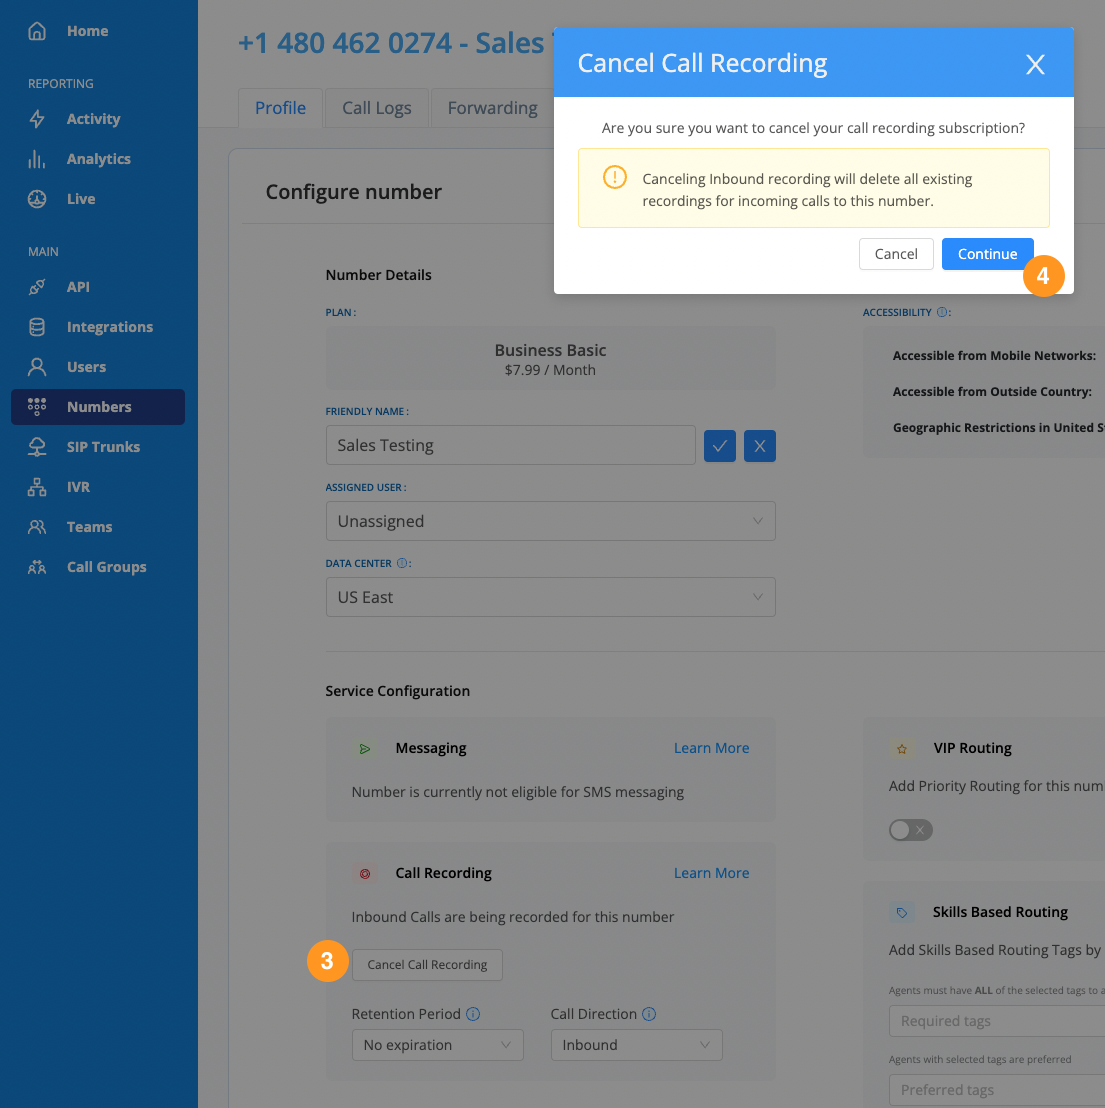
-
Select the “Cancel Call Recording” button.
-
If you are 100% sure you want to reactive the call recording feature on the particular number, then select “Yes” to confirm
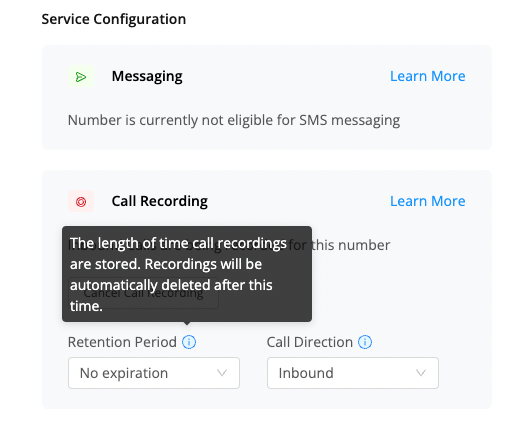
Managing Inbound Retention Rules
By default call, recording retention rules are set to 1 year but can be updated by an administrator at any time. Use our below guide to learn more.
- Once you have logged into your account, select the “Numbers” section on the left-hand navigator.
-
Select the phone line/number you wish to review

- Adjust your retention/storage rules using the drop-down
-
Please read our guide and warning on External Recording storage before adjusting your retention settings to “External Only.” Changing your retention settings to this setting will automatically delete all existing recordings.
Download Call Recordings
If your Inbound, Outbound, or Internal call recording feature is activated, all calls will automatically b recorded and stored using Google Cloud Storage (GCS). All recorded files will be deleted automatically once they hit your pre-selected retention period or if the feature is disabled. To avoid losing essential recordings of audio or data, we recommend you download any critical recordings.
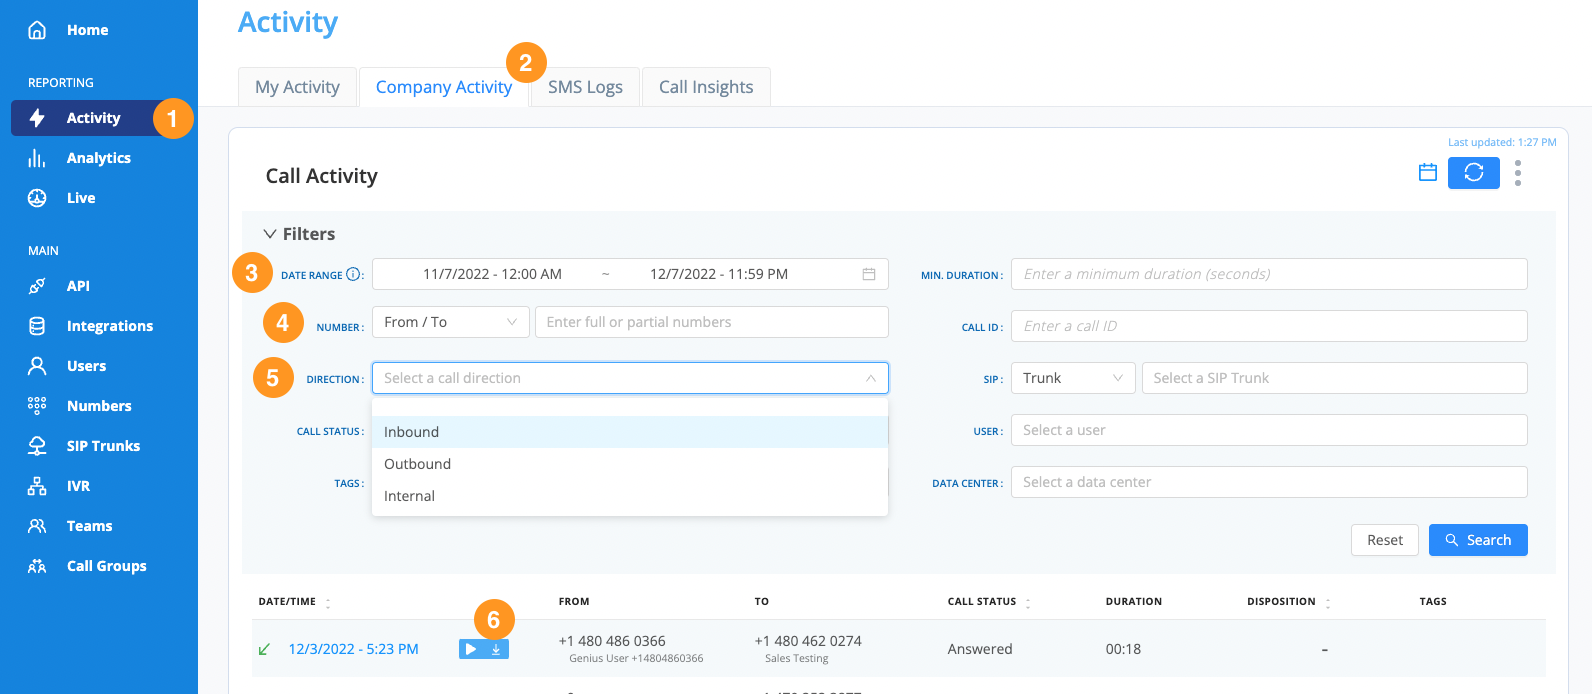
Administrators can view and download call recordings for the entire organization anytime.
- Once you have logged into your AVOXI account
- Navigate to the Company Activity section
- If required, use the date picker to filter by a specific date range (maximum allowed range of one month between the start and end date)
- Filter by user or number
- Using the drop-down, select the call direction
- Click the down arrow to download the required call recording to your device in a .wav file.
-
NOTE: AVOXI does not currently support mass download
Tip: Agents/Users/Supervisors can only pause recording within the phone application.
Listen to your Call Recordings
If your Inbound, Outbound, or Internal call recording feature is activated, all calls will automatically be recorded and stored using Google Cloud Storage (GCS).
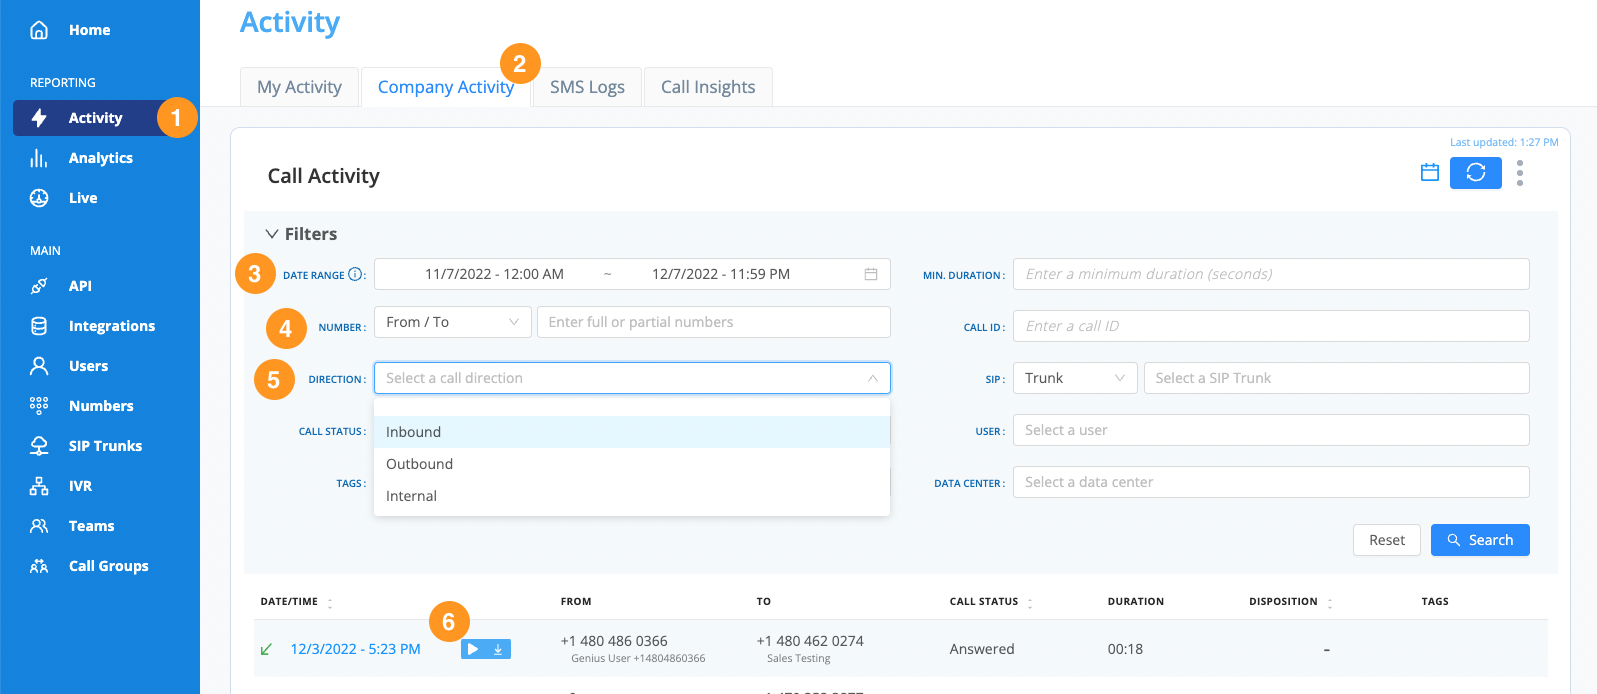
Administrators can playback call recordings for the entire organization, and users can listen to their inbound recordings.
- Once you have logged into your AVOXI account
- Navigate to the Company Activity section
- If required, use the date picker to filter by a specific date range (maximum allowed range of one month between the start and end date)
- Filter by user or number
- Using the drop-down, select the call direction
-
Once you have filtered your calls, you can use the “playback” to listen to the call recordings.
Tip: Agents/Users/Supervisors can only pause recording within the phone application
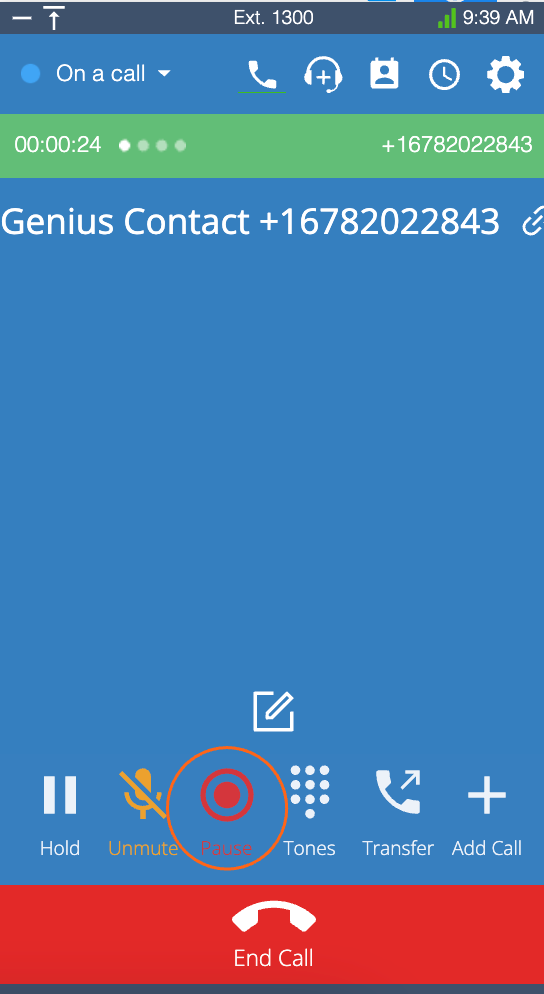
Pausing Call Recordings
If call recording is activated, all calls will automatically be recorded. However, some organizations require the ability to pause recordings for PCI compliance.
-
Admins, Agents, and Supervisors can “Pause” recording within the webphone application.