Billing Groups make it easy for you to organize your billing items into various groups with the purpose of dividing costs amongst these groups. Once your Billing Groups have been configured, your end-of-month invoice will then display your charges listed by billing group.
For an overview of this feature see our Introduction to Billing Groups.
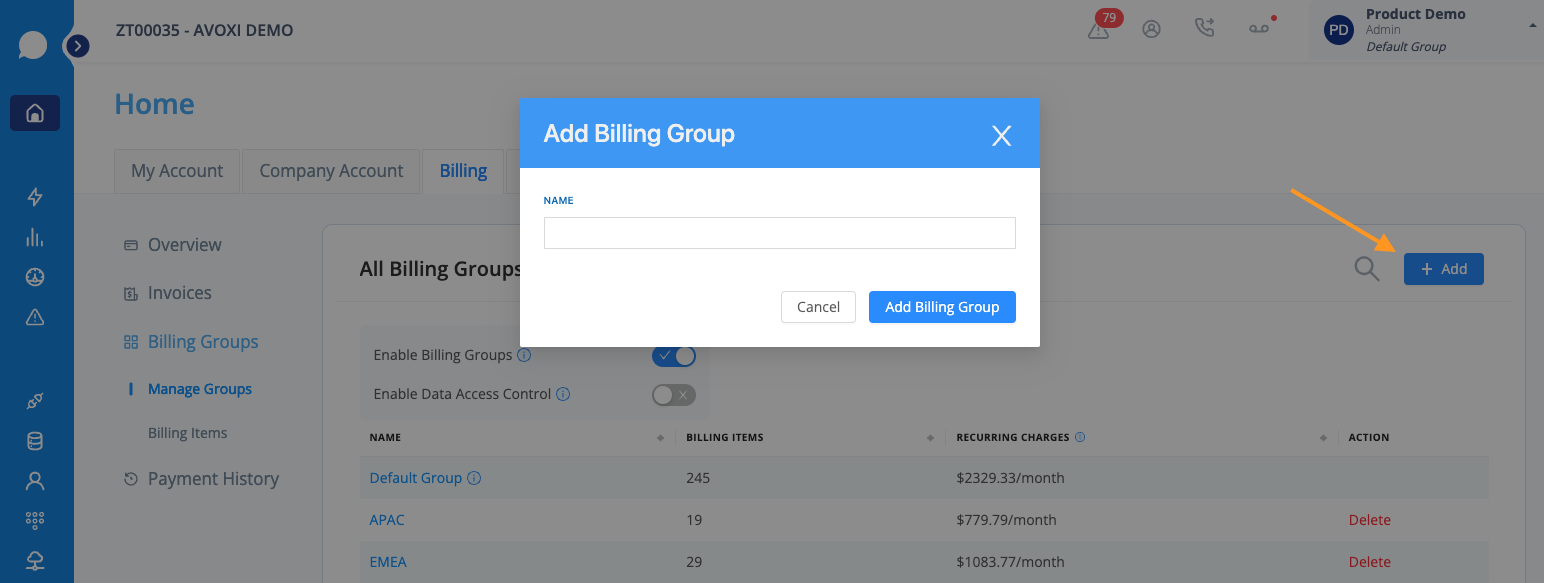
Create a New Billing Group
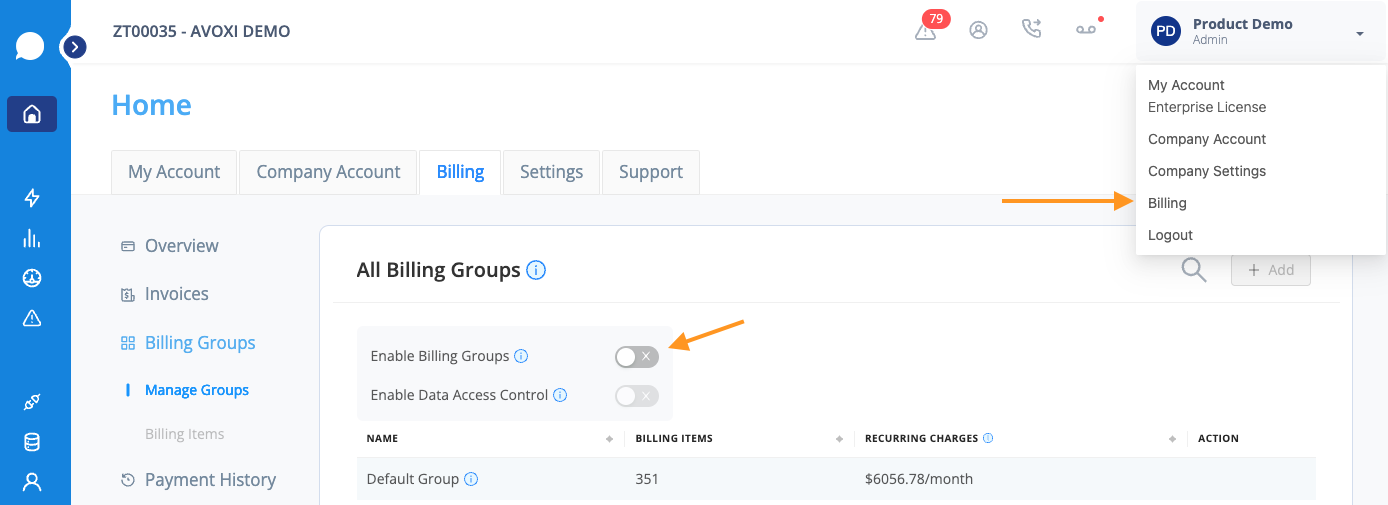
- Navigate to My Account > Billing > Billing Groups
- Enable the Billing Groups
- Select ‘Add’ to create a new group
- Assign billing items to your Billing Groups (see below)
View Billing Group Details
- Navigate to My Account > Billing > Billing Groups
- Select a Billing Group
- View Details of Billing Group
- Item - Description of billing item (SIP Trunk Name, Call Insights Plan, License, Phone Number)
- Type - Type of billing item (SIP Trunk, Call Insights, Number, User, Team)
- Assigned to - What or who the billing item is assigned to (Organization or User)
- Billing Group - Billing Group the item is assigned to
- Action/Move - Move this item to a different Billing Group
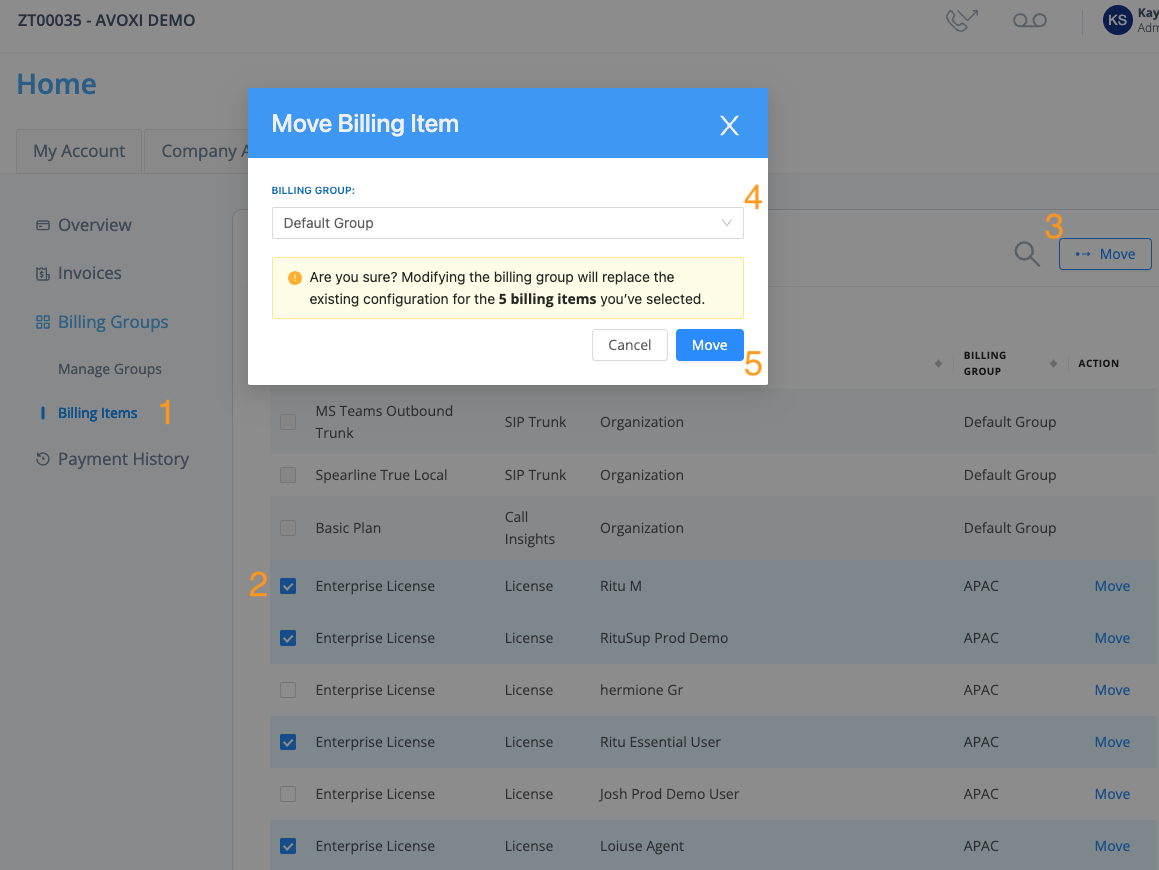
Assign/Move Billing Items to a Billing Group
There are several ways to assign billing items to a group or to move items around between groups. From within the Billing area, you can either navigate to the Billing Items page or navigate to a Billing Group and reassign items from one group to another. You can also assign Numbers and Users to a group from within their respective pages.
All billing items are initially assigned to the Default Group.
There are some items that cannot be moved out of the Default Group.
- Account-level Services & Fees: These are services and fees that are not associated with a particular number or user, but rather apply across the entire account.
- Call Insights, Platform Fee
- Unassigned Licenses: Licenses are assigned to a group based on user association. A license must be assigned to a user before it can be assigned to a Billing Group.
Assigning Items from the Billing Items page
- Navigate to My Account > Billing > Billing Groups
- Enable Billing Groups
- Navigate to the Billing Items page
- Select one or more billing items
- Select the move button on the billing item itself to move that single item
- Select multiple billing items, then select the ‘Move’ button in the upper right-hand to move multiple items at once
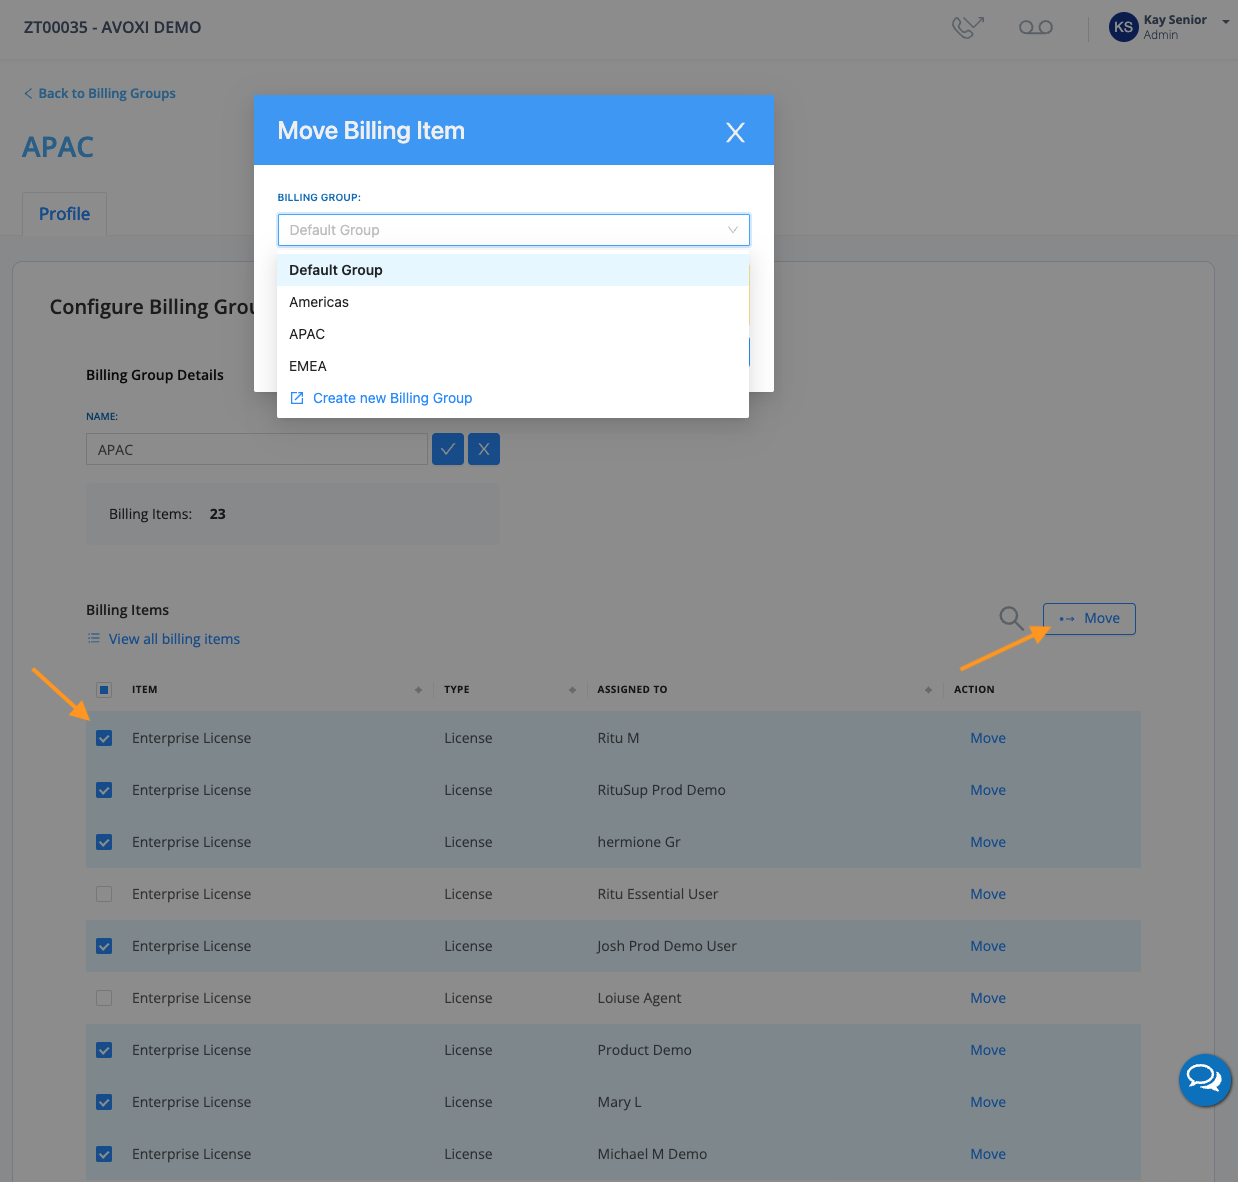
Moving Items from One Group to Another
- Navigate to My Account > Billing > Billing Groups
- Enable Billing Groups
- Select a Billing Group
- Select one or more billing items
- Select the move button on the billing item itself to move that single item
- Select multiple billing items, then select the ‘Move’ button in the upper right-hand to move multiple items at once
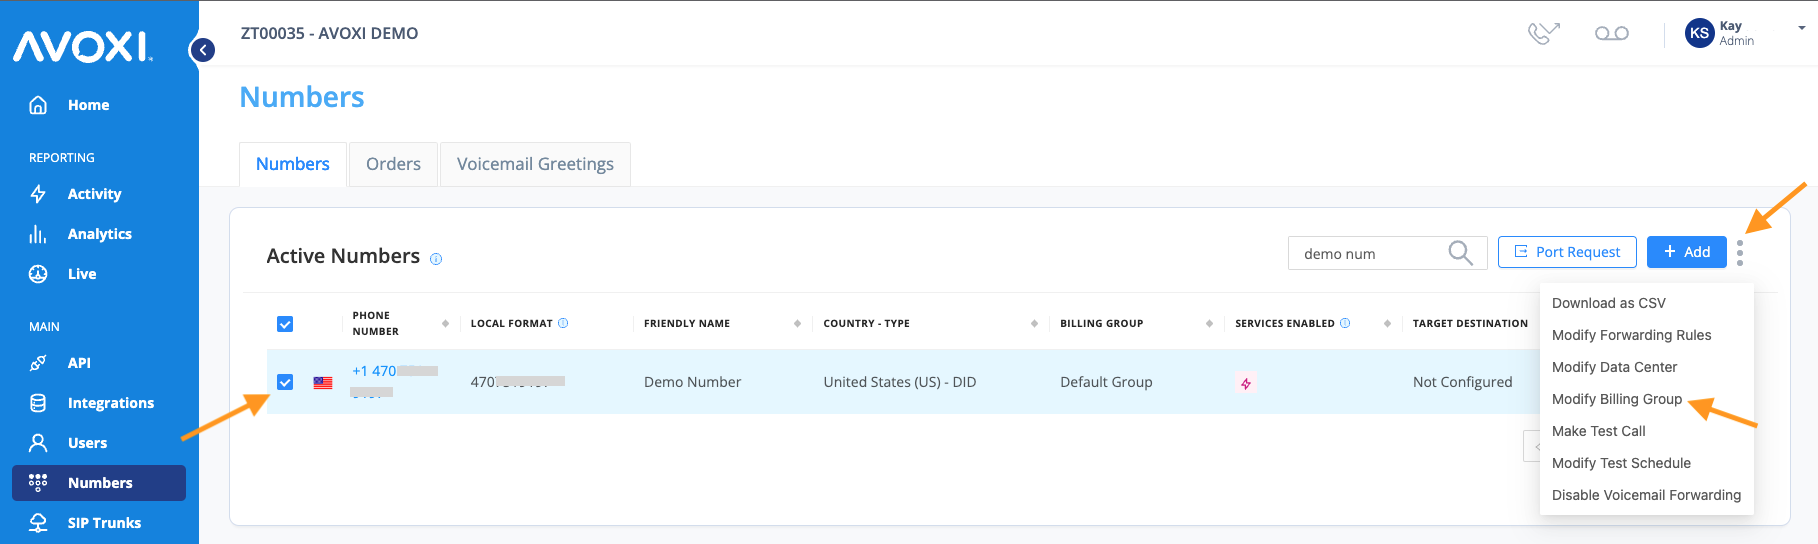
Assigning a Number to a Billing Group from the Numbers Page
- Ensure that Billing Groups are enabled (see above)
- Navigate to the Numbers page
- Select one or more numbers
- Select the 3 dots next to the ‘Add’ button
- Select ‘Modify Billing Group’
- Choose a group from the dropdown or Create a New Group
- Create New Group will take you back to the Billing area to create your new group. You will need to navigate back to the Numbers page to complete your Number assignment
OR
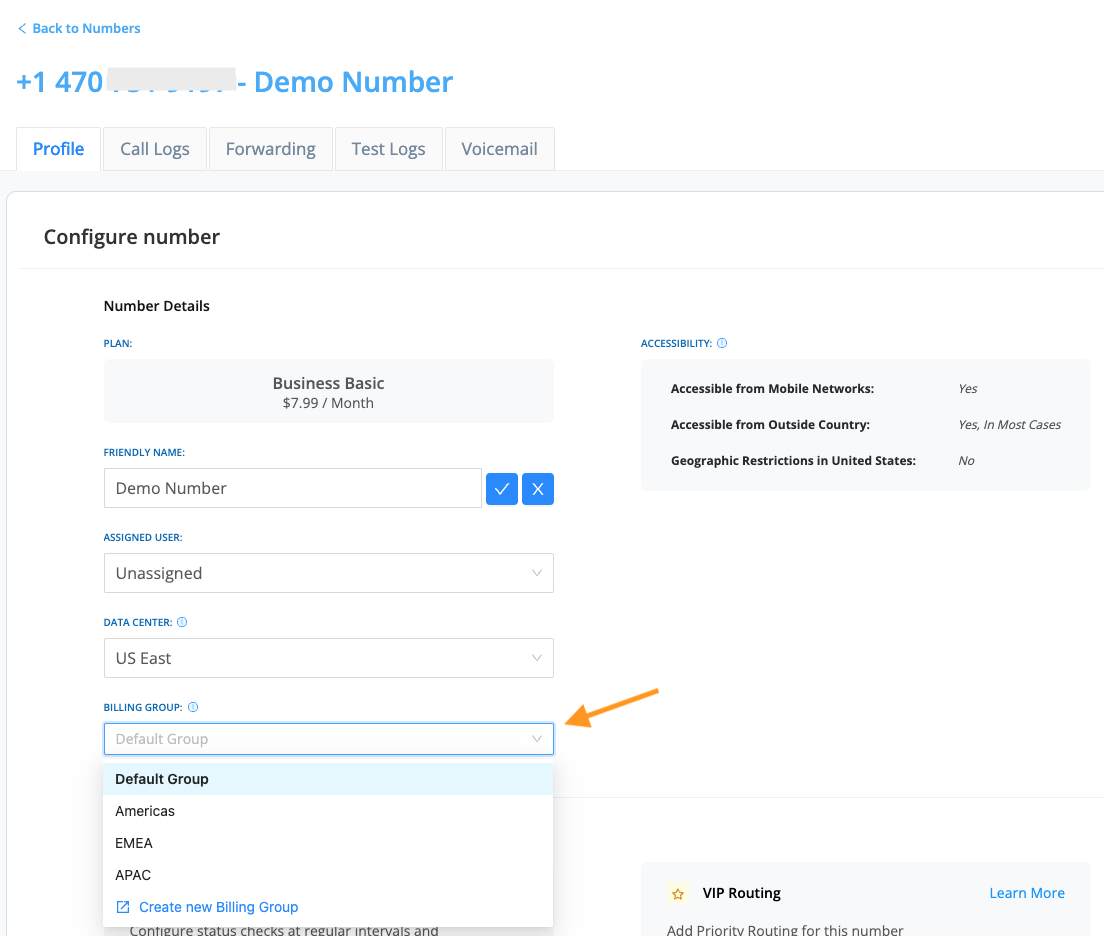
- Ensure that Billing Groups are enabled (see above)
- Navigate to the Numbers page
- Select a Number
- Navigate to Billing Group on the Number profile
- Select a group from the dropdown or Create a New Group
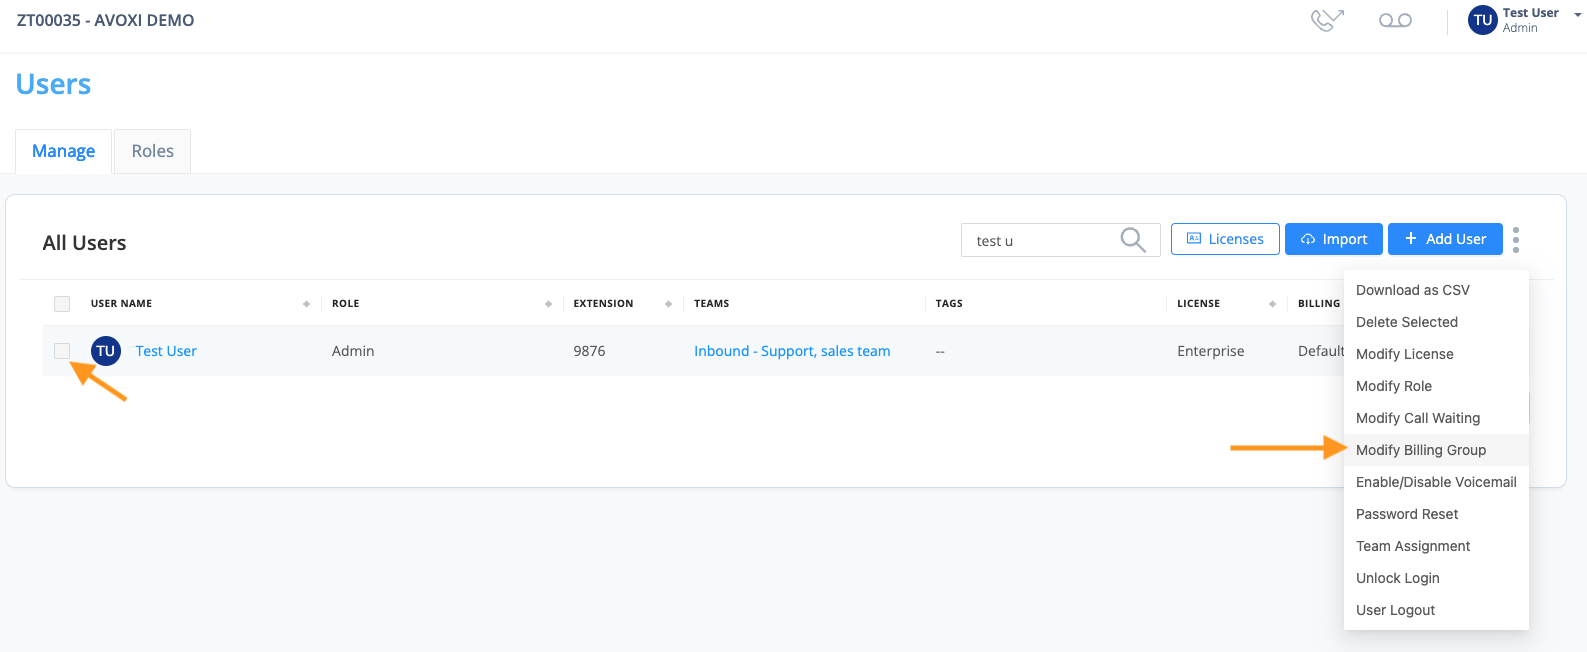
Assigning a User to a Billing Group from the Users Page
- Ensure that Billing Groups are enabled (see above)
- Navigate to the Users page
- Select one or more users
- Select the 3 dots next to the ‘Add’ button
- Select ‘Modify Billing Group’
- Choose a group from the dropdown or Create a New Group
- Create New Group will take you back to the Billing area to create your new group. You will need to navigate back to the Users page to complete your User assignment
OR
- Ensure that Billing Groups are enabled (see above)
- Navigate to the Users page
- Select a User
- Navigate to Billing Group on the User profile
- Select a group from the dropdown or Create a New Group

Assigning a Team to a Billing Group from the Teams Page
- Ensure that Billing Groups are enabled (see above)
- Navigate to the Teams page
- Select a team or create a new one
- Navigate to the Billing Group field
- Choose a group from the dropdown or Create a New Group
- Create New Group will take you back to the Billing area to create your new group. You will need to navigate back to the Teams page to complete your User assignment
Once your Billing Groups have been configured, billing items will then be associated with the appropriate group on your monthly invoice. Please note that the invoice will only reflect billing item assignments based on the billing group configuration at the time the invoice is issued. It will not account for any changes made throughout the month.