The AVOXI Mobile app gives agents the ability to effortlessly make and receive calls on their mobile device giving them flexibility and ensuring they never miss a call. Included in all Contact and Enterprise licenses at no additional cost, the feature is available to all users who have been assigned a license.
Download & Login
Use the below easy steps to download and configure the App:
Download the App
- Navigate to the Apple App Store or Google Play Store on your mobile device and search for 'Avoxi'.
- Click 'Purchase' or 'Download'
Login to the App
When signing in for the first time, you will see a login screen with the options to log in using your Avoxi credentials or a QR Code
- Login with AVOXI Credentials
- Enter the email address and password that you use when logging into AVOXI via your web browser.
- Log in with QR Code (*Note: The application must have permission to use your device's camera.)
- Using your computer, navigate to your AVOXI (genius.avoxi.com) in your web browser.
- Enter your email address and password to log in.
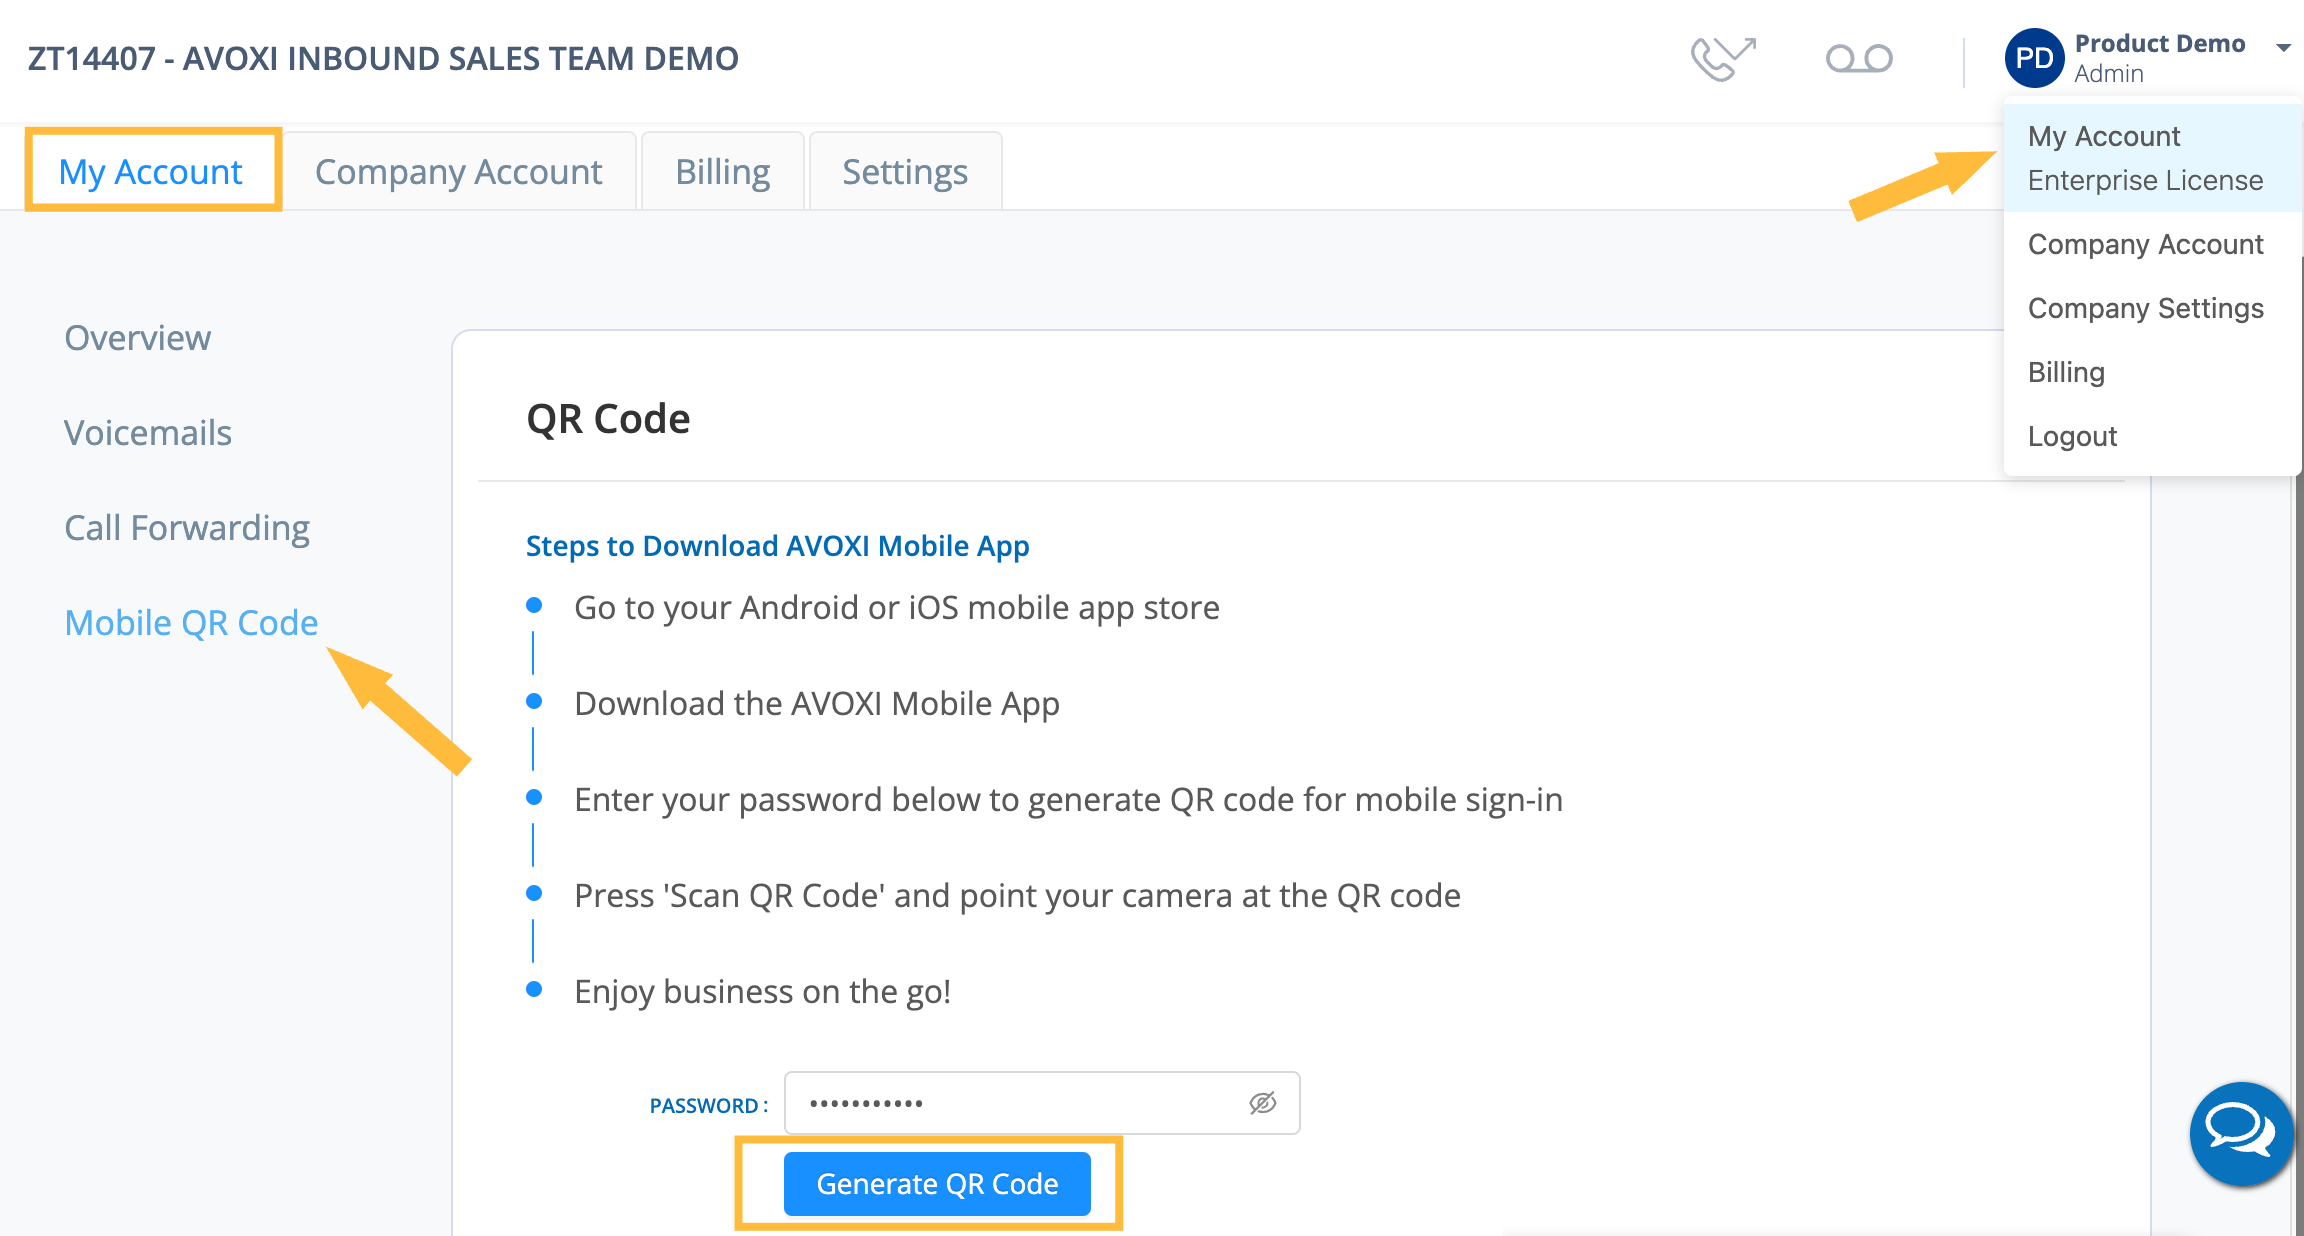
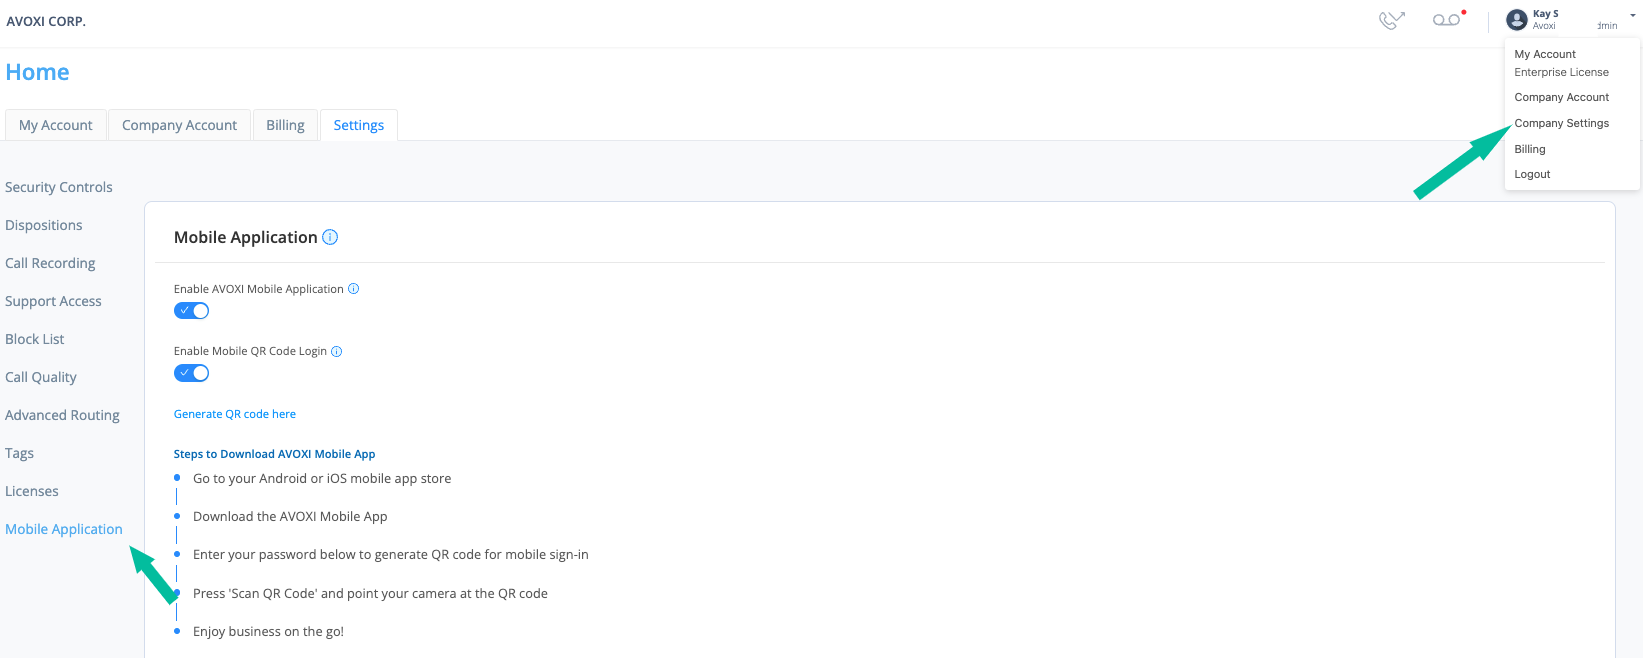
- Click the 'User' menu in the upper-right-hand corner, select 'My Account'
- From the 'My Account' tab, you will see a sidebar menu item for 'Mobile QR Code', select this menu option.
- On the mobile app login screen, select the QR Code login option.
- Using the camera on your mobile device, focus on the QR Code displayed on your computer screen. Once the camera has picked up the QR Code, the user will be automatically logged in.
App Navigation
Overview of the app features.
Keypad
- Use the keys to dial the number you want to call.
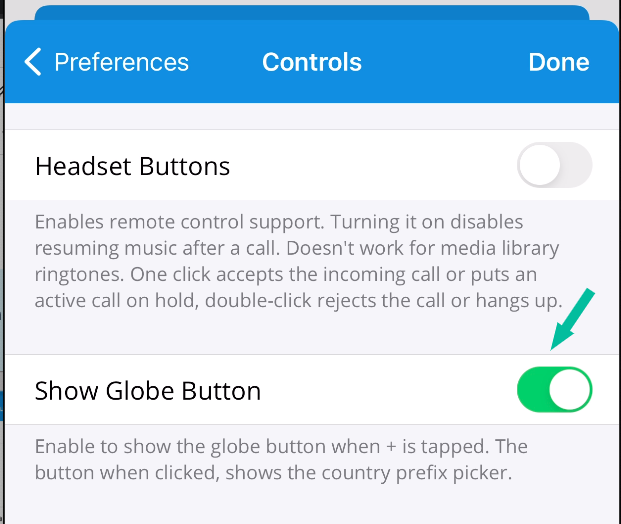
- Press and hold '0' to enter a '+' sign.
 .
. 
Quick Dial
Create contacts that can be called with the click of a button.
View Contacts in either list or card form. Swipe down to change the view.
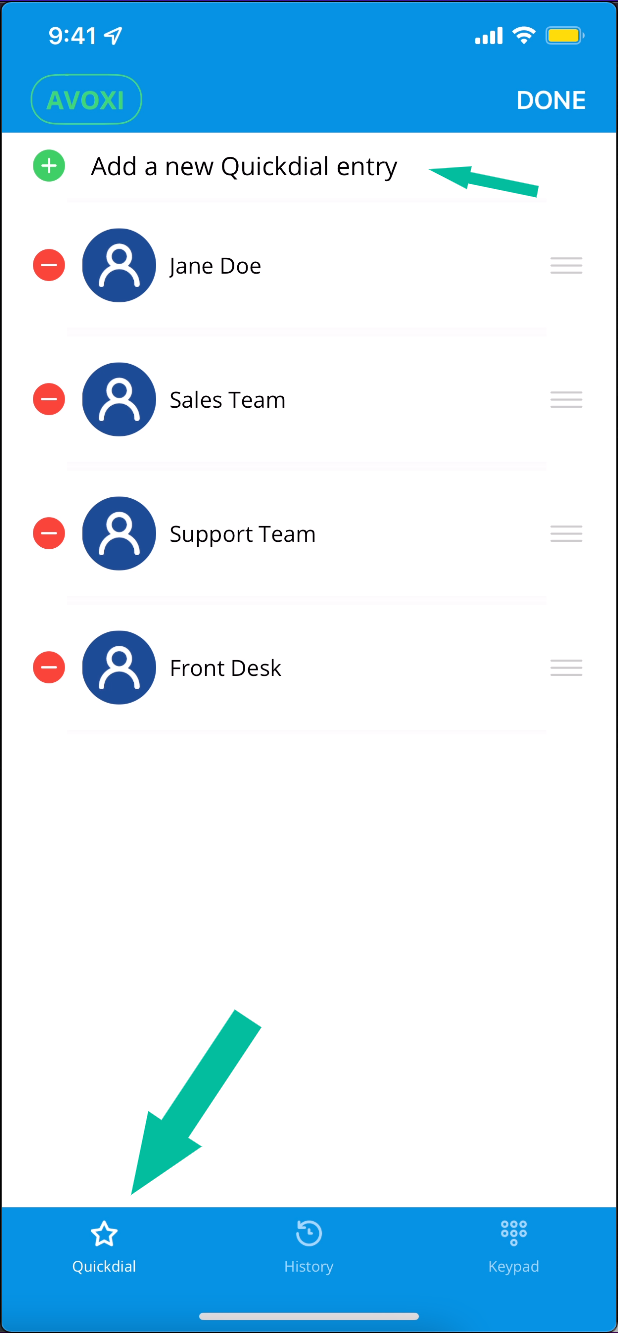
To add a new Quick Dial contact
1. Navigate to the Quick Dial page.
2. Click the Edit button.
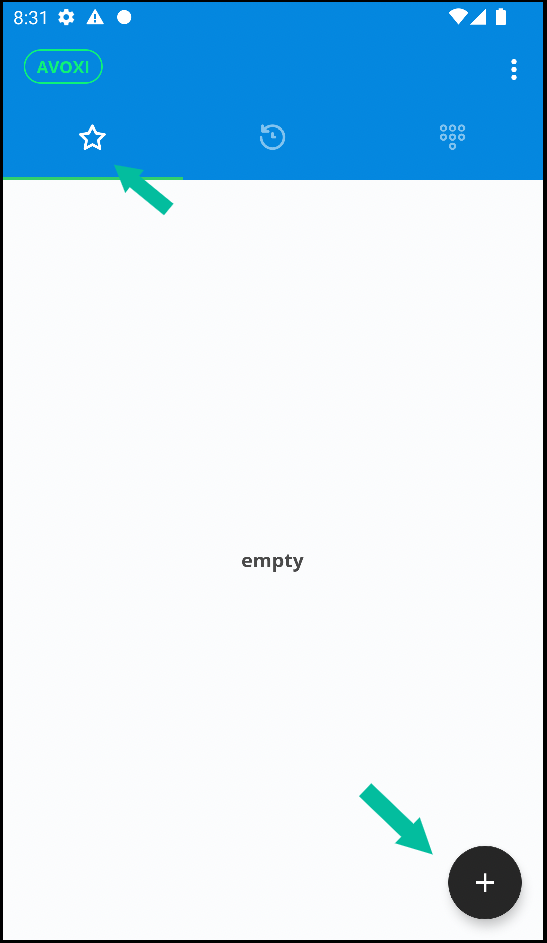
- Click the '+' button. This may look different depending on whether you are in the Card view or the List view.
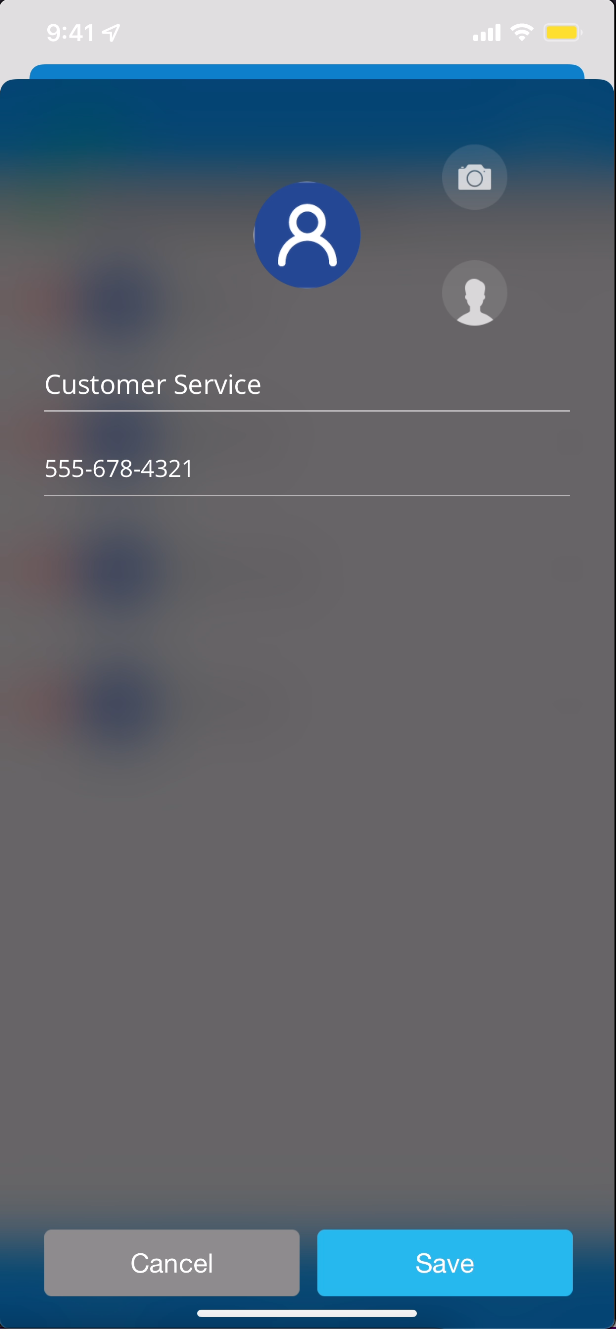
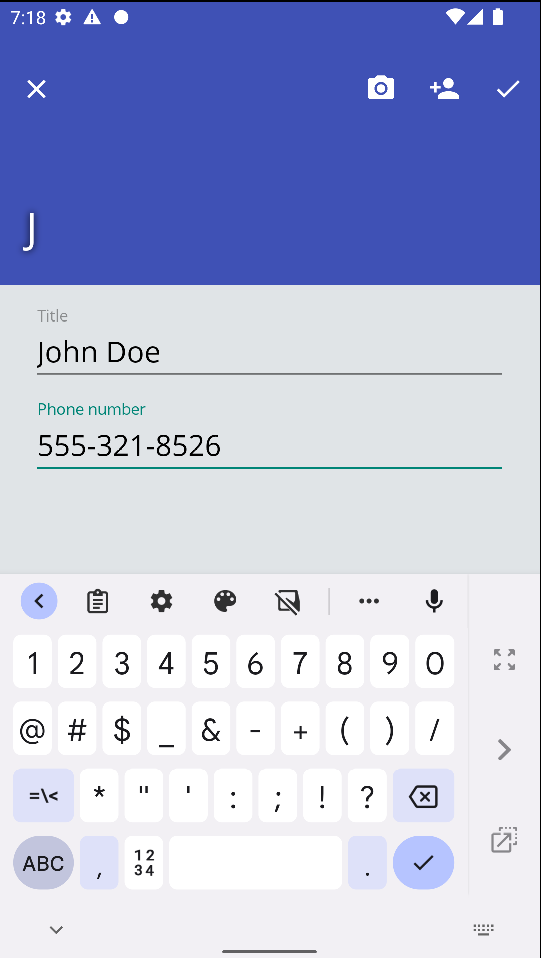
3. Enter a Title/Name and Phone Number for the Contact you are creating.
- Add a Contact photo. (Optional)
4. Click Save.
Contacts will appear in the order in which they were created. Use the 'Edit' button to Edit or manually re-arrange the order of the contacts.
iPhone
Android
To call a Quick Dial contact
1. Navigate to Quickdial.
2. Click on the Contact you want to call.
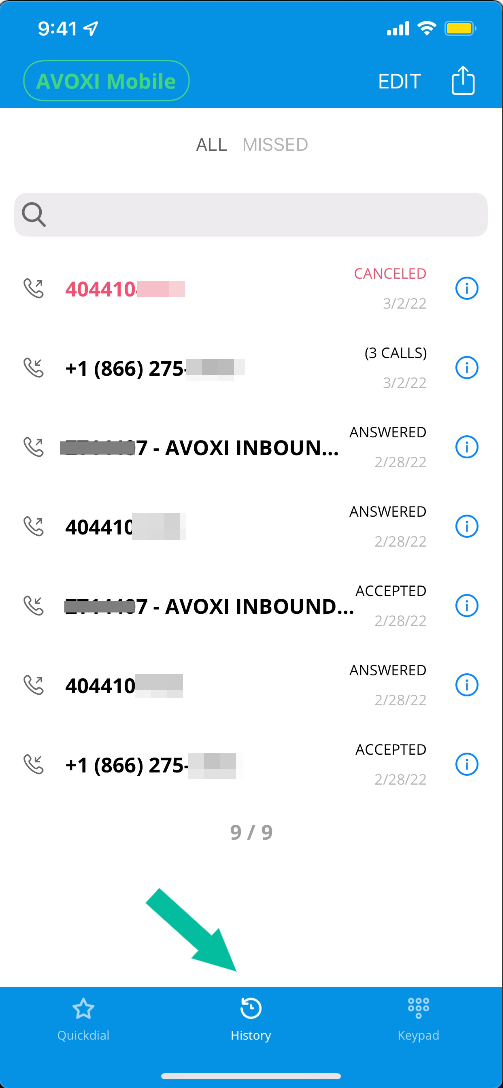
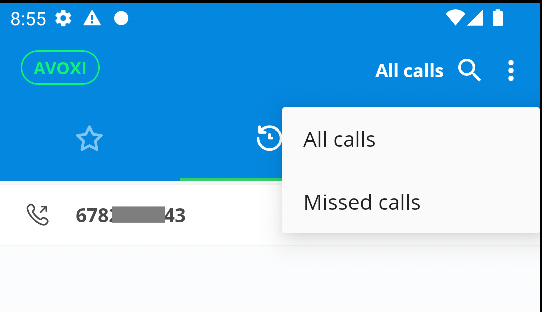
Call History
View a list of calls that have occurred on the app.
- Switch between ALL calls and MISSED calls as needed.
- Search for a call by name or number.
- Press the info button to list a list of calls that occurred between that number on a single day.
- Swipe left or use the Edit button to delete an entry.
- Use the Share button to the right of Edit to export or share your call history.
iPhone
Android
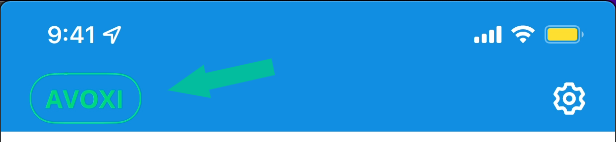
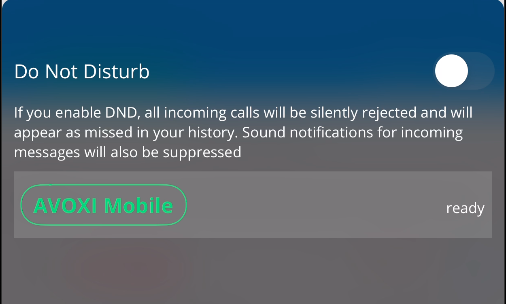
App Provisioning & Do Not Disturb
The AVOXI button in the upper-left corner will take you to the provision status screen. Here you can put the app on Do Not Disturb. You can also see whether your app is connected and ready to take calls.
Do Not Disturb (DND)
- When activated, all calls directed to you will go to voicemail.
- If you are also logged in on the webphone, then the webphone will continue to receive calls even when you have DND enabled.
- You can set up DND rules (set up DND to operate at specific times via the Settings menu below
iPhone
Android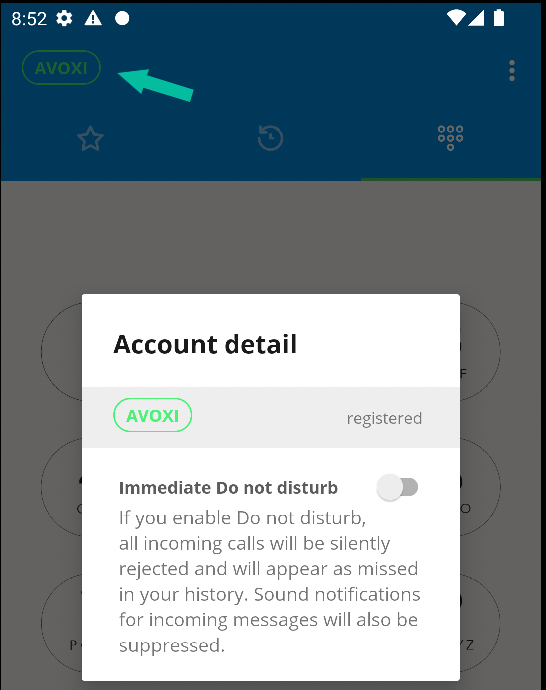
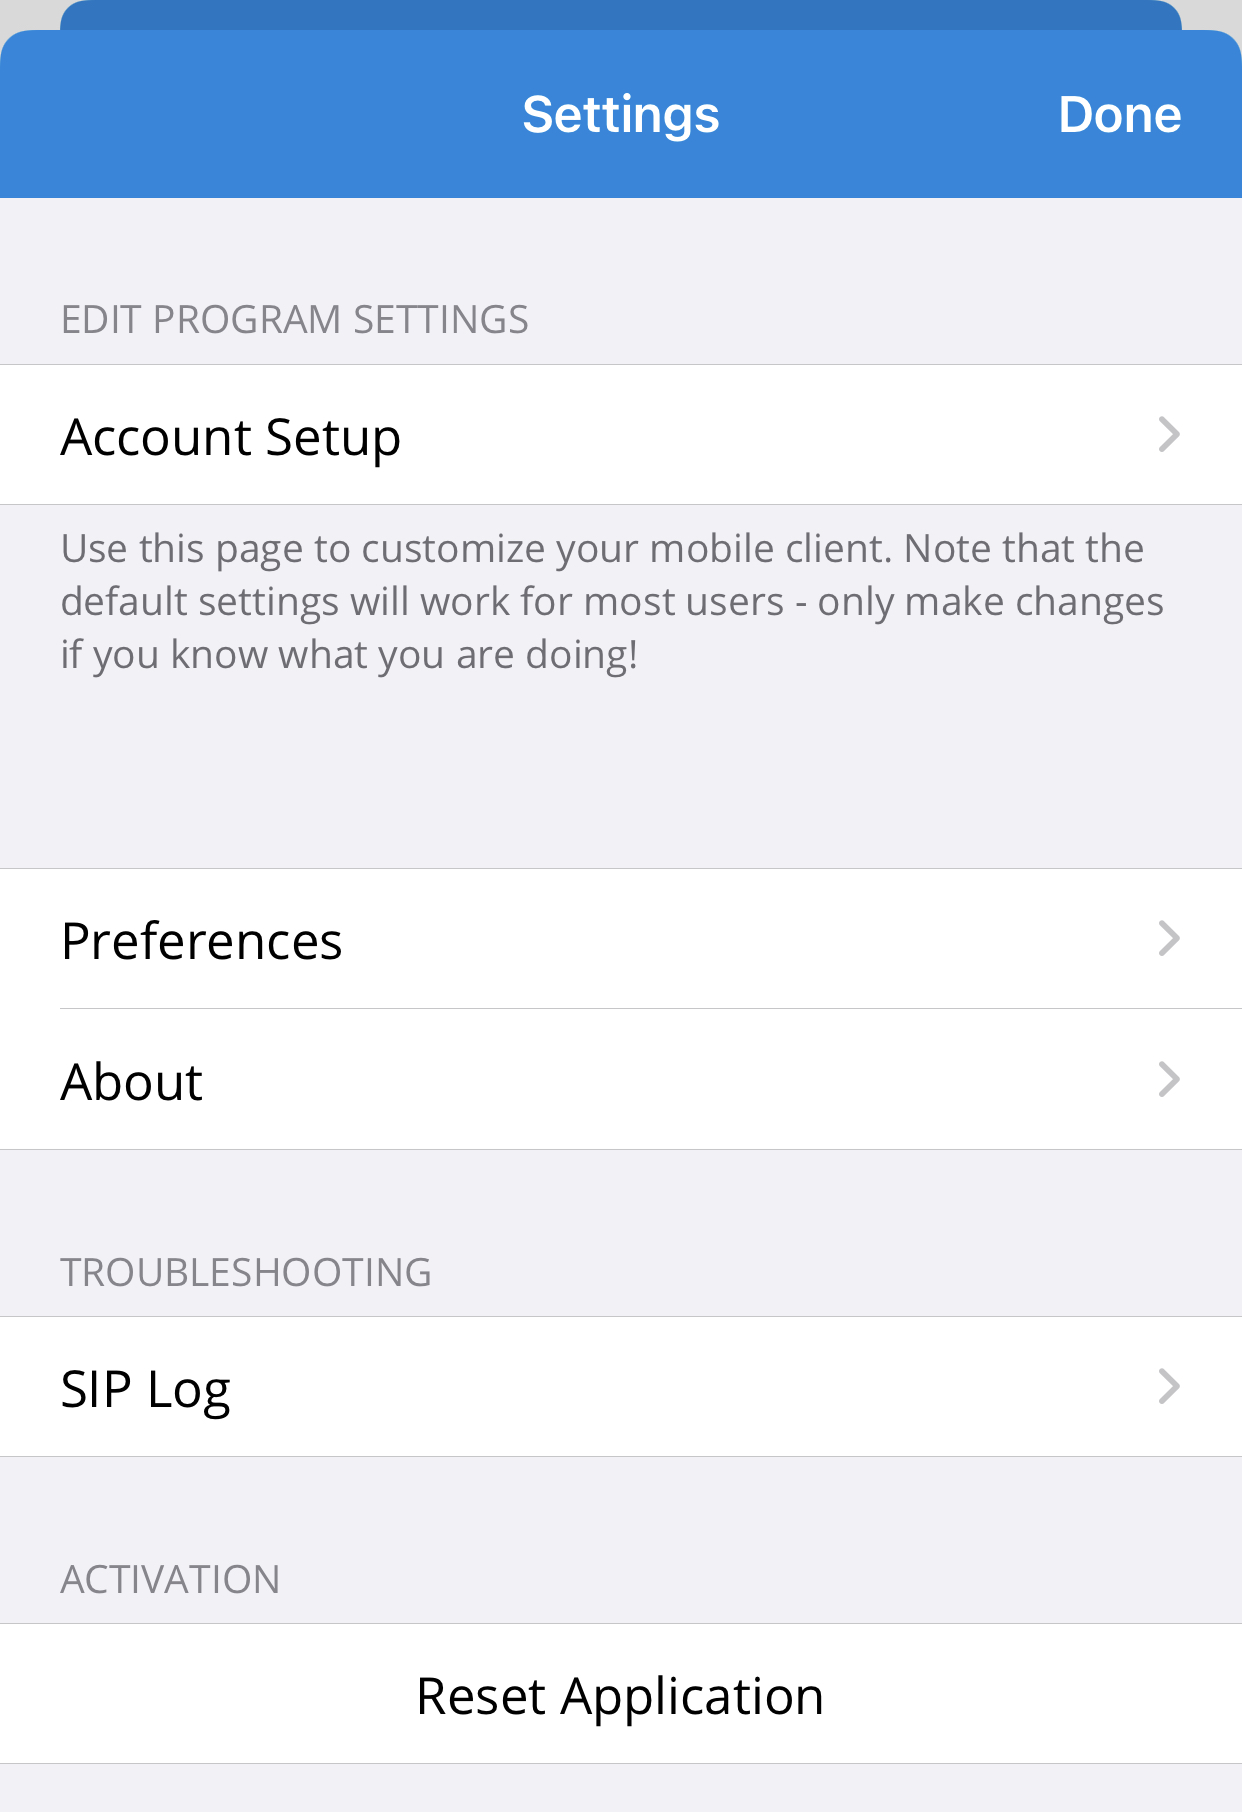
Settings
- You can access your application settings by selecting the Settings icon from the Keypad screen.
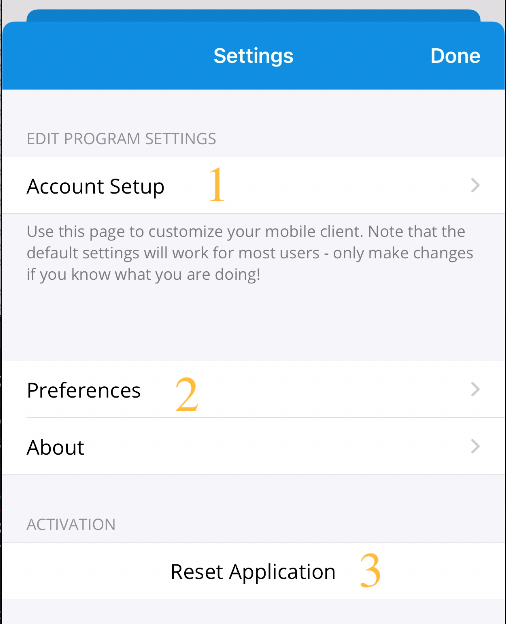
Account Setup (1)
This is where you will go to update your login credentials.
Preferences (2)

Adjust various settings across the app including ringtones, sound (echo/noise suppression, microphone, playback, and keypad volume), along with other controls. Each setting includes a description of what the setting does.
For example: To update your Do Not Disturb (DND) settings go to Preferences -> Do Not Disturb and you can set a schedule as shown in the screenshots below.


Reset Application (3)
This button will completely log you out and restore the application to its default state.
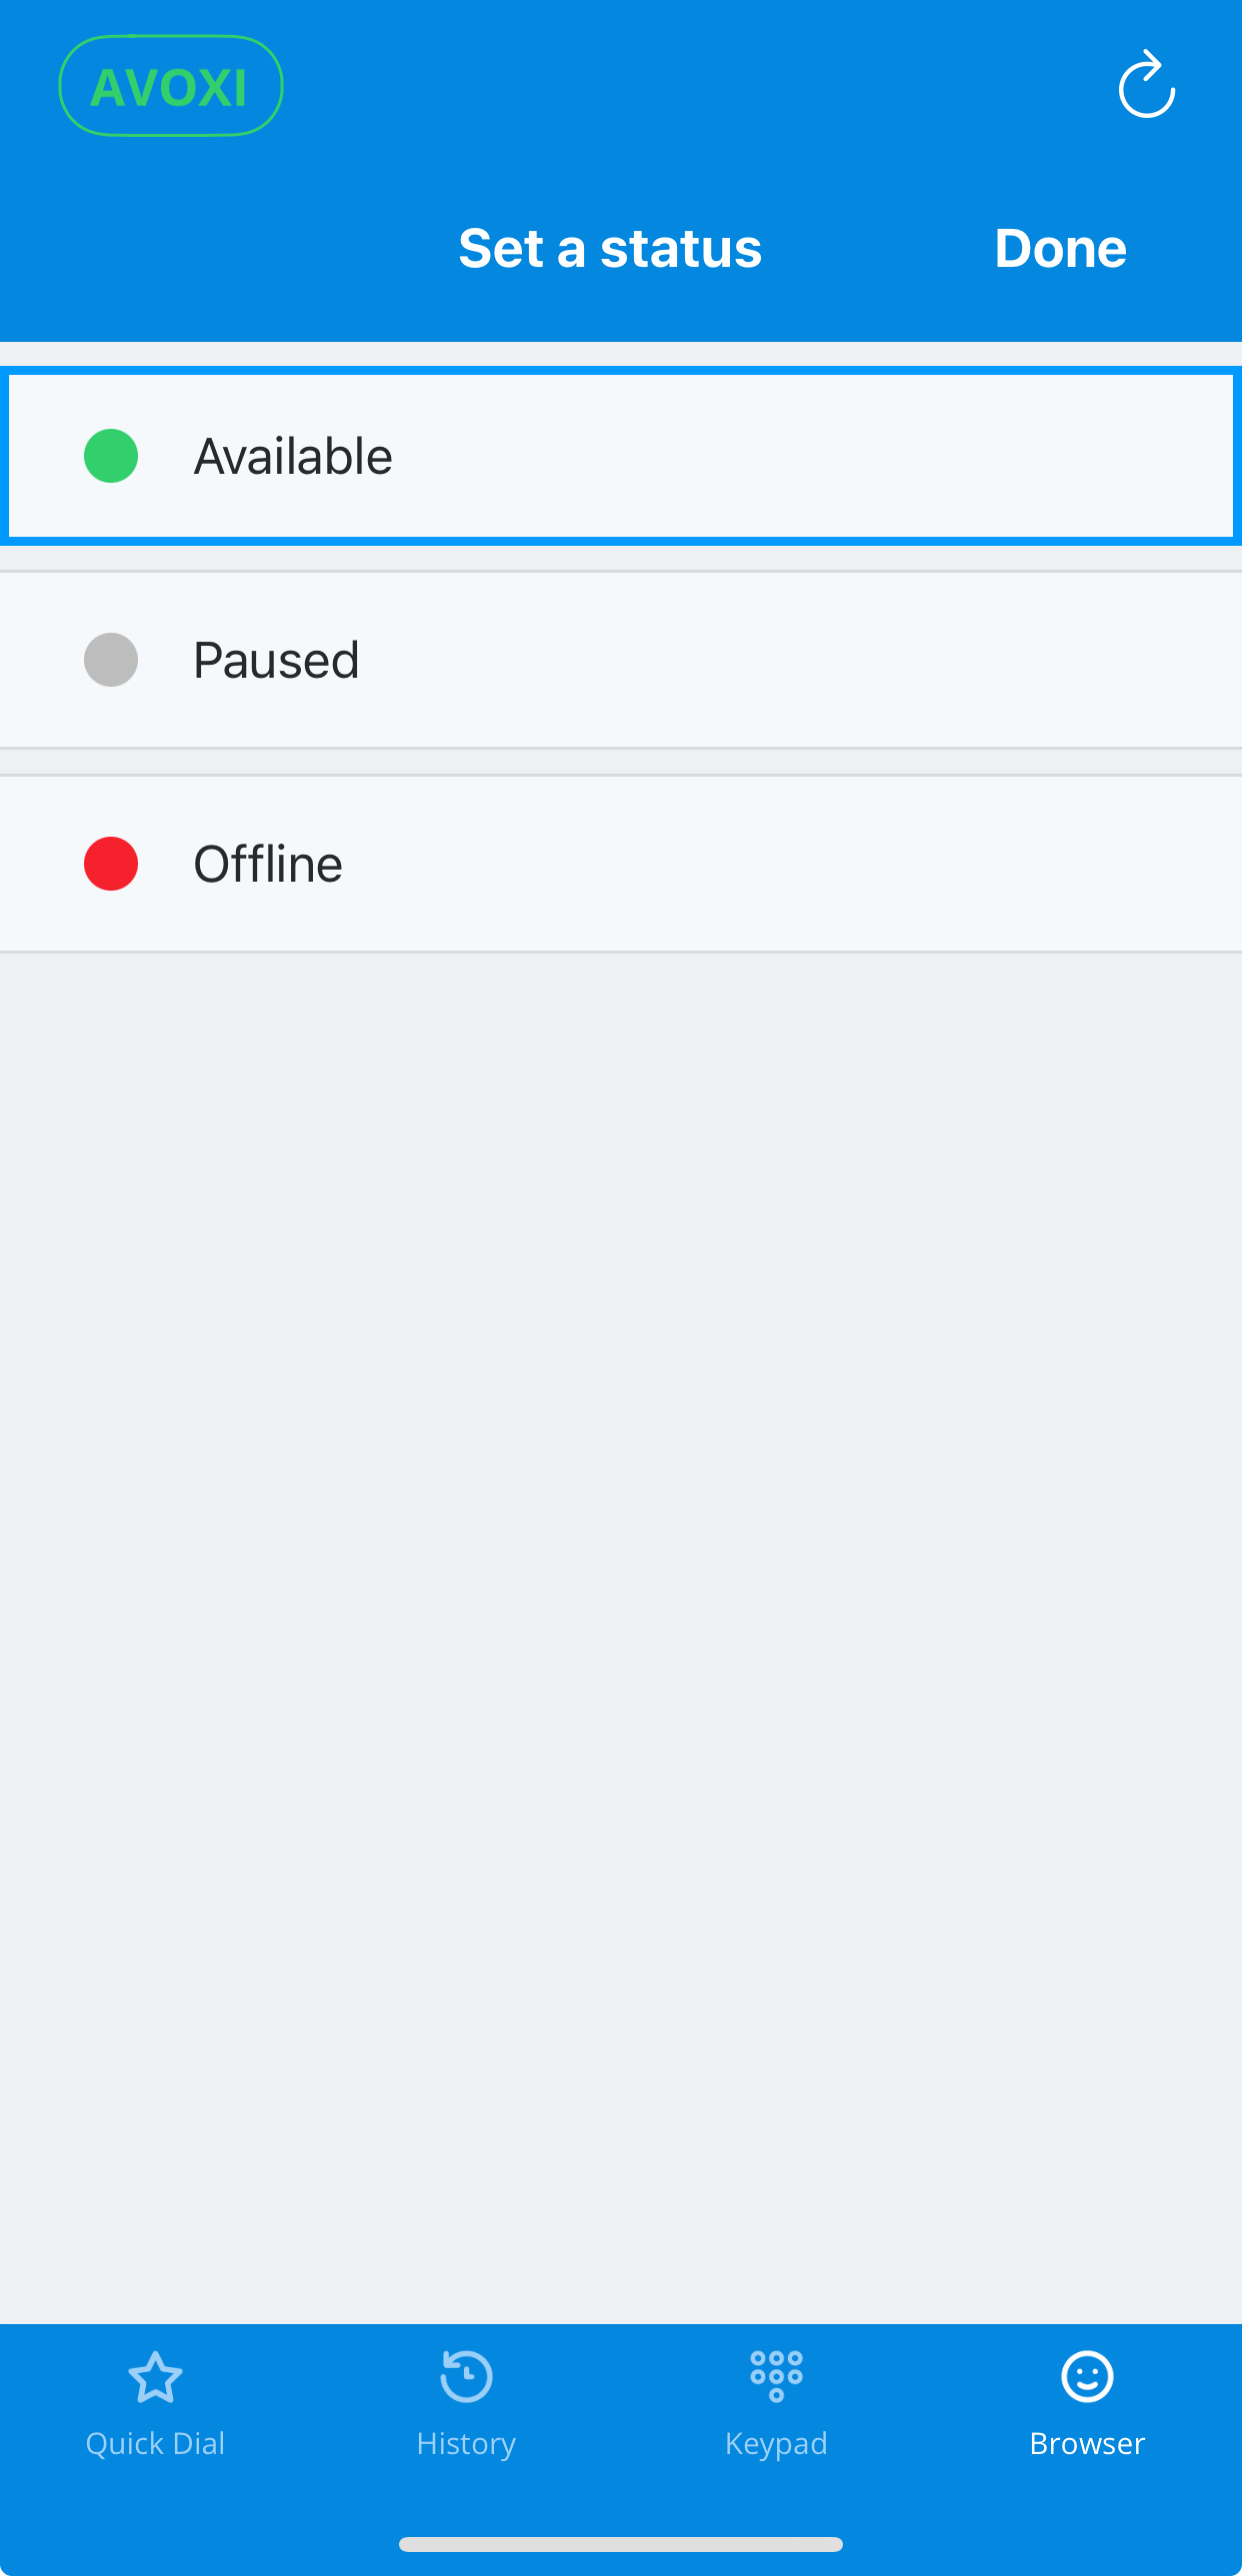
Agent Profile / Agent Status
To view your current status, navigate to the 'Browser' menu item. If you wish to change your status, navigate to the 'Set your status' menu and select a new status.
- Available - User is available to receive team calls
-
Paused - User is logged in, but is not available to receive team calls
- Note: This status is the catchall for all 'Paused' states seen your AVOXI webphone
- Offline - User is offline and is not able to receive calls
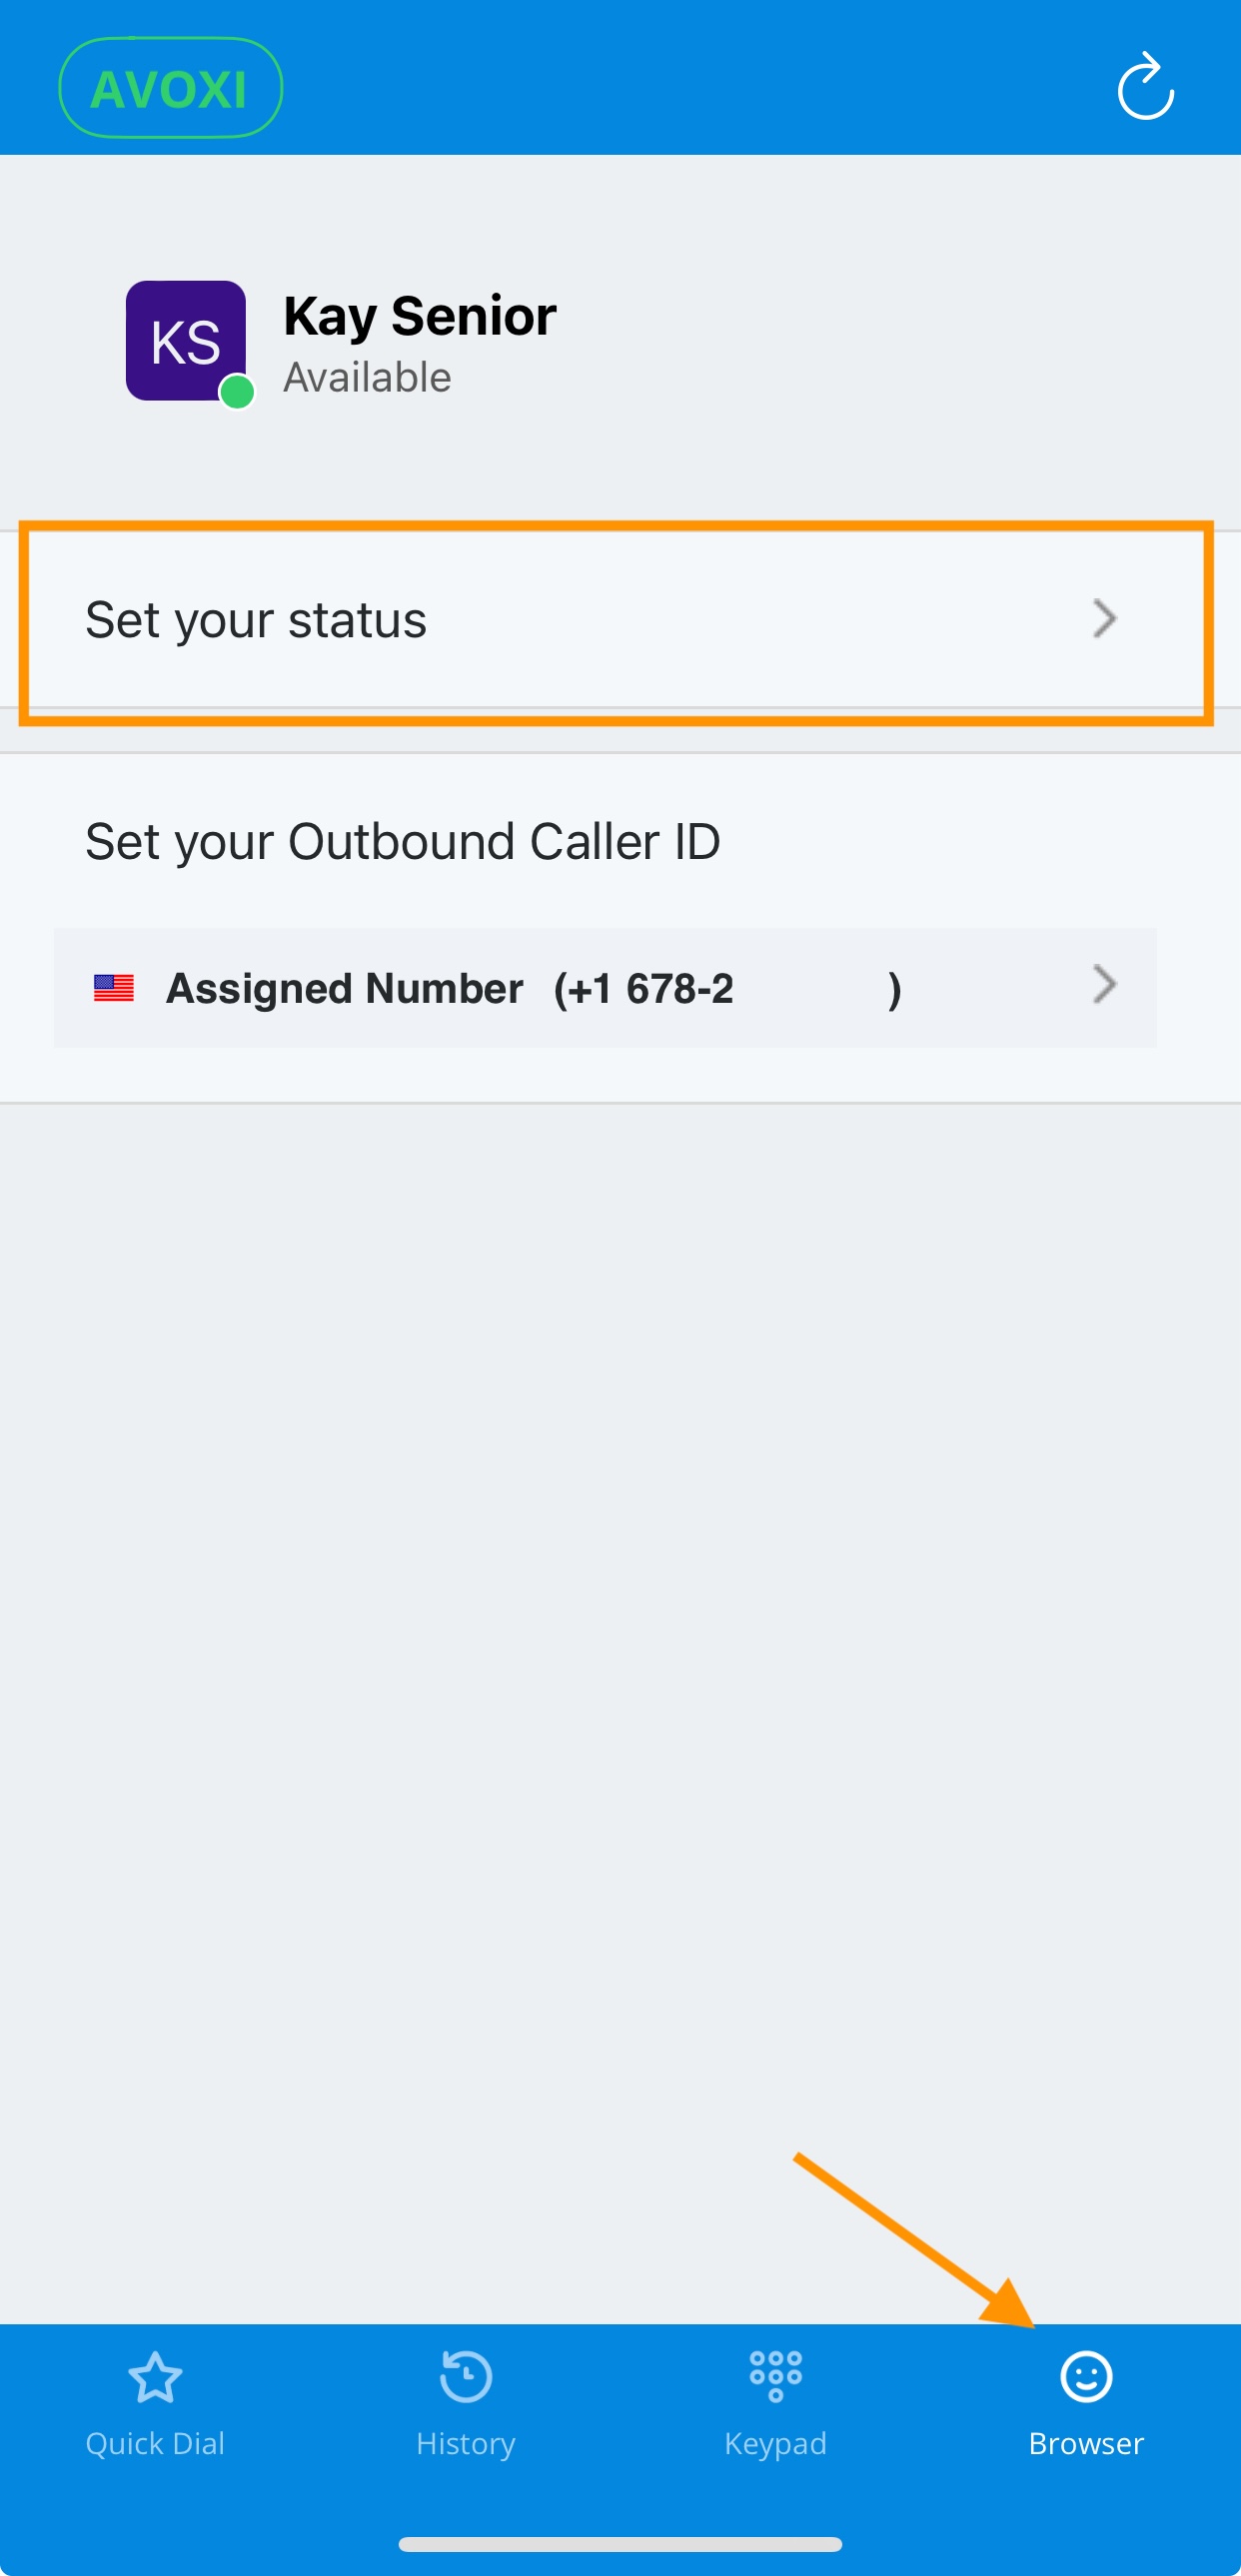
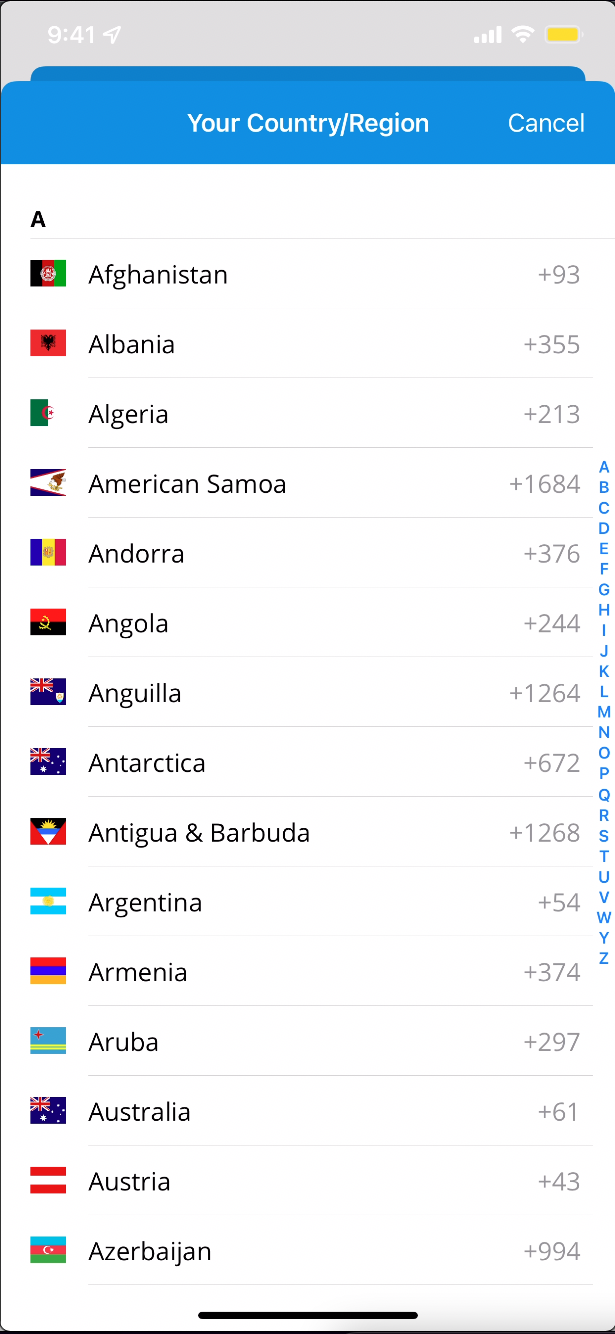
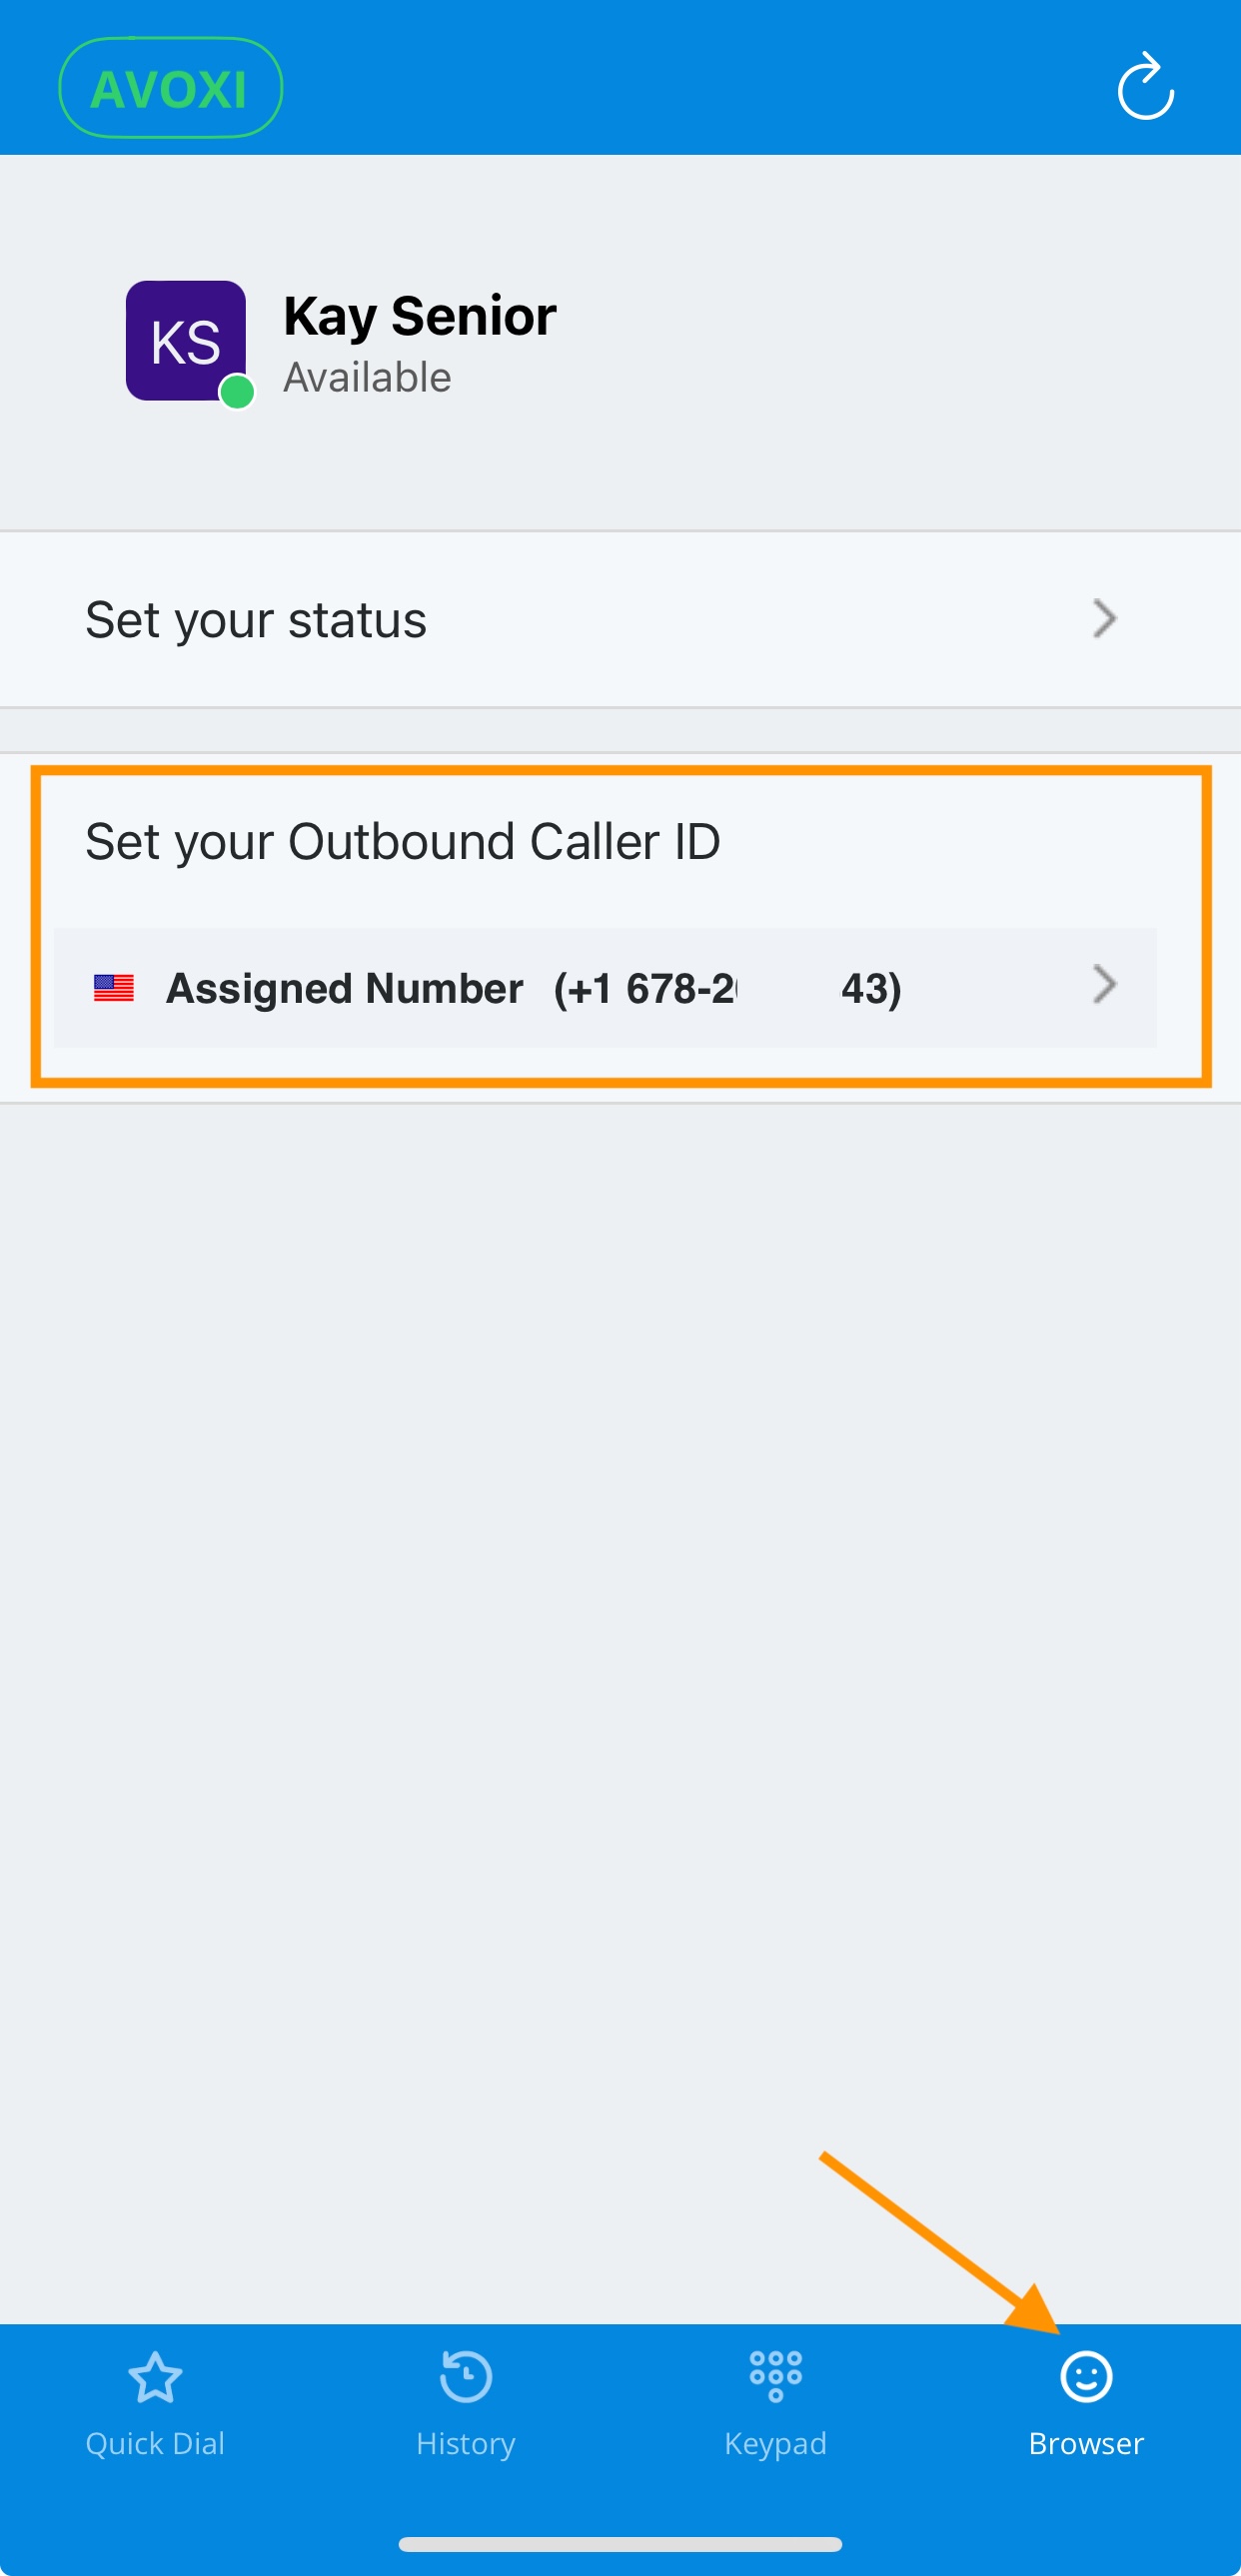
Changing Your Outbound Caller ID
When making calls on the mobile app, users can change their default Outbound Caller ID as needed.
- Navigate to the 'Browser' tab.
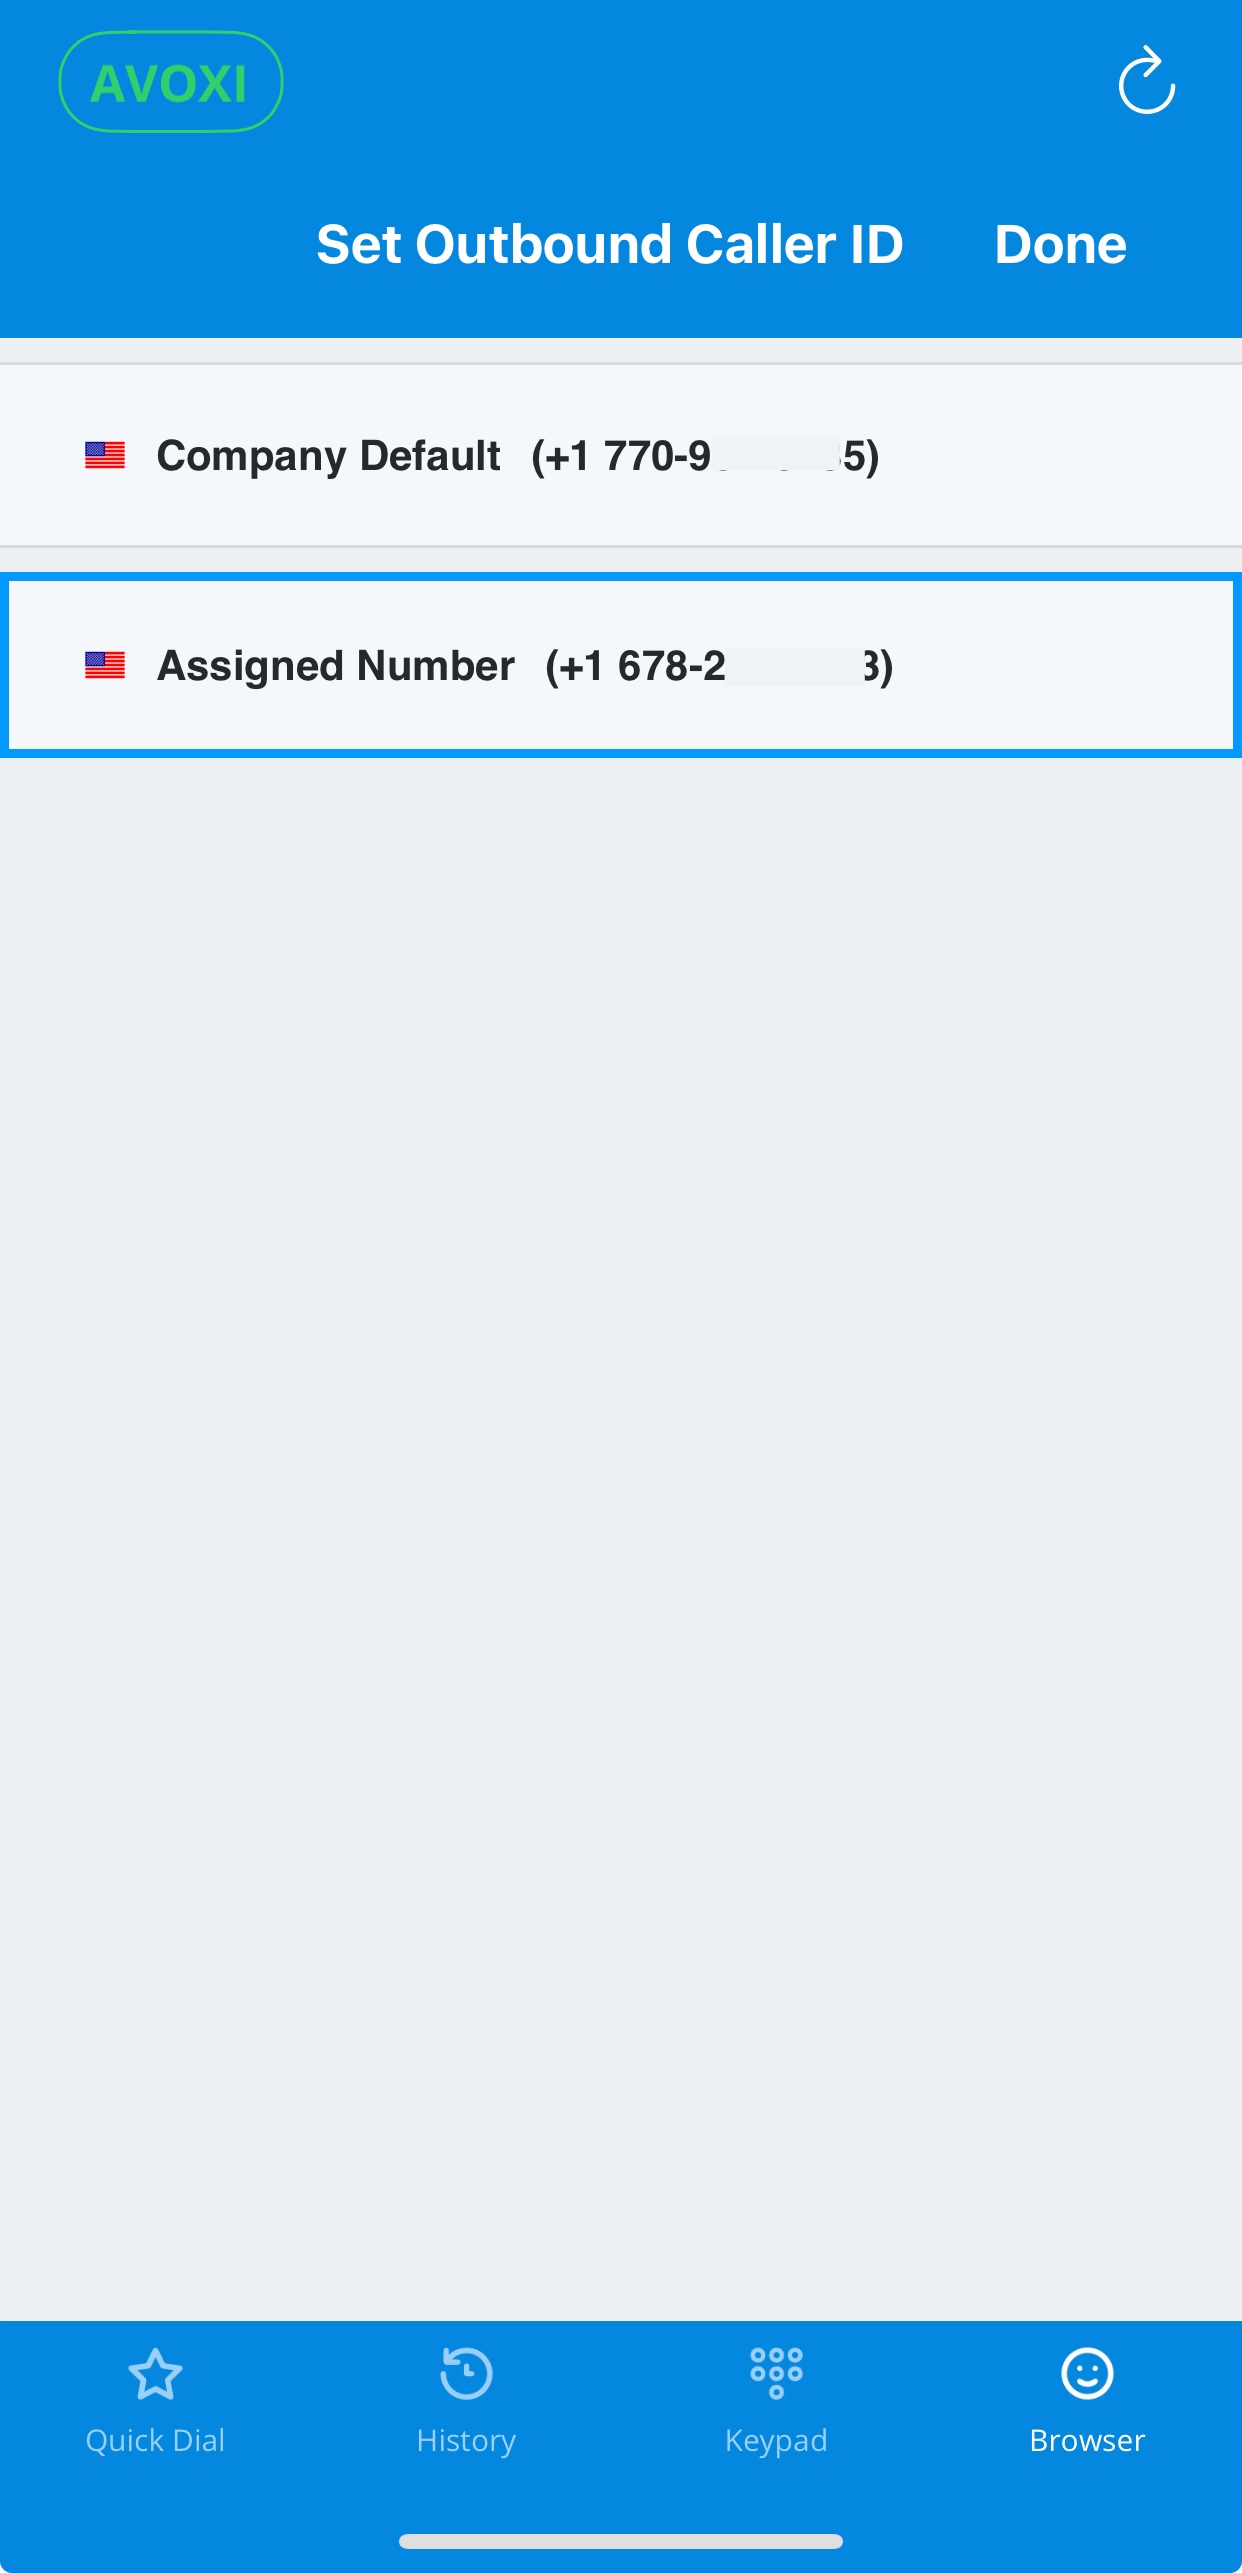
- Select ‘Set your Outbound Caller ID’.
- Select the desired Outbound Caller ID.
- This will be your new default Caller ID.
- If you only want to change the Caller ID for a single call, you MUST remember to change it back to your desired default after the call.
Troubleshooting
Issues Making/Receiving Calls
When you experience issues making or receiving calls on the mobile app, please provide as much detail as you can regarding the call(s). It is also very helpful to provide support with the SIP logs captured from your device as this may provide additional information.
- Enable SIP logs in the mobile app.
- Make test calls to/from the device.
- Provide support with the call sample details and SIP log
- Provide the additional following details to support
- Device (iOS/Android) and operating system version
- Was the call made via WiFi or cellular?
- Any additional helpful details about the issue
How to get the SIP Log from the Mobile App
Enable SIP Log:
- From the keypad, select the Settings icon in the upper right corner
- Navigate to Preferences
- Toggle the 'Troubleshooting Log' or 'Log SIP Traffic' button
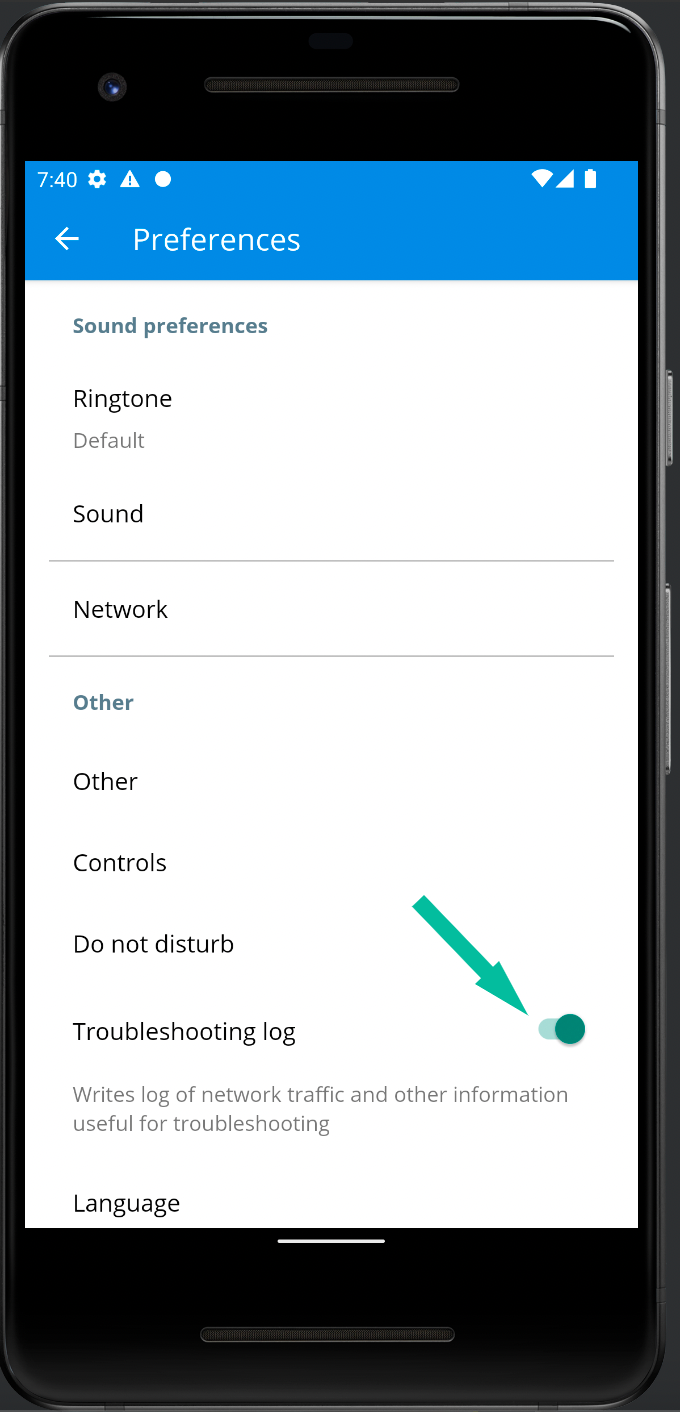 Android
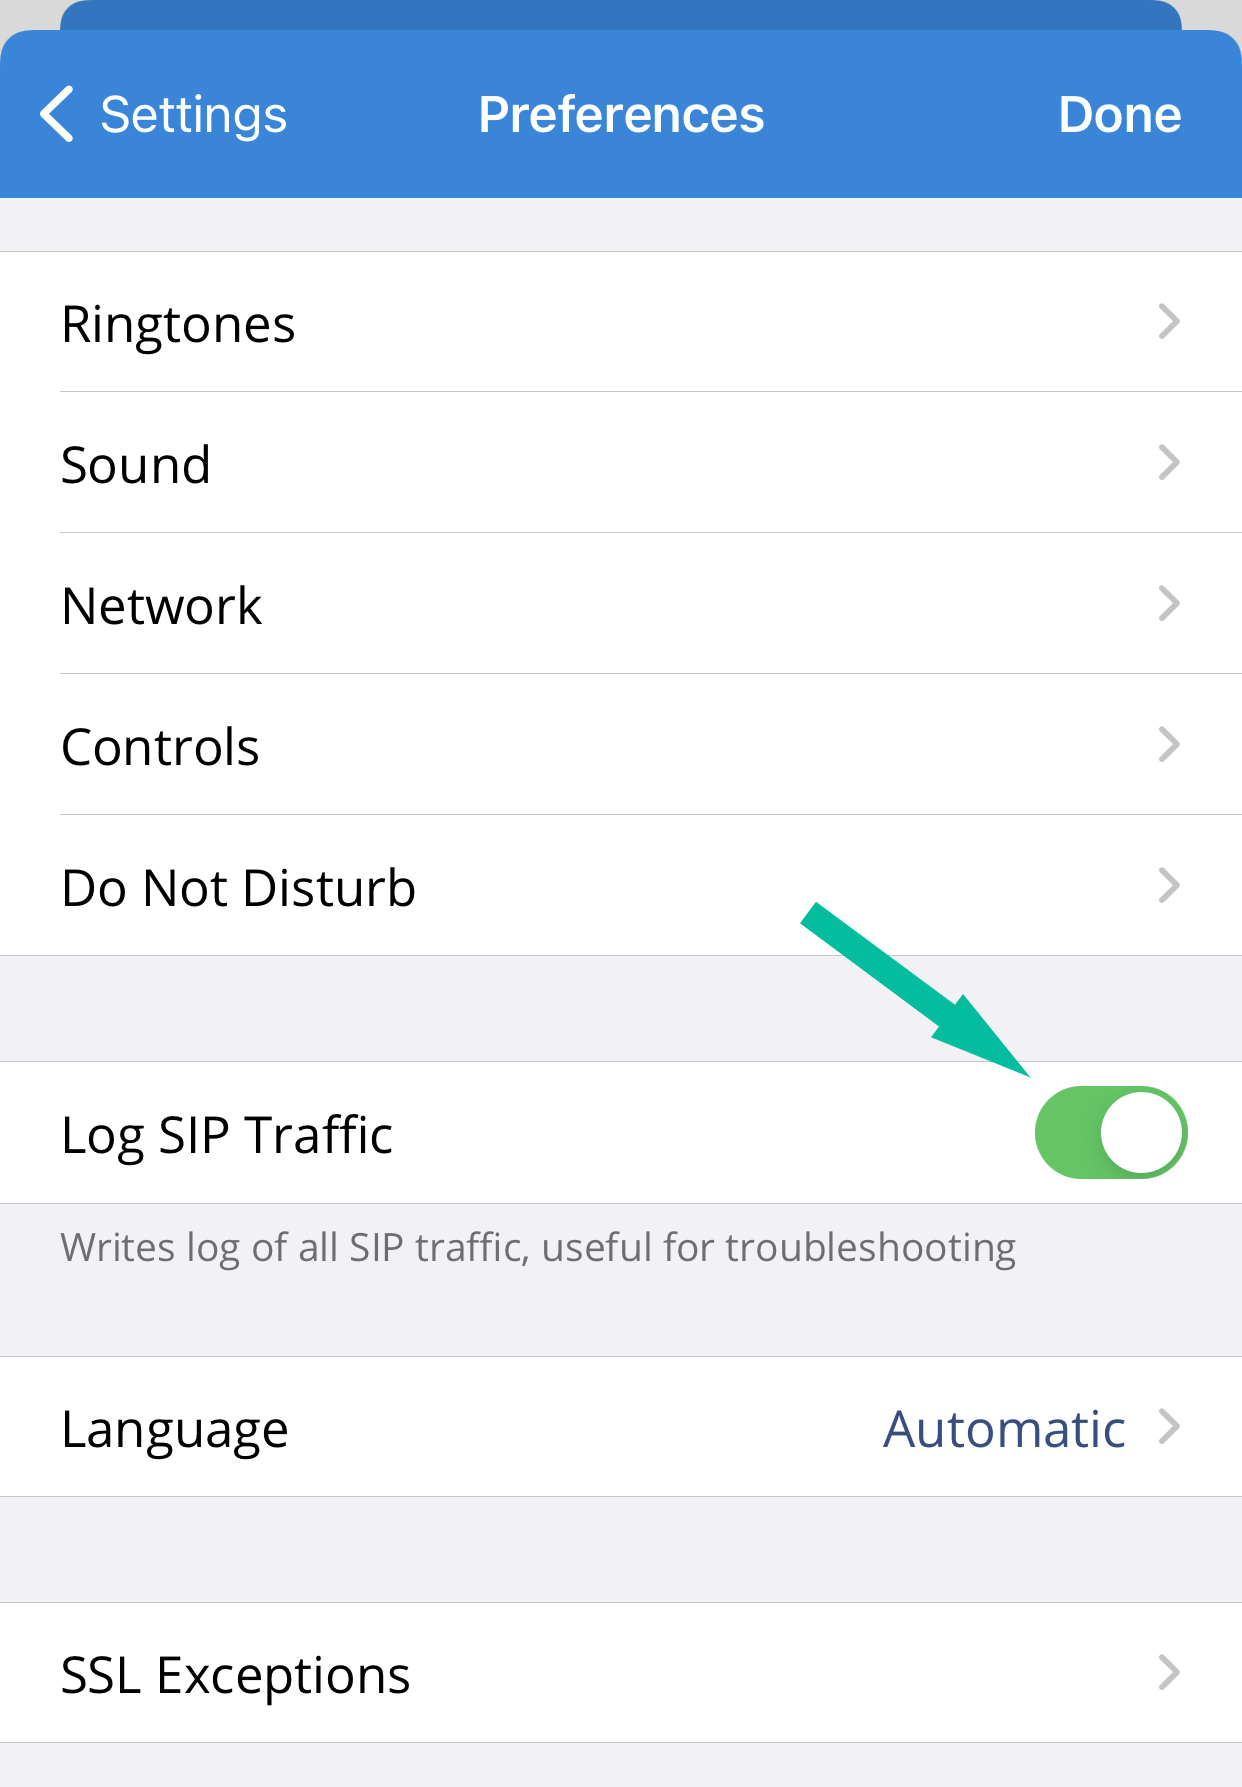 iPhone
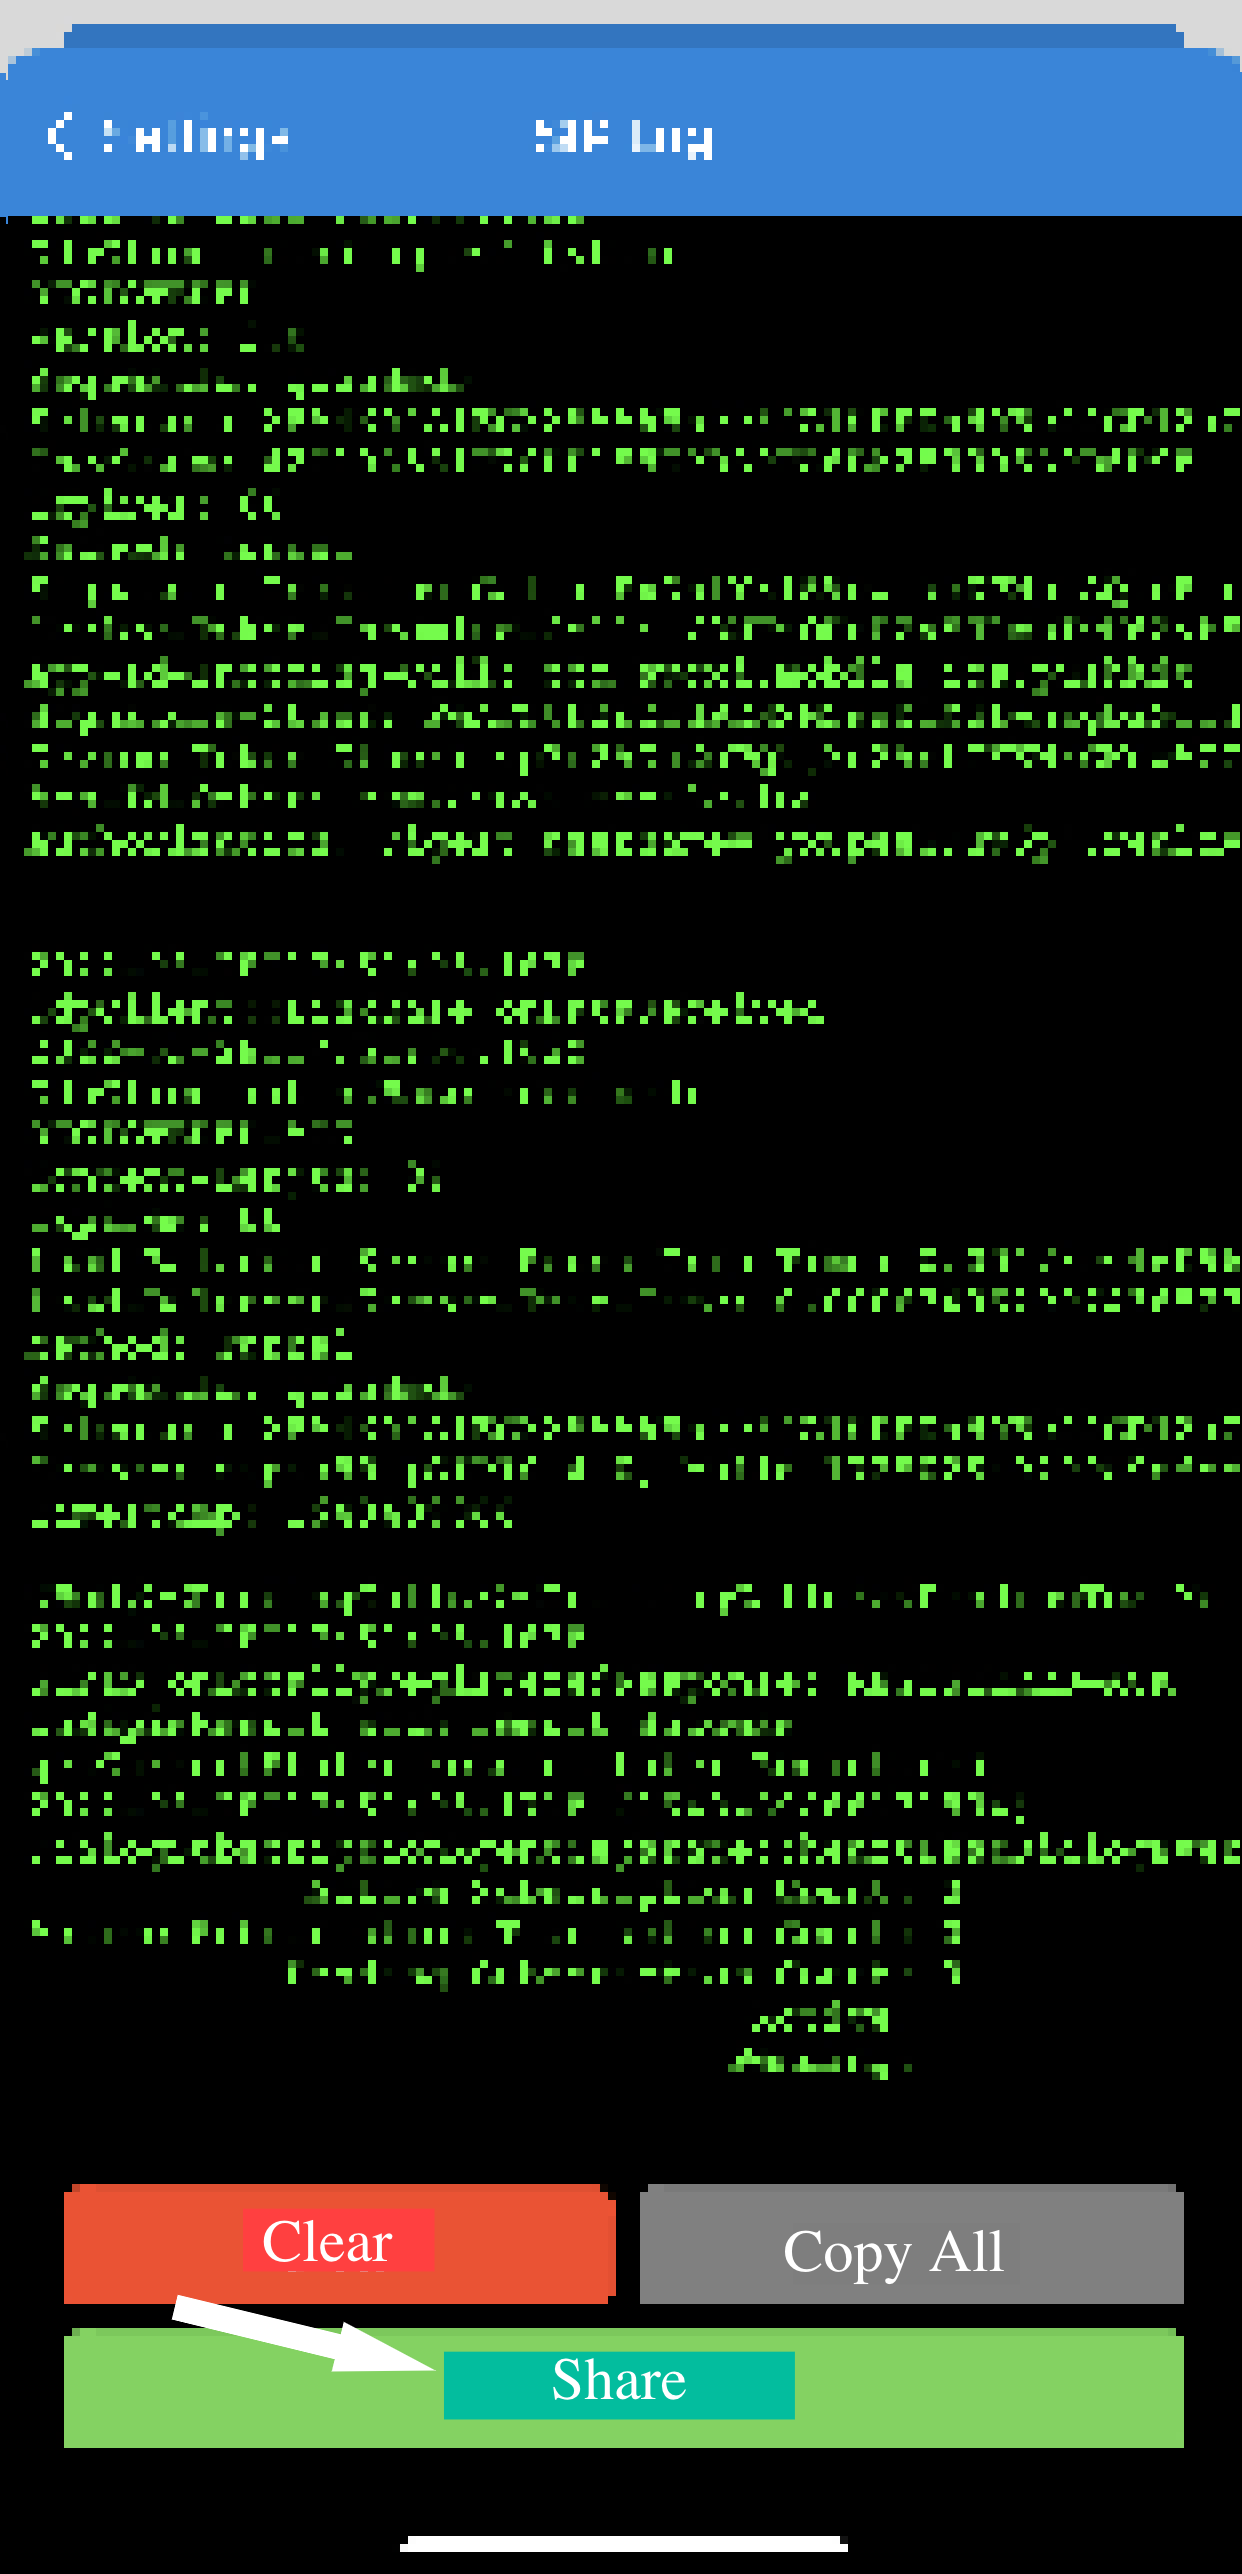
Share SIP Log (iPhone):
- From the Keypad, select the Settings icon
- Navigate to Troubleshooting > SIP Log
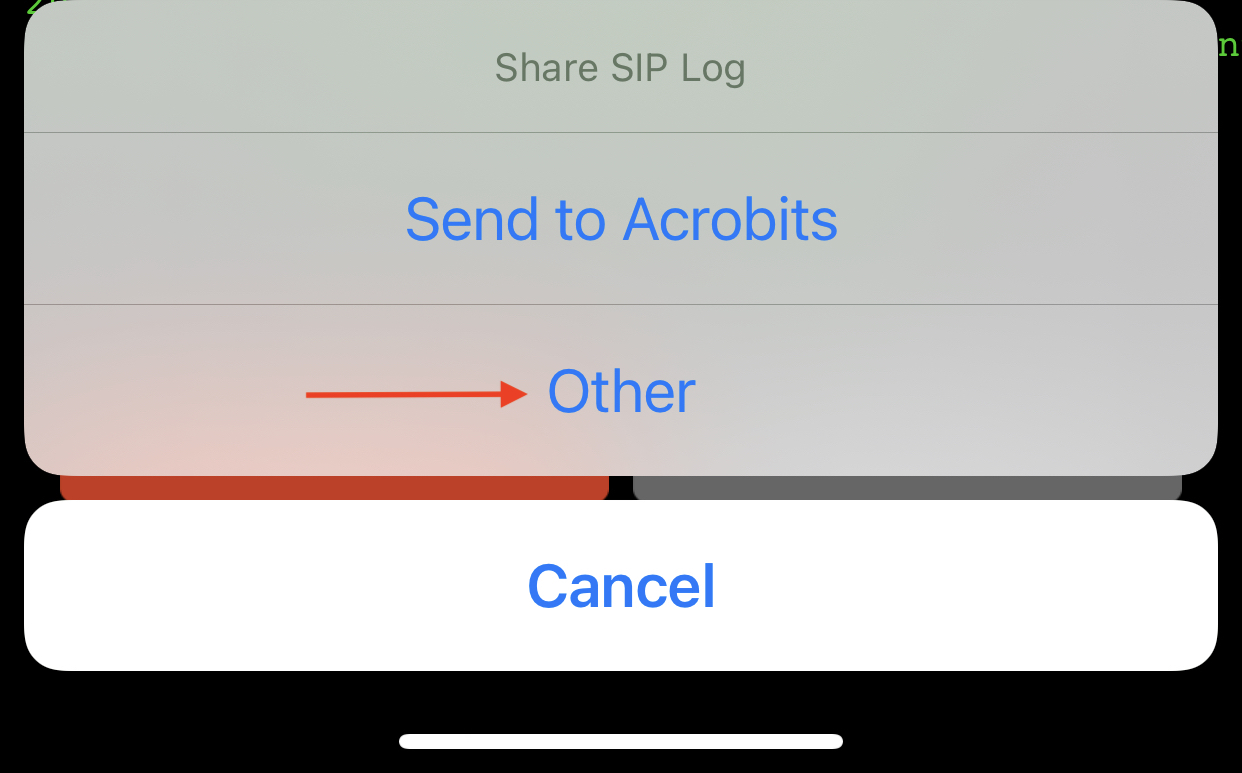
- Select Share > Other and send via email to support (service@avoxi.com)
- Share the SIP log AFTER the failed call is made/received.
Note: You can also copy and paste the log and send email to support, but it may be best to use the Share functionality so there are no typos or errors when using copy/paste
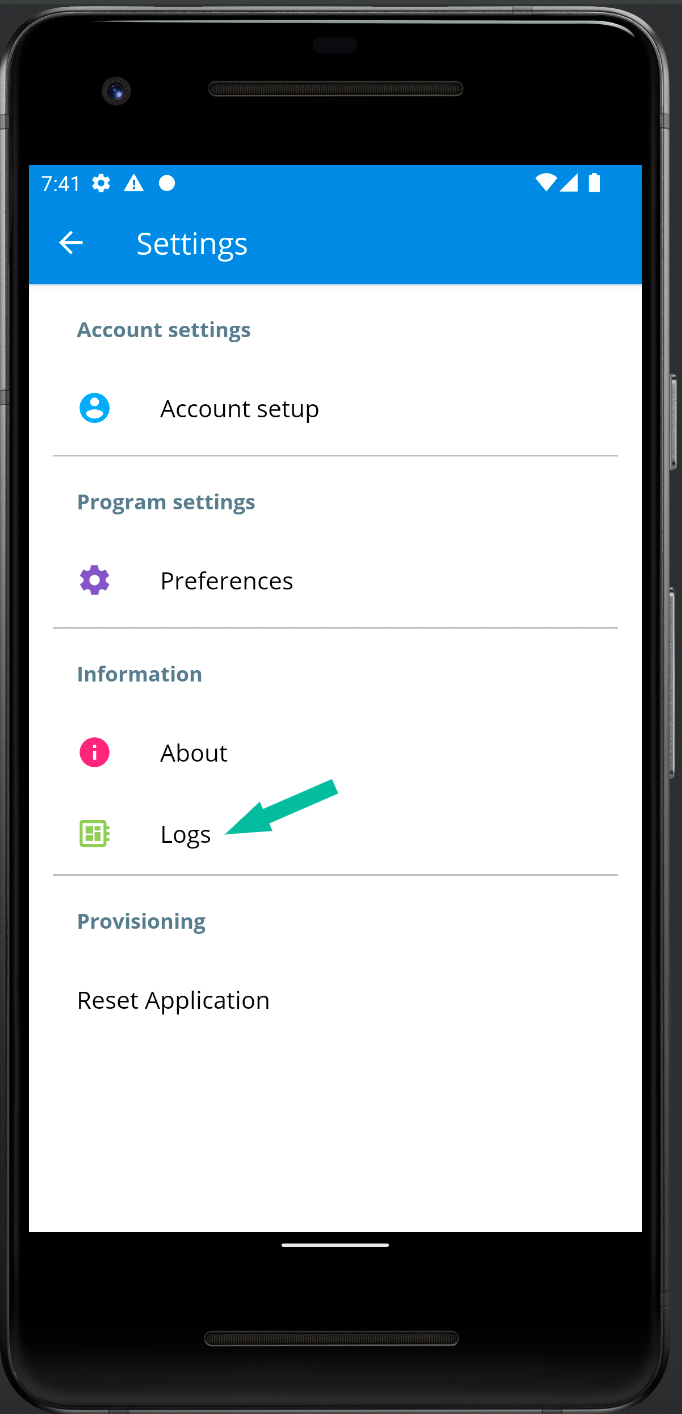
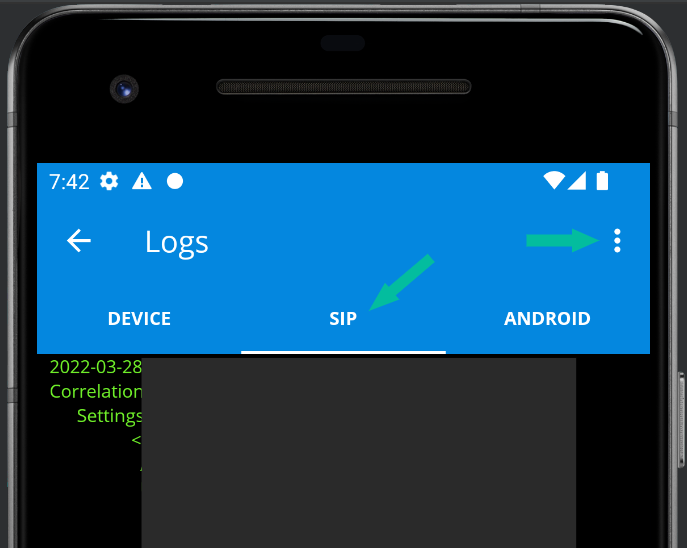
Share SIP Log (Android):
- From the Keypad, select the Settings icon
- Navigate to Information > Logs
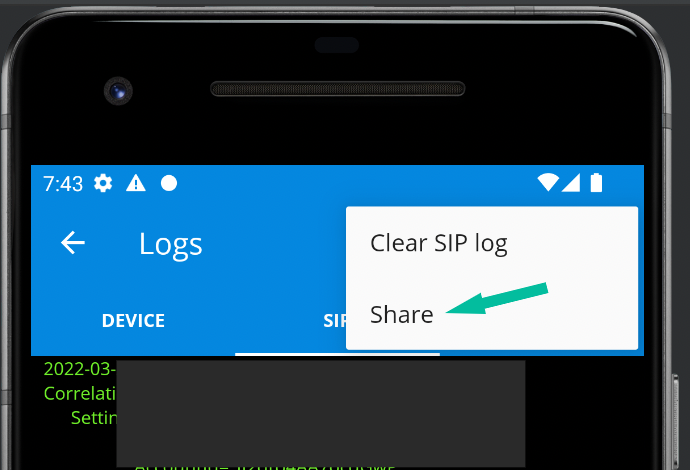
- Select Share > Other and send via email to support (service@avoxi.com)
- Share the SIP log AFTER the failed call is made/received.
Note: Be careful not to clear the SIP Log