As a Supervisor or Admin, you have the ability to monitor how many calls are transferred, by which agent, to which team on any particular date or time. This helps get an understanding of gaps in agents' technical or product knowledge and what agents and teams require additional training.
Use the below guide to configure a report and view an agent or team's overall transfer metrics.
Create a Transfer Report
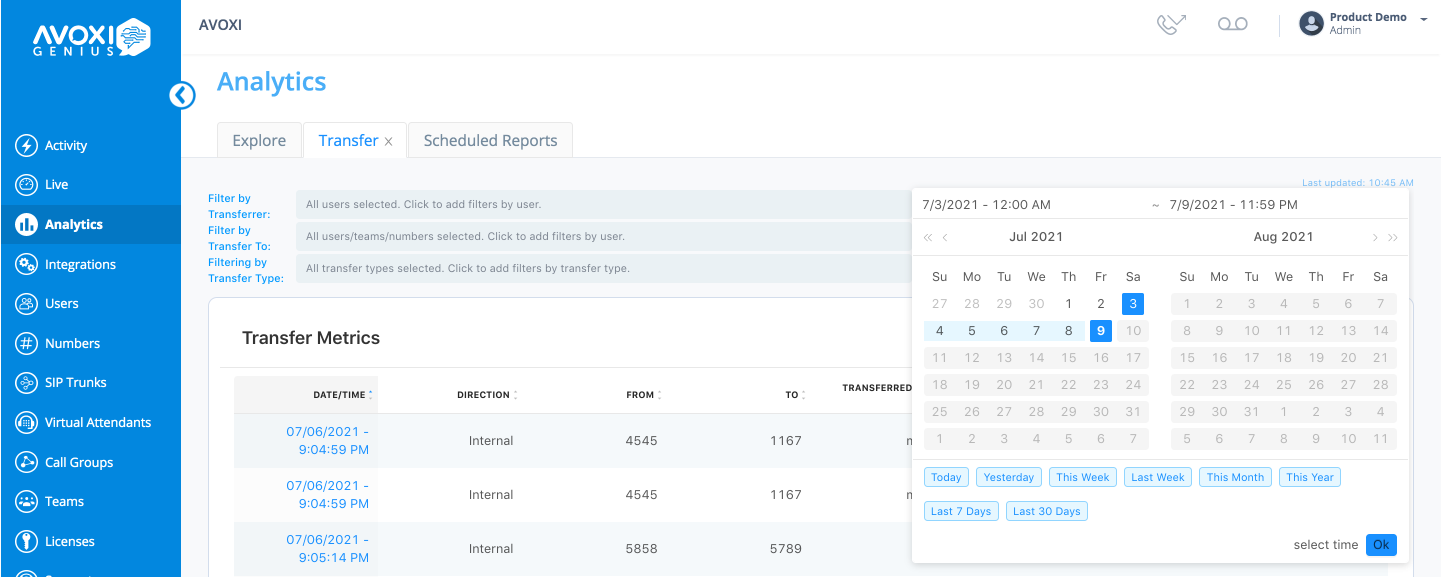
- Once you have logged into your AVOXI online platform, simply select the Analtyics section located on the left-hand navigation bar.
- Use the search bar to search for "Transfer"
- Select the Transfer section.
-
On the Transfer report tab, you can now create your custom report using the available filters
- Filter by Transferrer: Enter one or multiple agent(s)
- Filer by Transfer To: Enter agent or team name(s)
- Filter by Transfer Type: Select either Blind or Warm
-
Date and Timezone
- Use the date picker located on the top right corner to select the desired date range
- By default, the dashboard will use your account Timezone
- Using the shortcuts to select the time interval
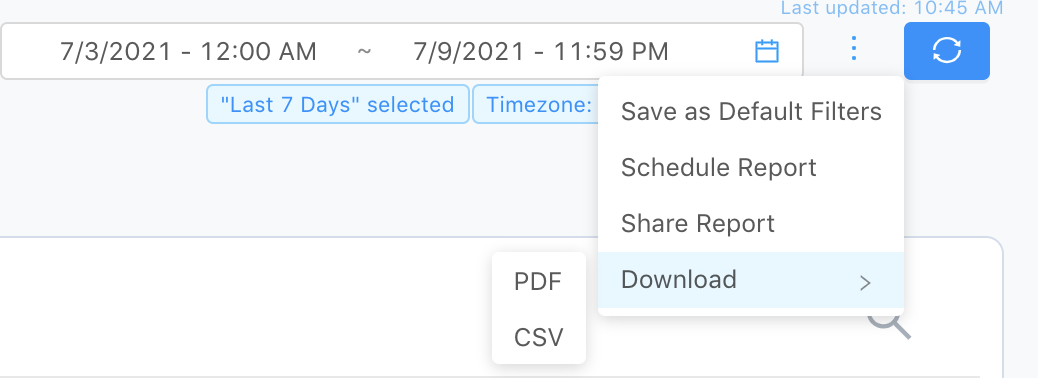
Saving, Sharing, or Scheduling a Transfer Report
Once you are ready to share your report, select the "three dots" located to the right of the date picker
Save as Default Filters
- By selecting the "Save as Default Filters" option your existing report filters will be saved and with updated metrics visible each time the report is viewed.
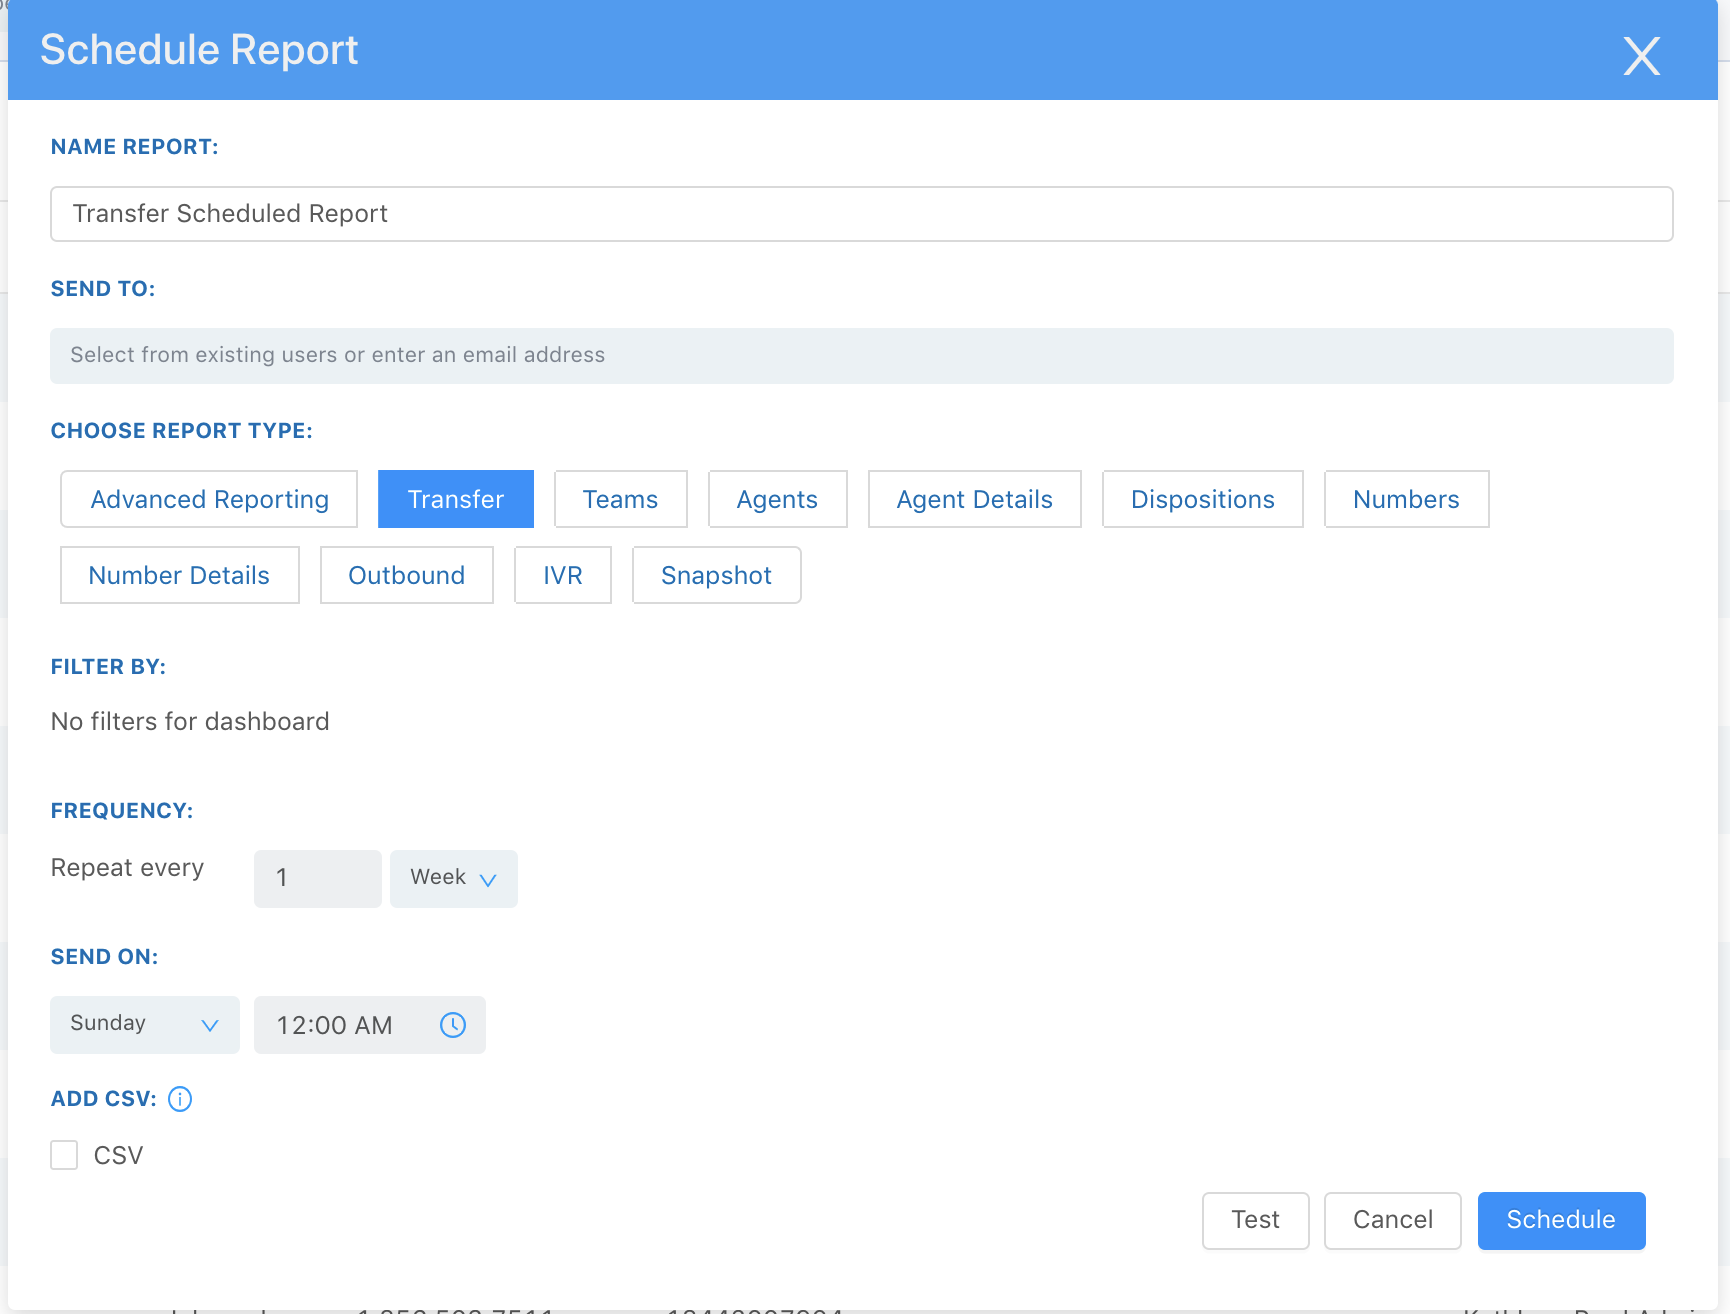
Scheduled Report
Scheduled Reports gives Genius license holders with Admin/Supervisor Roles the ability to proactively send prebuilt reports containing relevant business metrics to internal users and specific email addresses at specified intervals. Reports can be built using specific parameters with options to filter by team, agent, numbers, outbound calls, or snapshots. Once set up, scheduled reports will automatically update the data using the predefined settings for that frequency. This robust feature helps managers proactively monitor their team's performance and automatically delivers real-time metrics to the right users.
Complete the below information to schedule your report:
- Name Report - Give your report an easy to recognizable name (Genius Tip: You can not duplicate report names).
- Send To - Enter the email address(es) reports should be sent to, recipients can be any configured user or valid email address. Reports can also be sent to multiple email addresses.
- Report Type - Confirm the report/dashboard type and filters are correct.
- Frequency - Determine your frequency ie reports can be sent daily, weekly, and monthly. Admins have the freedom to schedule frequency to meet their required needs.
- Send On - Select the day and time you want reports sent.
- File Type - Reports will automatically be sent in PDF, but you can choose to add a CSV file to some reports.
- Test - Will email a preview of the scheduled report to the user creating it, other users or email addresses in the SEND TO field will not receive a copy of the test.
-
Schedule - When you are ready to select the "Schedule" button.
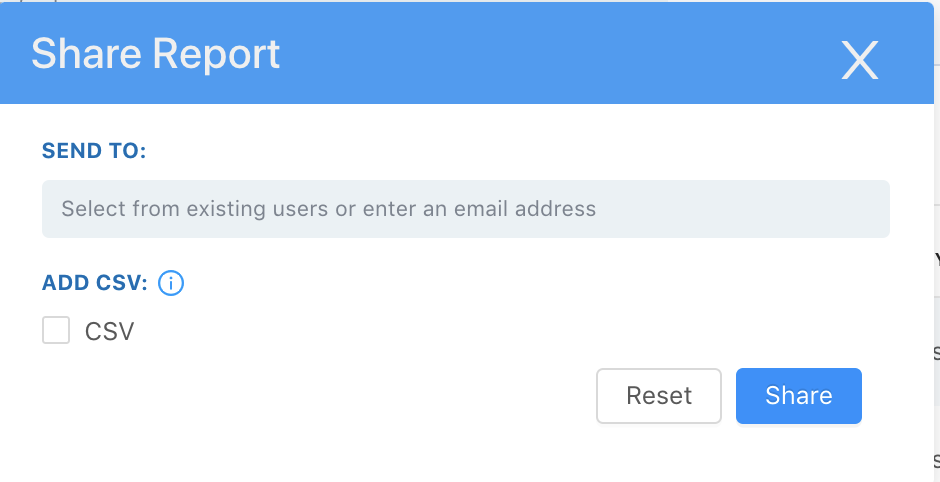
Shared Report
- In the "Send To" field select from the existing user or enter an email address
- Choose the required file type "PDF or CSV"
- Select "Share"
Download Report
- Simply click the "Download" option from the list
- Select PDF or CSV file and then the report will automatically be downloaded to your desktop.