Scheduled Reports gives Genius license holders with Admin/Supervisor Roles the ability to proactively send prebuilt reports containing relevant business metrics to internal users and specific email addresses at specified intervals. For example, a scheduled report may be sent out once a week on a Thursday at 9 am. Reports can be built using specific parameters with options to filter by team, agent, numbers, outbound calls, or snapshots. Once set up, scheduled reports will automatically update the data using the predefined settings for that frequency. The robust feature helps managers proactively monitor their team's performance and automatically delivers real-time metrics to the right users.
Creating a Scheduled Report
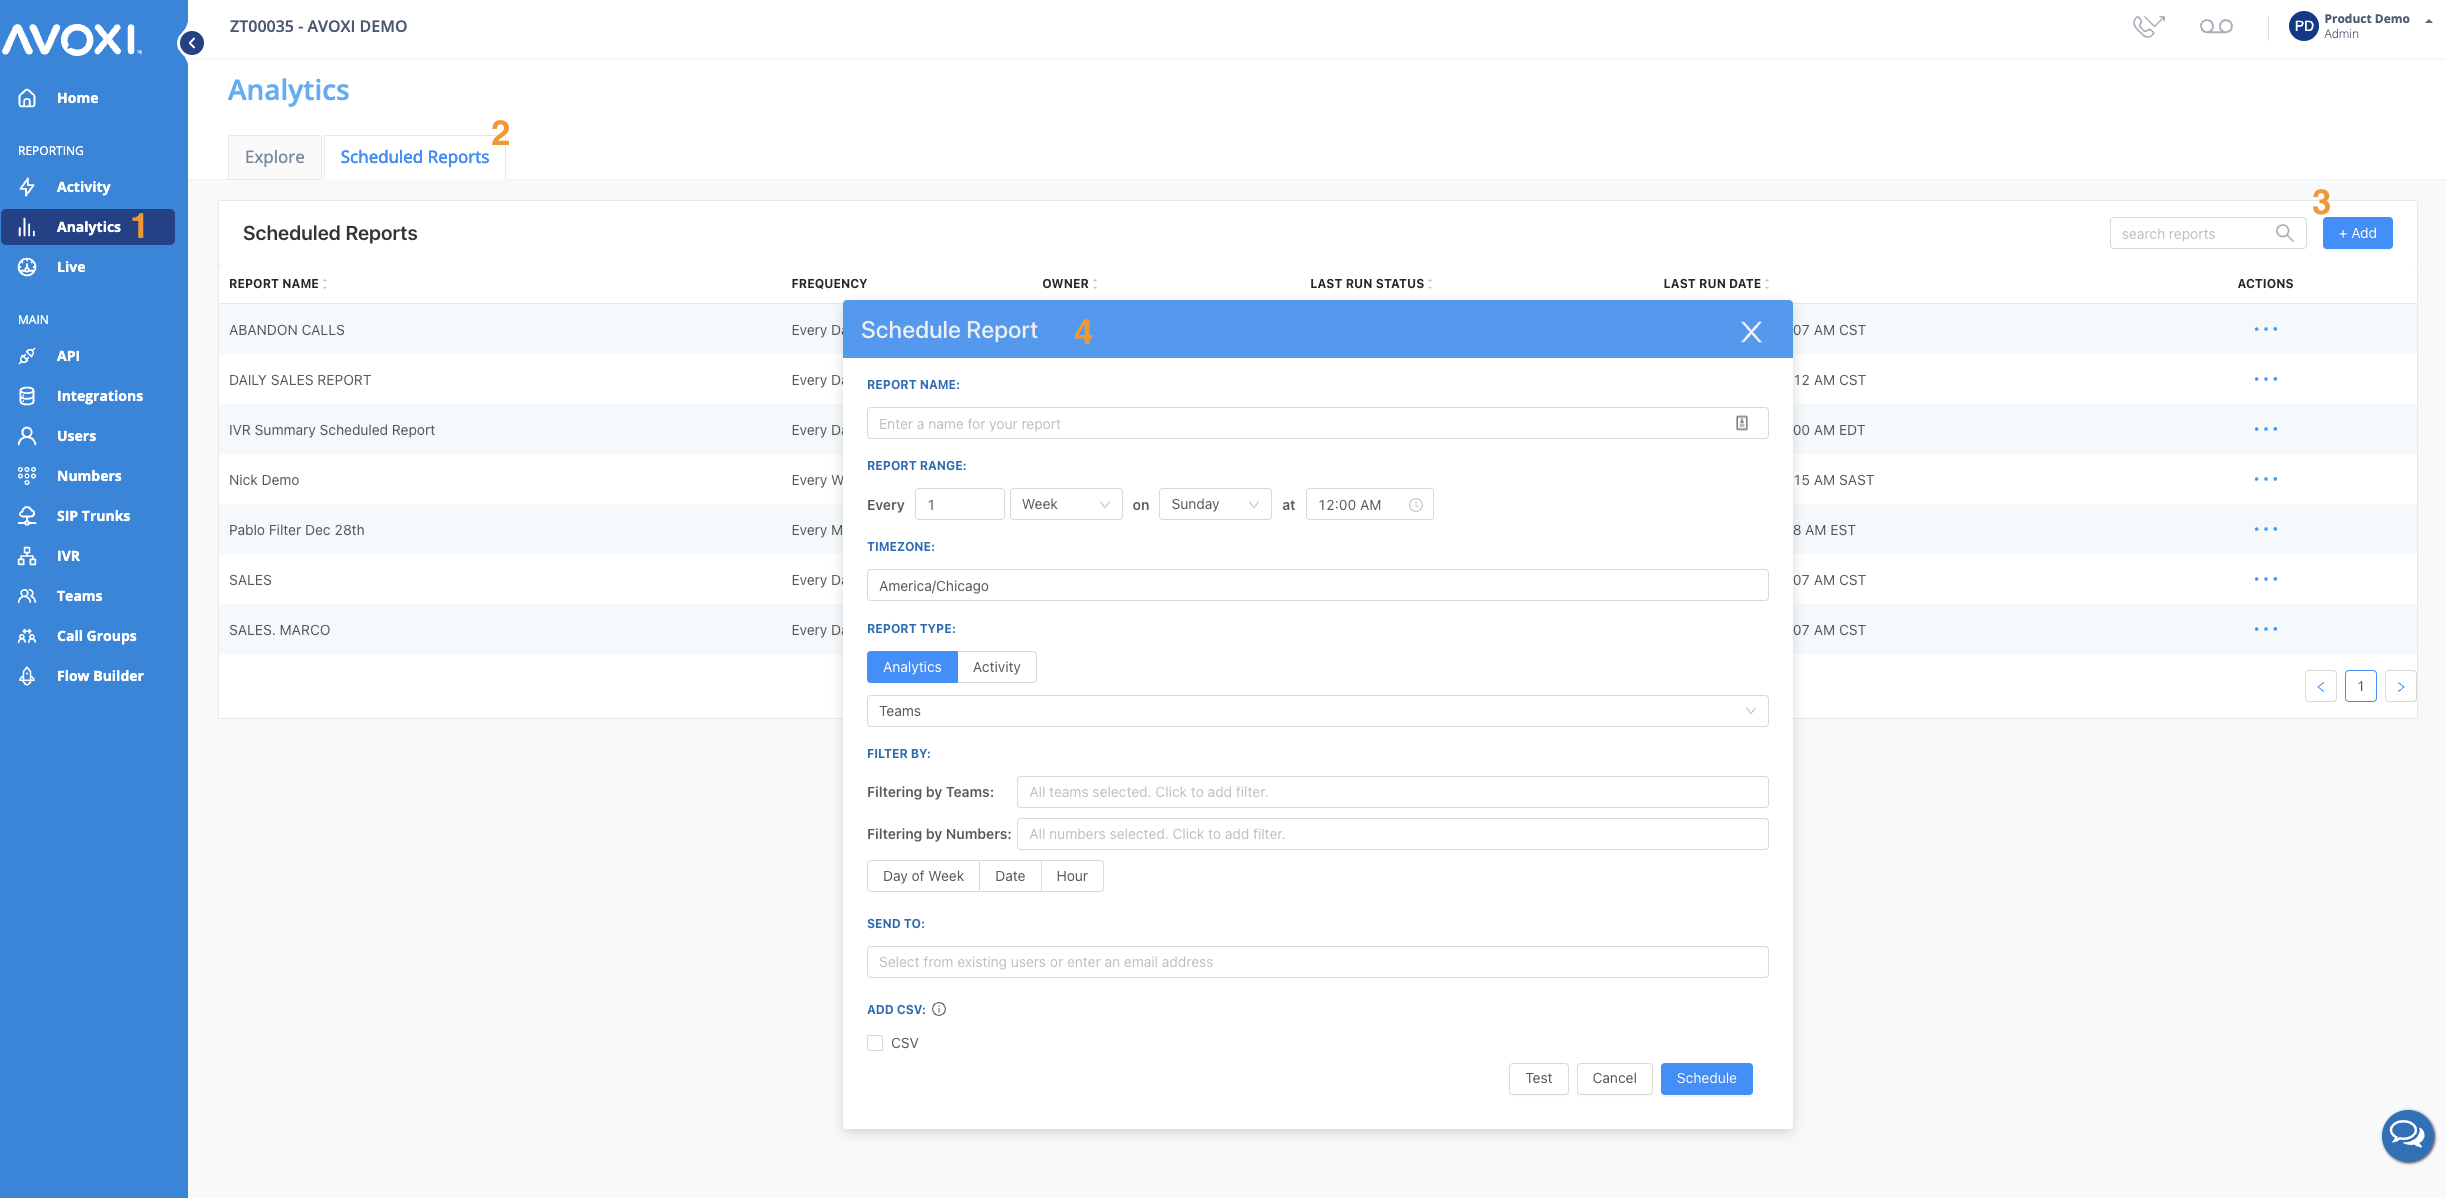
- Select the "Analytics" tab located on the left navigation bar.
- On the "Scheduled Reports" select the "+Add" button.
-
Next, complete the below information to create your scheduled report:
- Report Name - Give your report an easy to recognizable name (You can not duplicate report names).
-
Report Range - Determine your frequency ie reports can be sent daily, weekly, and monthly. Select the day and time you want reports sent.
- Note: The report will always contain data from the prior period here. For example:
- Daily - If your report is scheduled daily at midnight, you will receive the report with data from midnight yesterday to midnight today
- Weekly - If your report is scheduled weekly on Monday at midnight, you will receive the report with data from midnight last Monday to midnight (12am) today
- Monthly - If your report is scheduled monthly on the 1st at midnight you will receive the report with data from the 1st of last month until midnight (12am) today
- Note: The report will always contain data from the prior period here. For example:
- Timezone - Supervisors can schedule reports based on a specific timezone that contains more detailed information about the callers and share them with others in relevant time zones. (The default timezone is set to the location of the user).
- Report Type - Confirm the report/dashboard type and filters are correct.
-
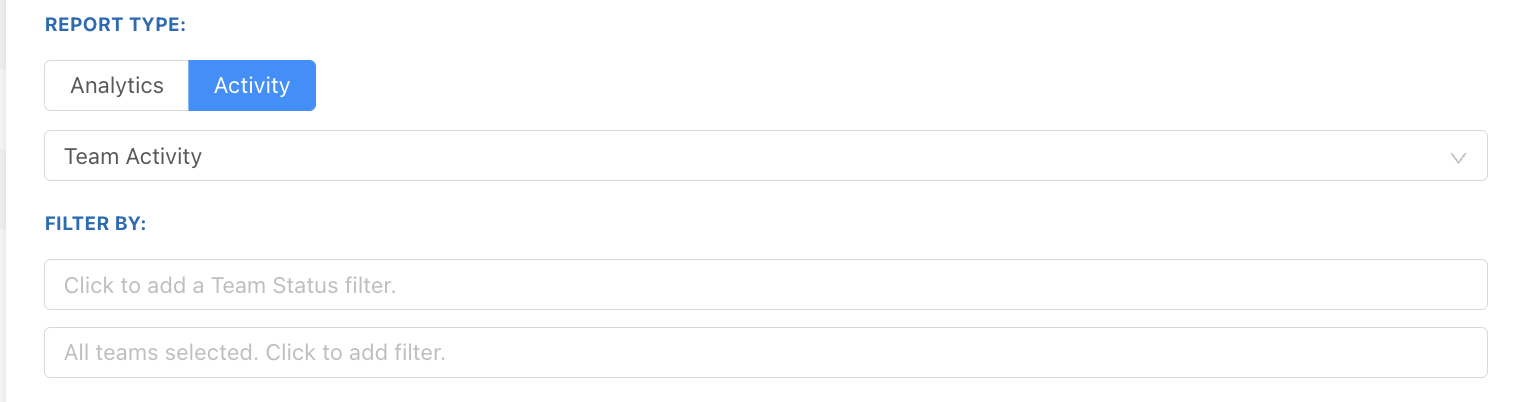
Filter By - Teams / Numbers
- When scheduling a Team Activity report, you can filter by Team and/or Team Status.
- Send To - Enter the email address(es) reports should be sent to, recipients can be any configured user or valid email address. Reports can also be sent to multiple email addresses.
- Add CSV - Reports will automatically be sent in PDF, but you can choose to add a CSV file to some reports.
- Test - Will email a preview of the scheduled report to the user creating it, other users or email addresses in the SEND TO field will not receive a copy of the test.
-
Schedule - When you are ready to select the "Schedule" button.
NOTE: Use the Share Report or Download feature to share/download real-time metrics.
Viewing and Managing Existing Scheduled Reports
- Select the "Analytics" section on the left-hand navigator.
- Then select the "Scheduled Reports" tab.
- To quickly find the report you require, simply type the report name in the search bar.
- To "Edit / Delete /Test" a scheduled report use the three dots located to the right-hand side of the desired report.

-
Edit - Edit an existing report by selecting the edit option, then updating the information within the pop-up.
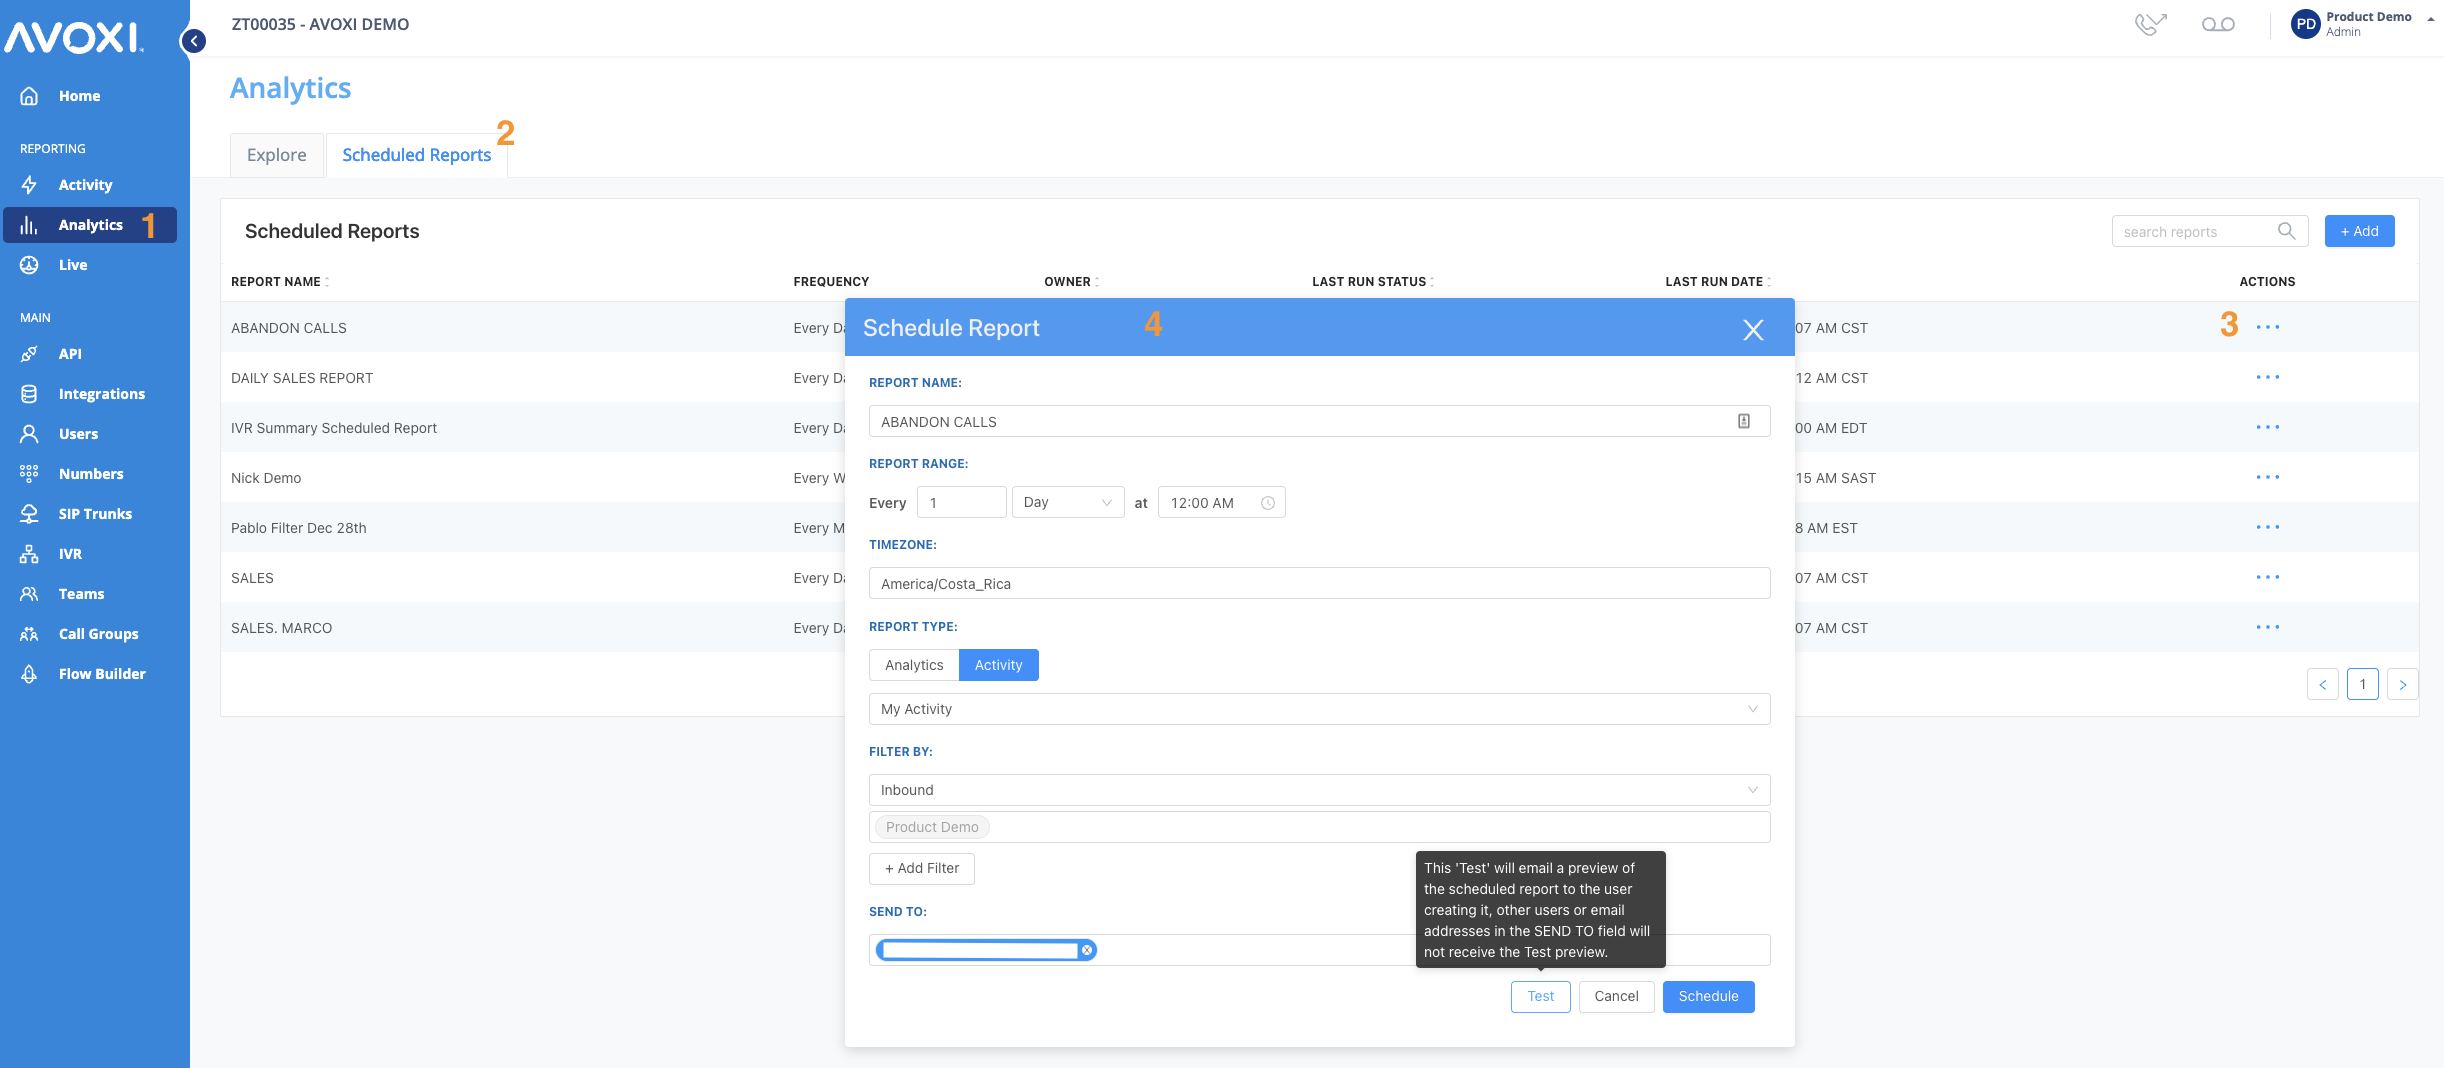
- Test - Will email a preview of the scheduled report to the current user.
- Delete - This will automatically delete your scheduled report and can not be undone.