Citrix Systems is an American multinational software company that provides servers, applications, and desktop virtualization, networking, software as a service (SaaS), and cloud computing technologies.
Citrix combines digital workspace and networking technologies to provide access to the things people require in order to get their work done. On the frontend, people have one place to safely access all their apps, desktops, files, and services from any of their devices and from any location. An on the backend, IT has a simple, unified platform to manage, monitor, and oversee everything.
Citrix Studio Configuration Guide
- System Requirements
- Creating AVOXI as Published Content
- Modifying AVOXI in Citrix Studio
- Providing Access to AVOXI Published Content
- Adding an Icon to AVOXI
- Testing Access through Citrix
System Requirements
- Recommended Citrix Infrastructure to be XenDesktop 1912 LTSR, but will work on 7.11 and above.
- Citrix VDA and Citrix Workspace App are not applicable as this method does not require either component.
- Citrix PowerShell SDK (installed by default with Citrix Studio)
- Citrix Site Administrator rights to perform PowerShell commands.
Notices
This document has been testing using Citrix XenDesktop 1912 LTSR and using Windows 10 as the client OS. Although the steps are similar in other versions of XenDesktop, you might experience slight differences while following this document.
Creating AVOXI as Published Content
This section will provide the process to create the AVOXI application in Citrix. For ease of reading, the commands have been added to the reference page, located at the end of this document.
- From the Citrix Delivery Controller, launch PowerShell as Administrator.
-
Load the Citrix PowerShell SDK by running the following command:
- Add-PsSnapin Citrix*
- Note: If this fails to load, you must install the Citrix PowerShell SDK located on the installation media**
-
Create a new Delivery Group using the variable.
-
$dgname = "Published Content Apps"
New-BrokerDesktopGroup "Published Content Apps" -DesktopKind Shared -DeliveryType DesktopsAndApps - SessionSupport MultiSession
- $dg = Get-BrokerDesktopGroup -Name “Published Content Apps”
- Note: This does not need to have machines allocated.
-
$dgname = "Published Content Apps"
-
In order to add users in Studio, run the following commands to set the access policies:
- New-BrokerAccessPolicyRule $dgname"_AG" -DesktopGroupUid $dg.uid -AllowedConnections ViaAG - IncludedUserFilterEnabled $true.
- New-BrokerAccessPolicyRule $dgname"_Direct" -DesktopGroupUid $dg.uid -AllowedConnections NotViaAG -IncludedUserFilterEnabled $true
-
Create the Published Content Application by running the following command:
- New-BrokerApplication -ApplicationType PublishedContent -CommandLineExecutable “https://genius.avoxi.com” -Name “Avoxi Genius” -DesktopGroup $dg.uid
- The “Avoxi Genius” application should now be published in Citrix Studio.
Modifying AVOXI in Citrix Studio
This section defines a process to provide access and modifications to the AVOXI application in Citrix.
- Launch Citrix Studio
- Navigate to Application and select the “AVOXI Genius” application.

- Right-click “Avoxi Genius” and select “Properties”.
- If you need to change the URL, it can be done under “Location”.
Providing Access to AVOXI Published Content
- From the Citrix Delivery Controller, launch “Citrix Studio”.
-
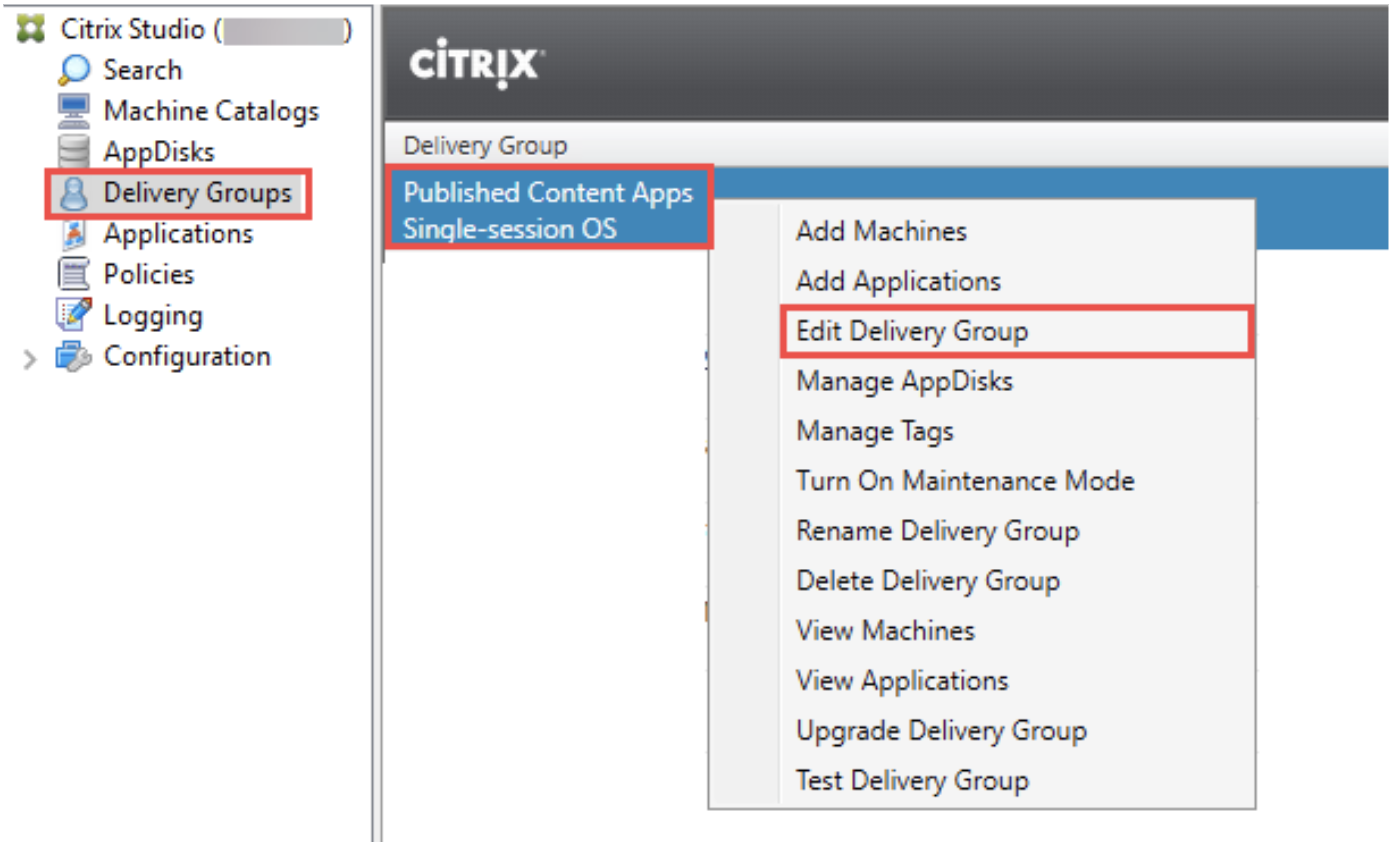
Navigate to “Delivery Groups” and select the delivery group “Published Content Apps > Right-click > Edit Delivery Group”
- Click “Users”, then “Add…”
- After adding the users, click “OK”.
- Navigate to “Application” and select the “Avoxi Genius” application.
- Right-click “Avoxi Genius” and select “Properties”.
- If you need to change the URL, it can be done under “Location”.
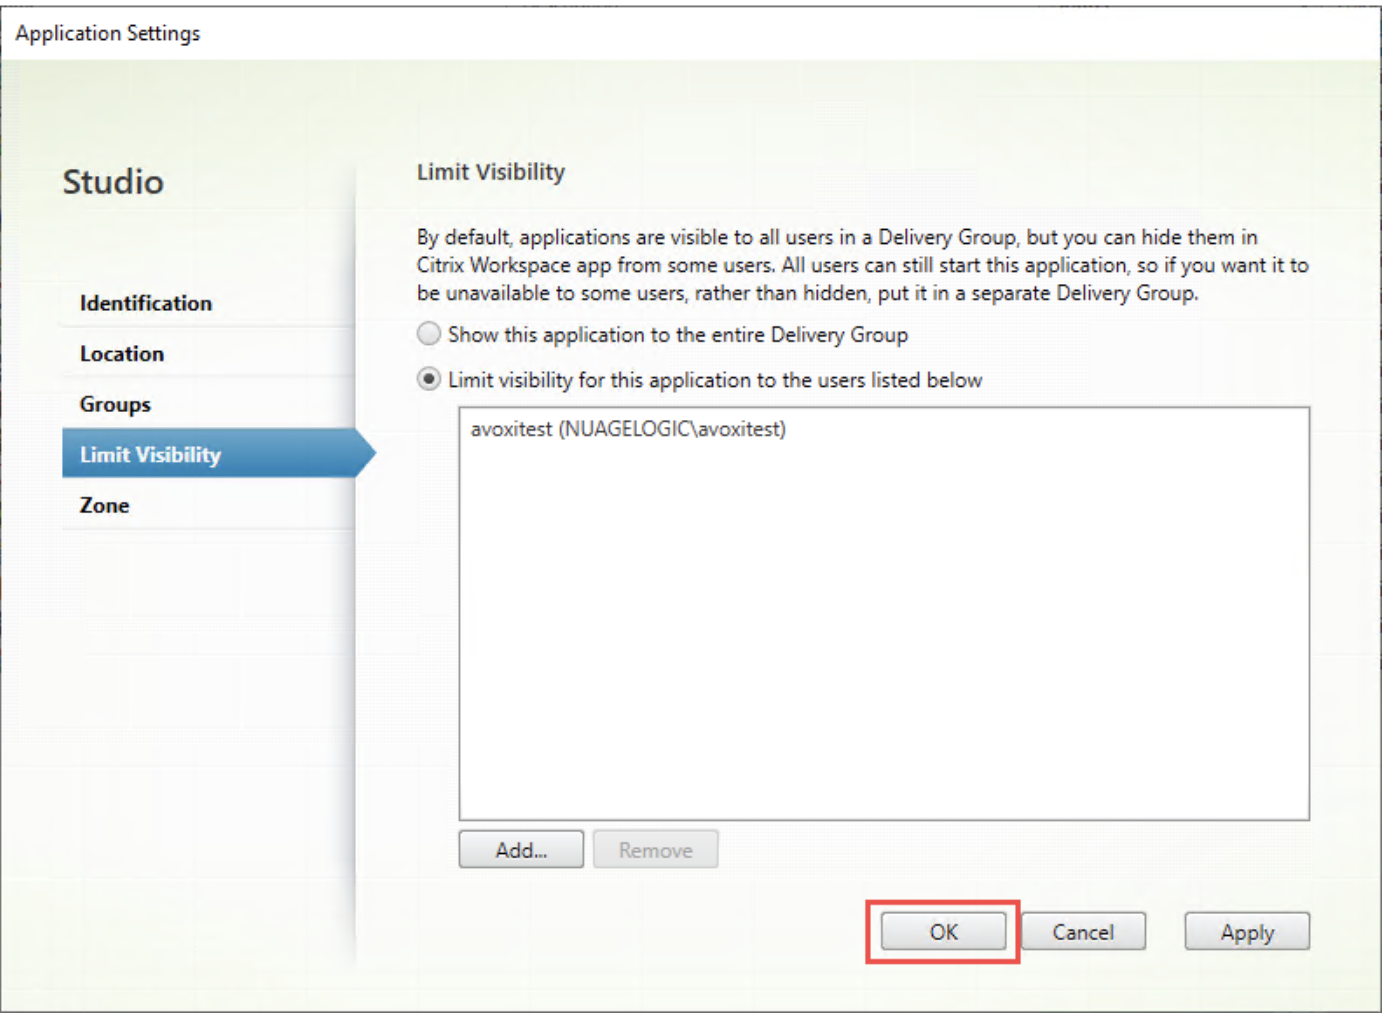
- Click “Limit Visibility”, select “Limit visibility for this application to the users listed below”, and click “Add…”.

-
Once the users are added, click “OK”.
- The user should now see the Avoxi Genius application within Citrix StoreFront.
Adding an Icon to AVOXI
- Download the following ico file to a temp location on the Citrix Delivery Controller.
-
Run the following script to set the icon, please note the temp location “c:\temp\favicon.ico”.
- Add-PsSnapin Citrix*
- $icon=Get-BrokerIcon -FileName "c:\temp\favicon.ico" | New-BrokerIcon | Select-Object Uid
- Get-BrokerApplication -name "Avoxi Genius" | Set-BrokerApplication -IconUid $icon.Uid
Testing Access through Citrix
- Log into the Citrix StoreFront / NetScaler URL and type the username as usual, then click “Log On”.
- Click on “Apps” and click the “Avoxi Genius”.
- A new tab will launch within the same browser under the client’s context, meaning all devices will be local, reducing the need to configure device redirection within Citrix.