Voicemail on a Number
Voicemail on your Extension
All AVOXI users enjoy unlimited voicemail storage and can easily manage and download "Voicemails" on a user/extension at any time via the AVOXI online portal. Use the below steps to get started.
- Select the "Voicemail" icon located in the top right-hand corner.
- You will now be redirected to the "My Account tab
- Next, select the "Voicemails" section.
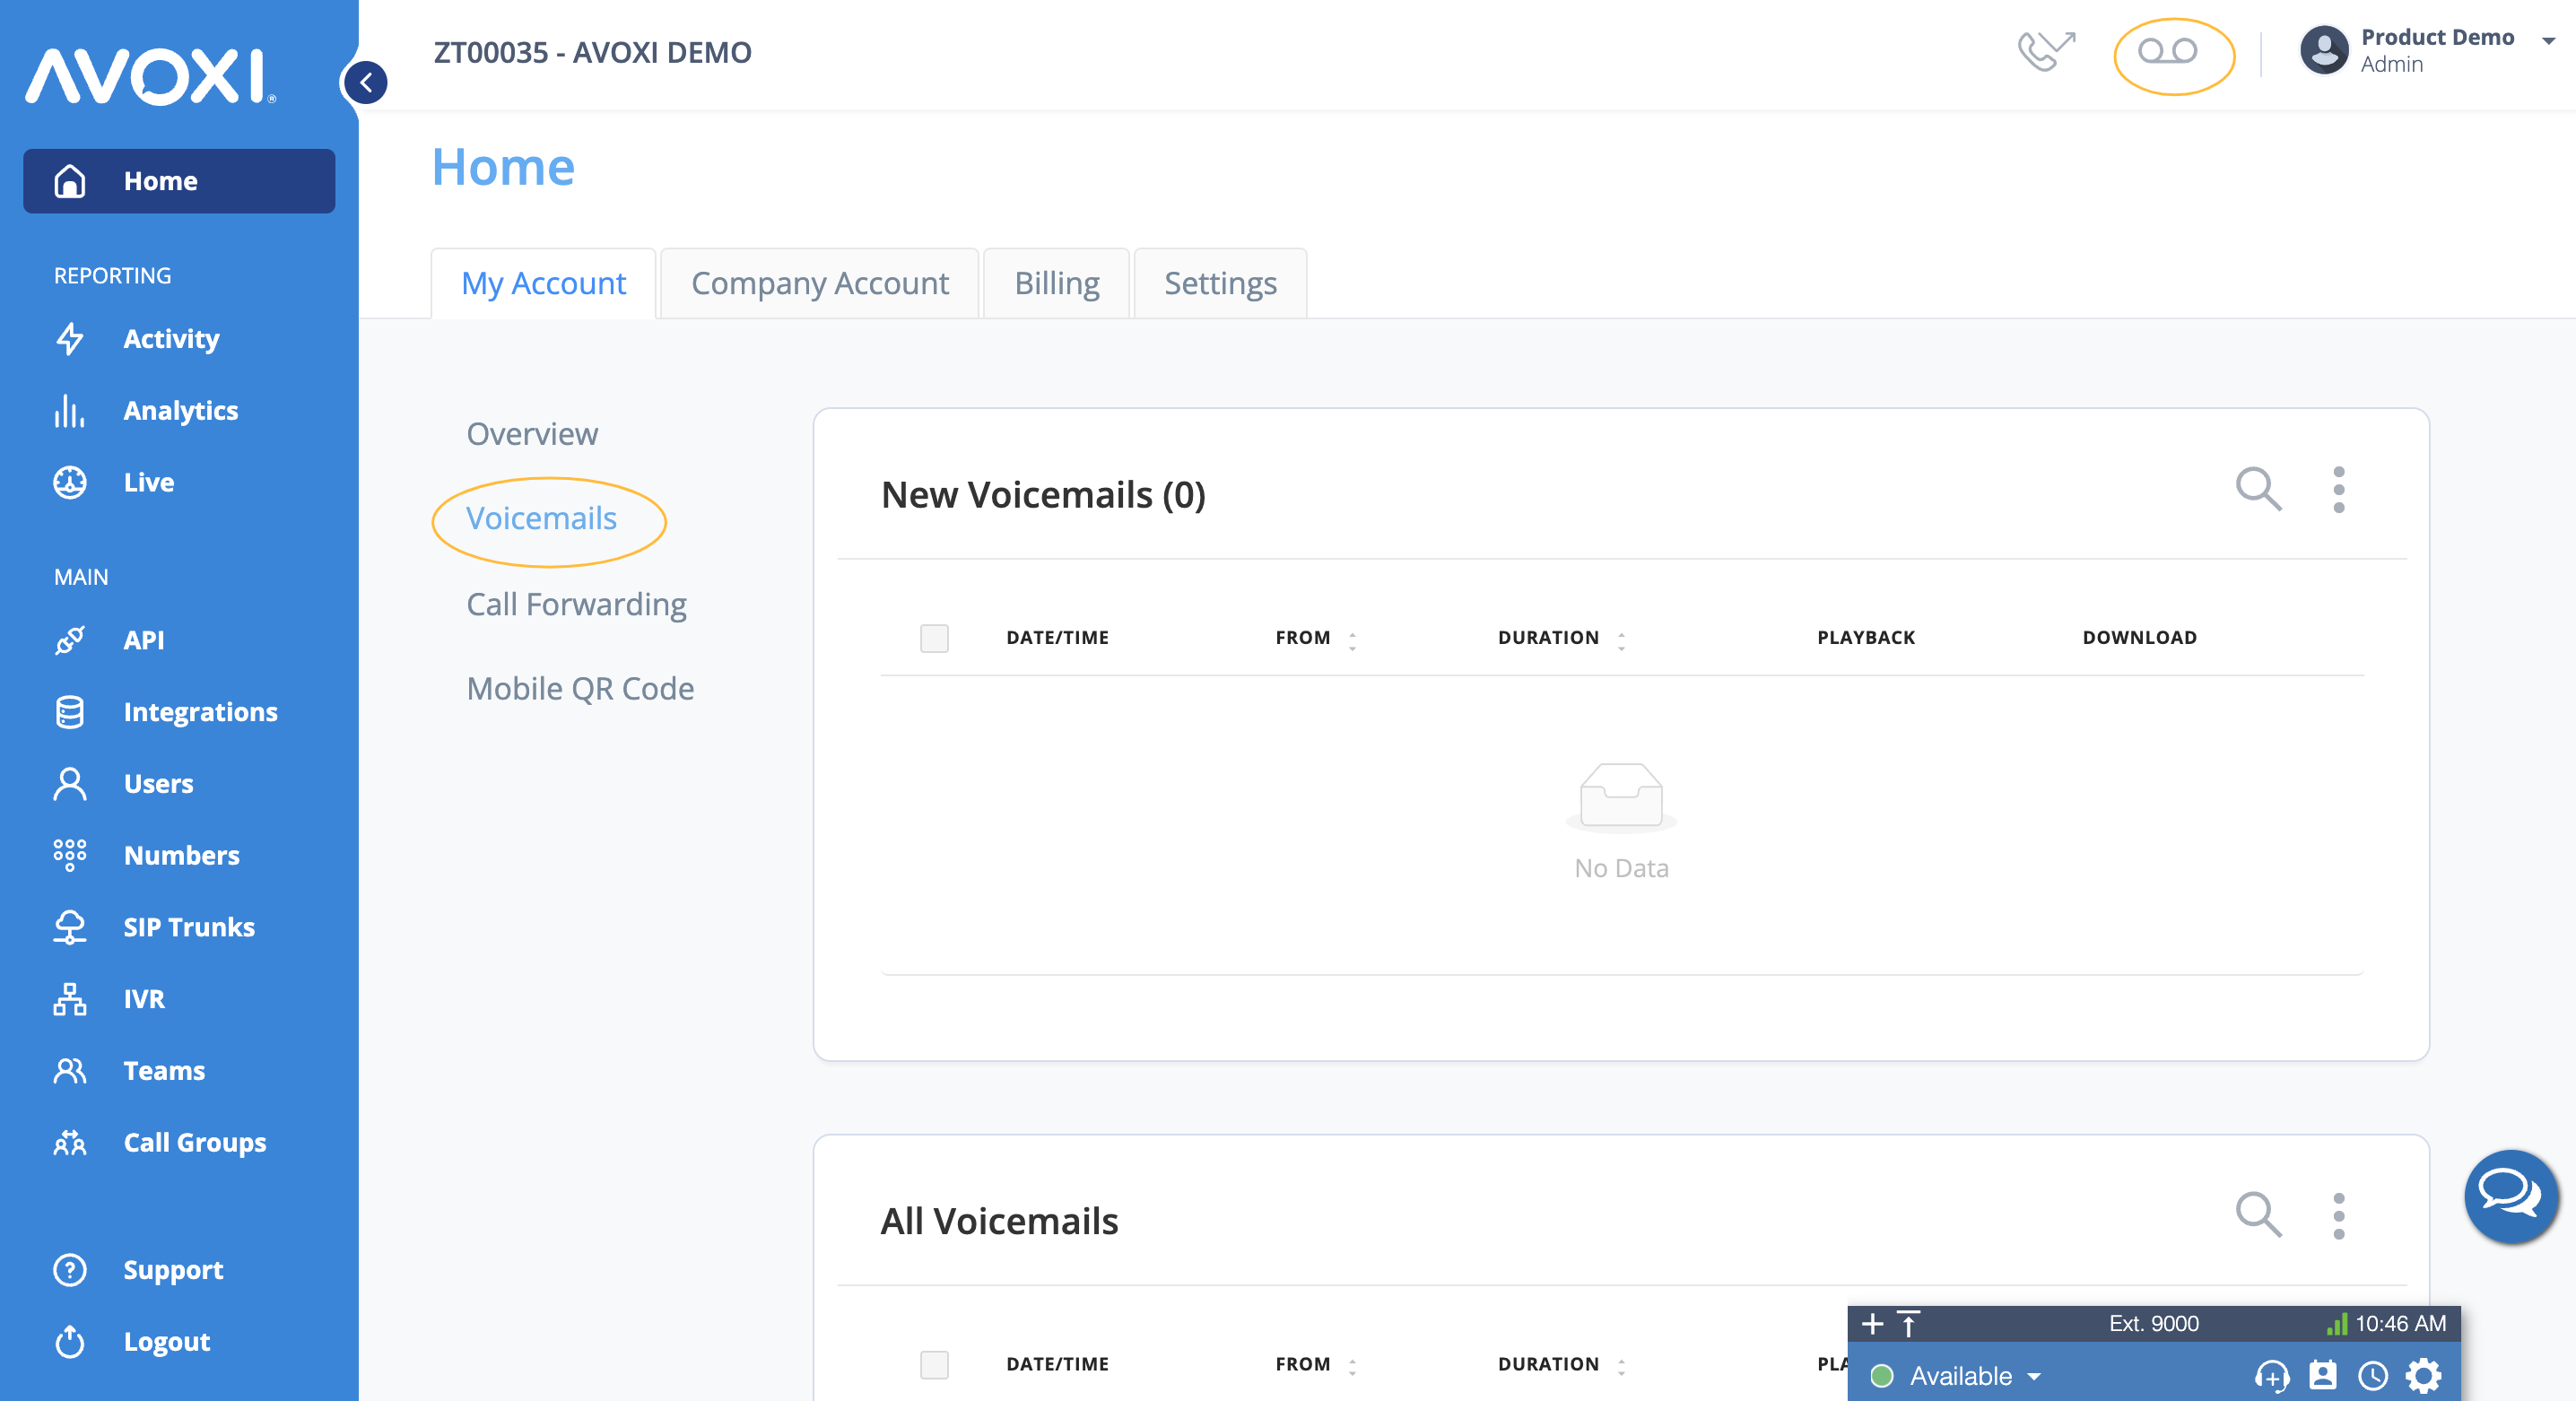
- On this page, simply scroll down to the “test” section located at the bottom.
Genius Tip: Push the Play button to listen to your current voicemail and follow the instructions below.
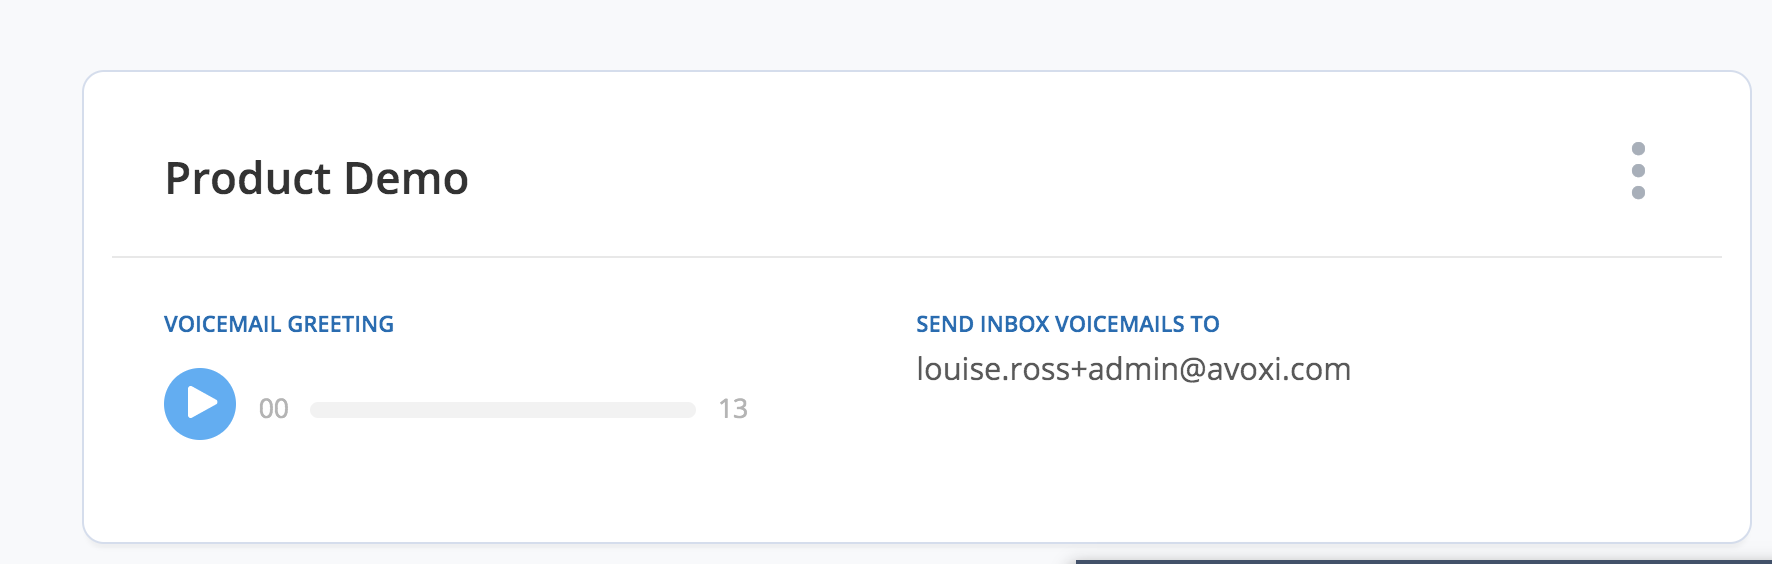
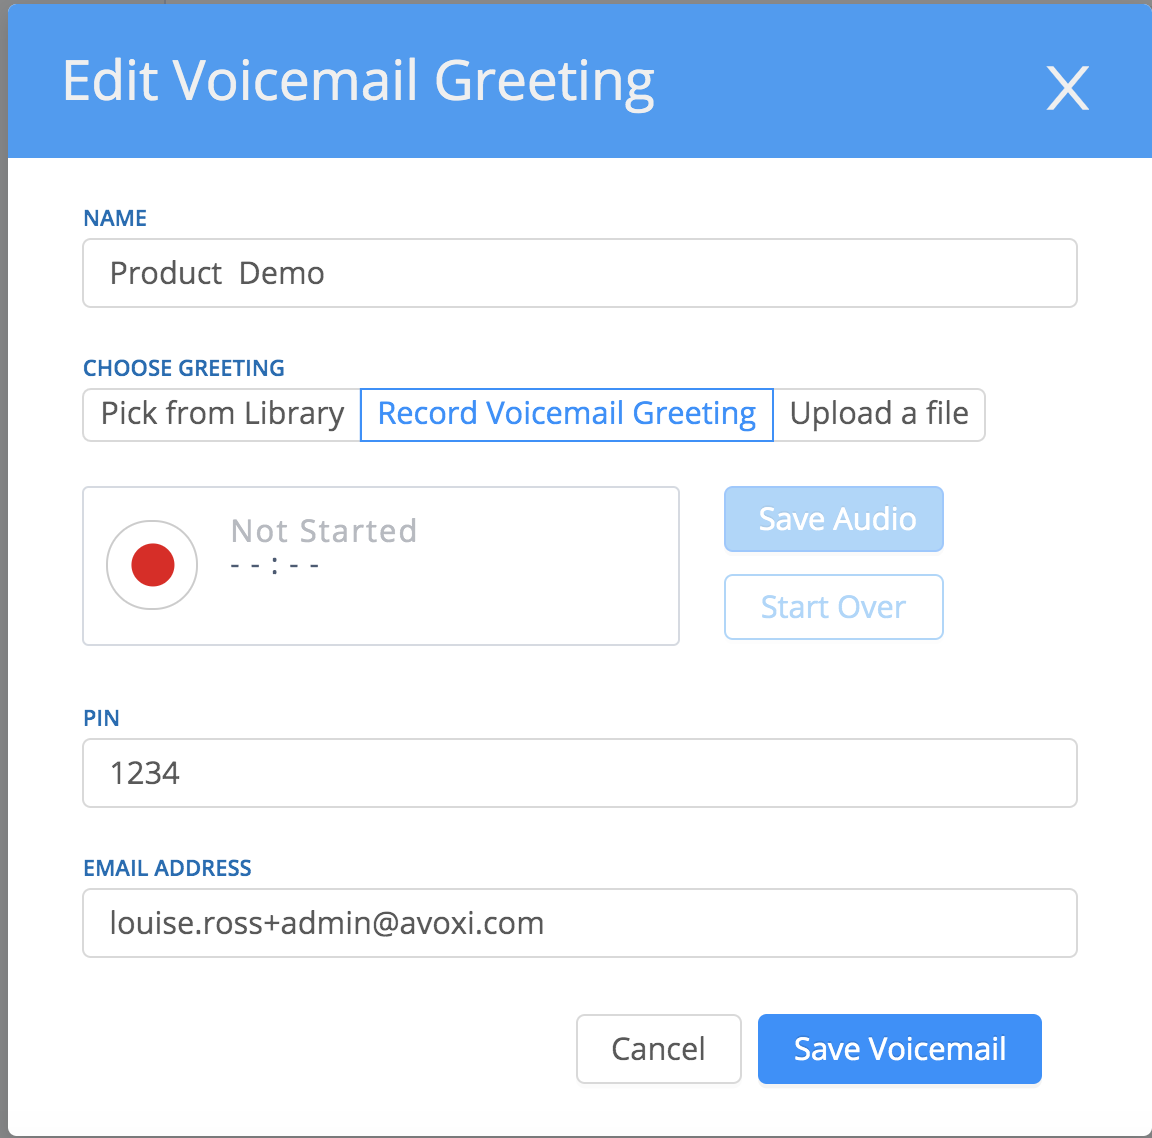
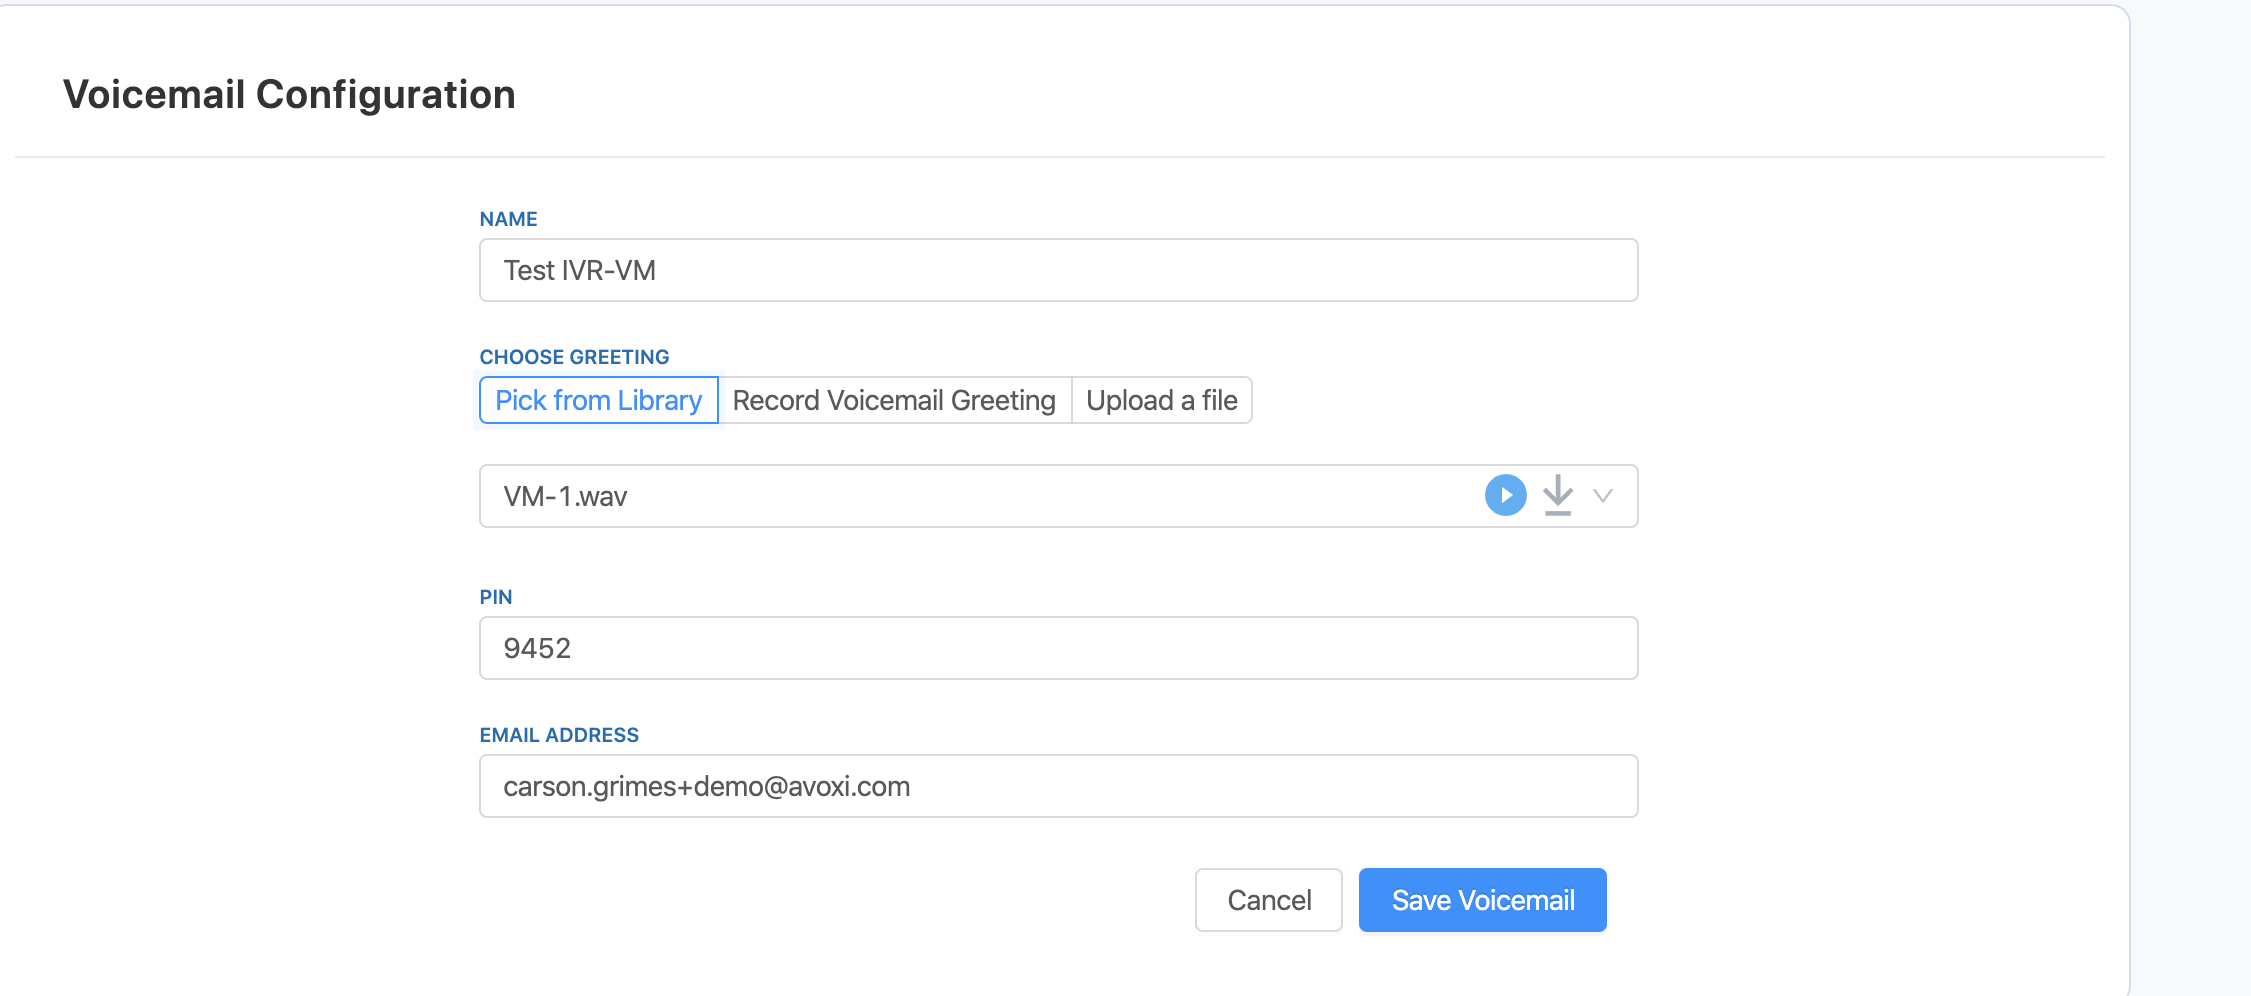
- To edit your voicemail, select the three dots and then Edit Voicemail Greeting.
- Here you can name your voicemail, choose your greeting, set a pin number, and select an email address for your voicemails to be routed to.
-
For your voicemail greeting you have three different options:
-
Pick from Library
- Choose one of our preloaded recordings by selecting the dropdown arrow

- Select Save Voicemail.
-
Genius Tip: You are able to preview and download audio files you uploaded by clicking the Play and Download button next to your selection
- Choose one of our preloaded recordings by selecting the dropdown arrow
-
Record Voicemail Greeting
- Record your own personal greeting.
- Select the record button to start recording.
- Once finished, select the stop button
 You can playback your recording by selecting the play button
  .
. - If you’re happy with the recording select Save Audio and then Save Voicemail.
-
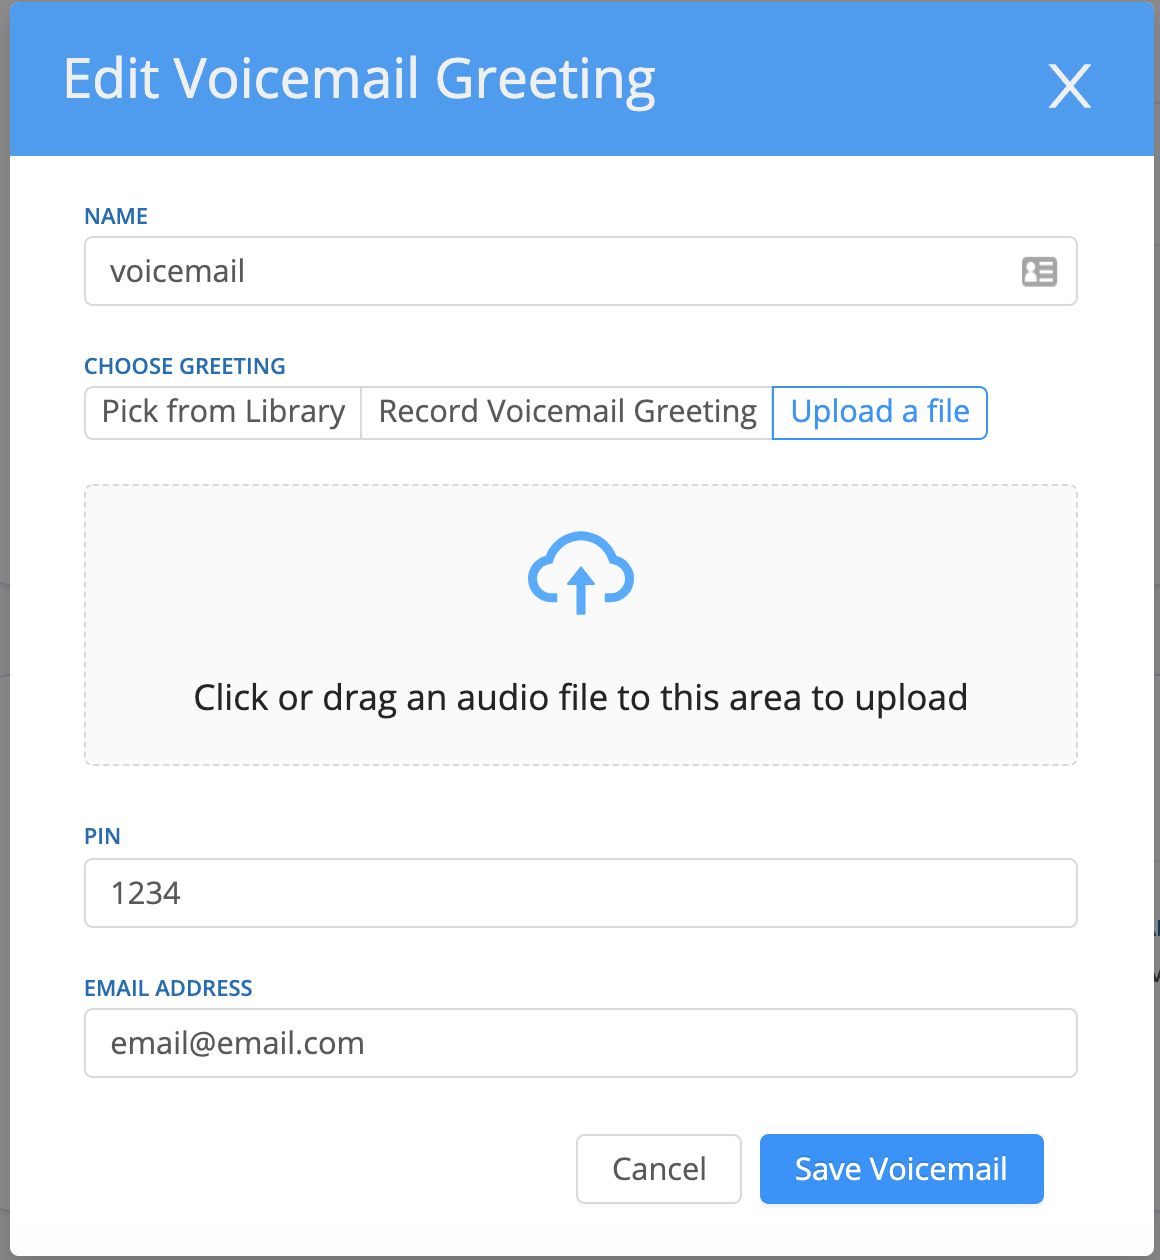
Upload a File
- Upload a file your company already has by simply dragging and dropping the file or selecting upload
- Then make sure to select Save Voicemail.
-
Genius Tip: Make sure your audio files are saved as .wav and delete any spaces or special characters from the file's name.
Team Voicemail
Configure a voicemail for your team using custom voicemail greetings. Voicemails are forwarded to an email address of your choice. Use the below steps to get started:
Configure New Voicemail
-
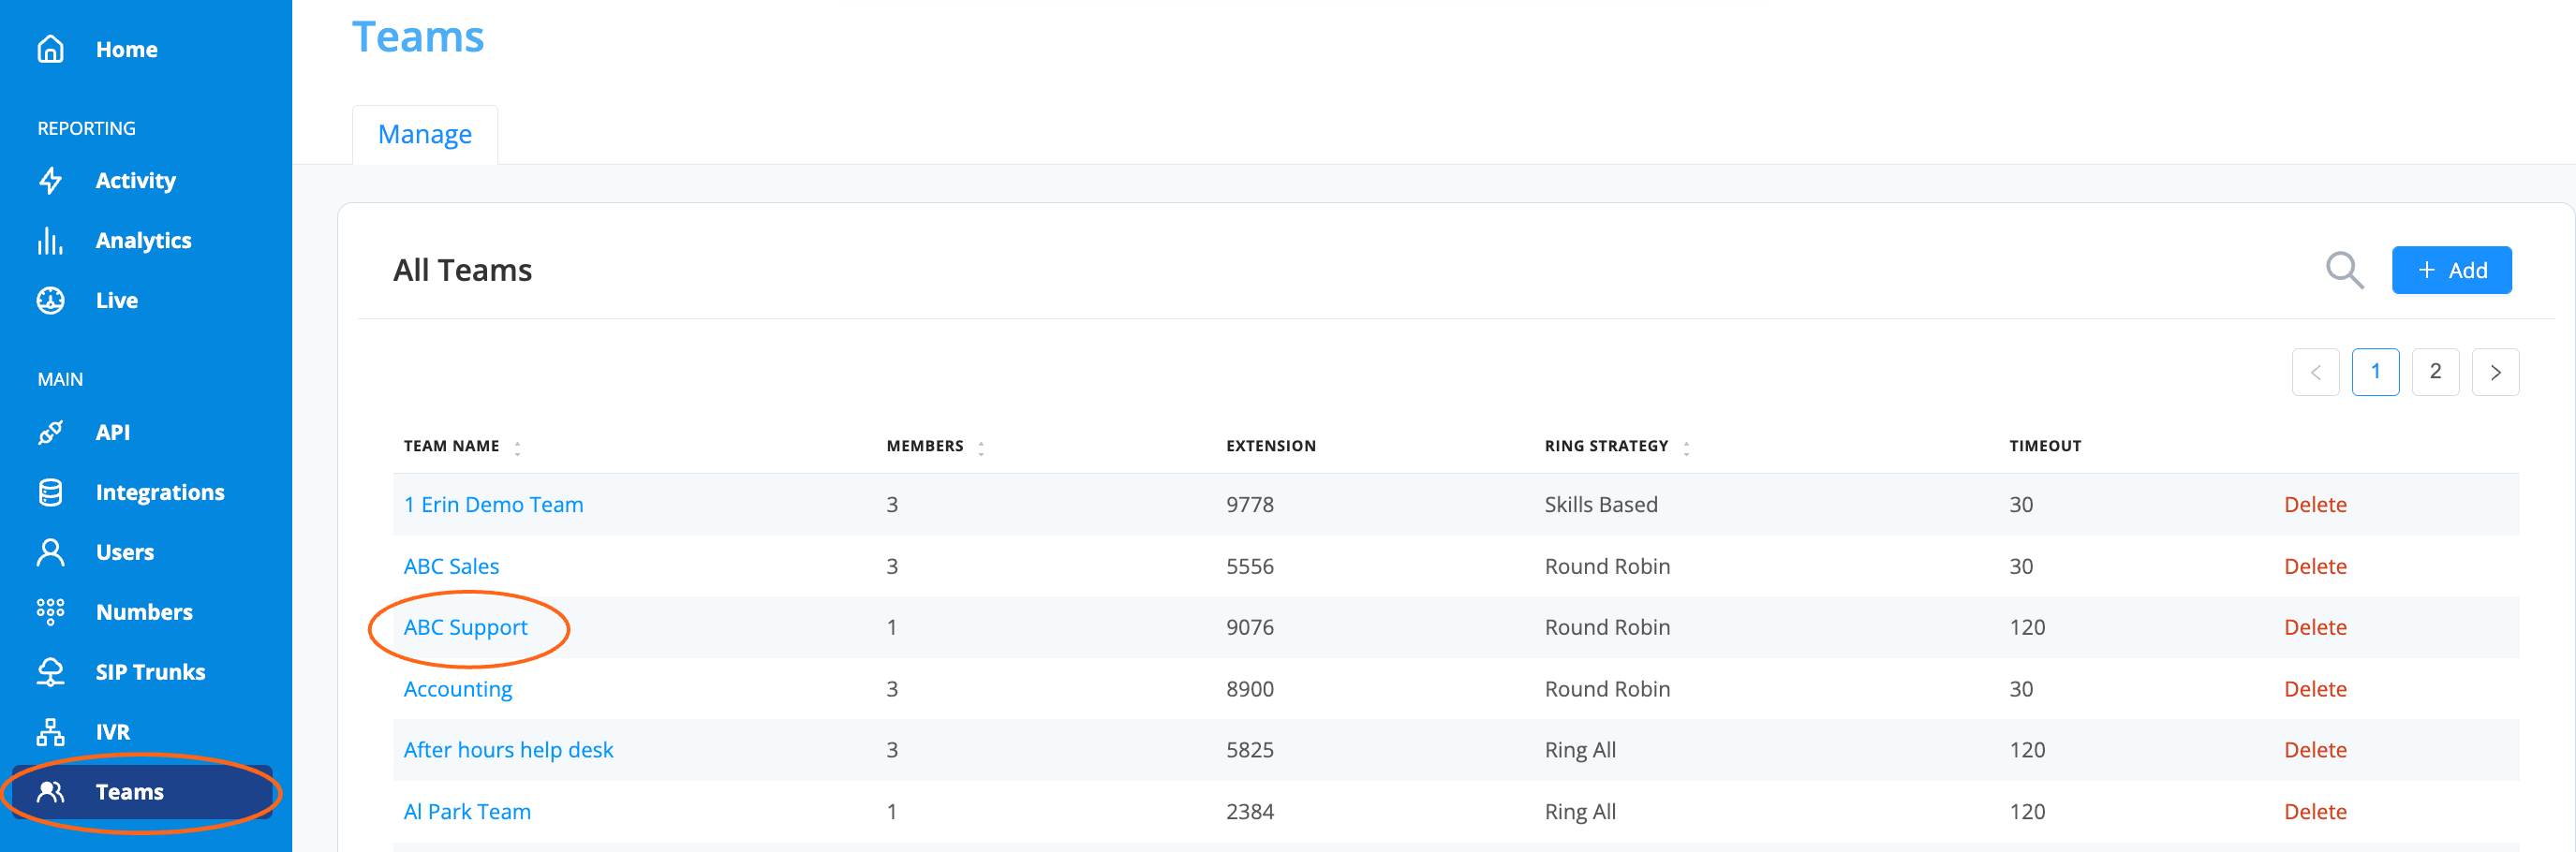
On the Teams section select the team you wish to update.
-
On the "Settings" tab, select the "Voicemail" section.
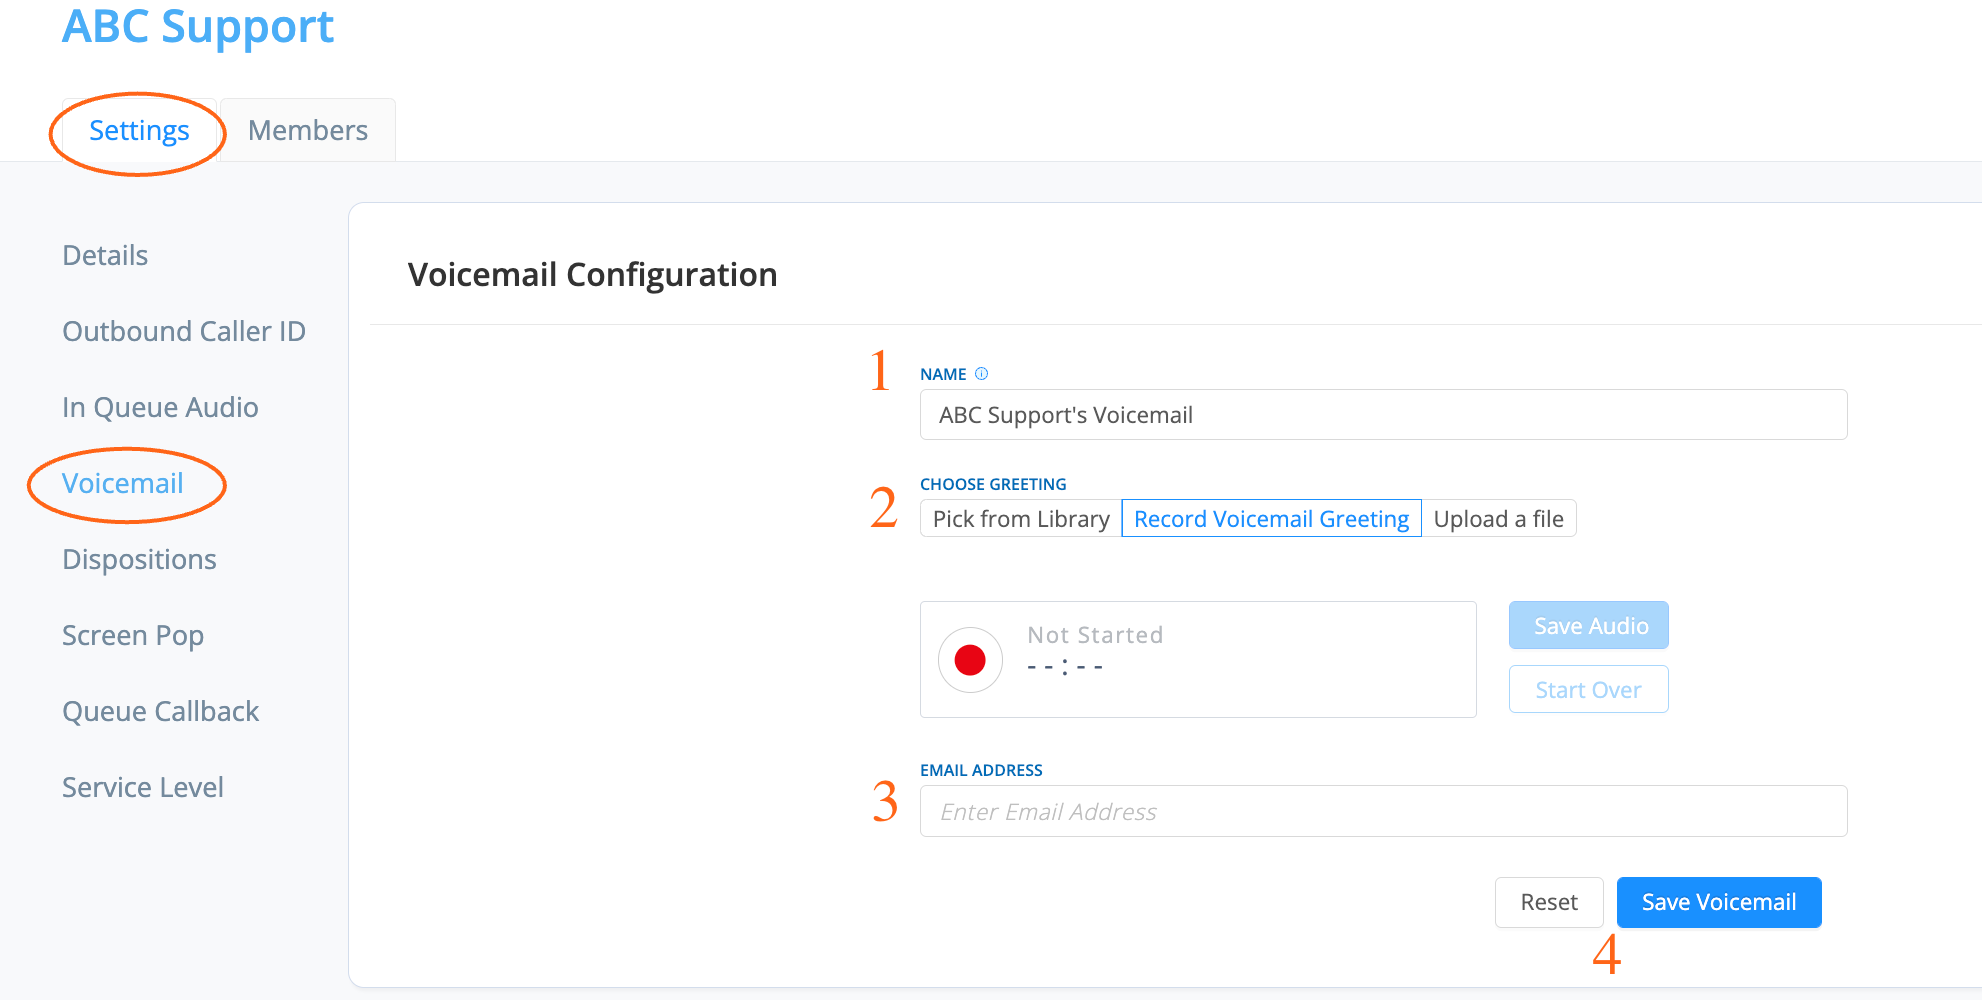
- Give your voicemail an easy to identify Name (this name will be included in the voicemail email body)
-
Choose your Greeting: You have three options to choose from
-
Pick from Library
- Choose one of our preloaded recordings by selecting the dropdown arrow
- Select Save Voicemail.
- Tip: You are able to preview and download audio files you uploaded by clicking the Play and Download button next to your selection
-
Record Voicemail Greeting
- Record your own personal greeting.
- Select the record button to start recording.
- Once finished, select the stop button
- You can playback your recording by selecting the "Play" button
 .
. - If you’re happy with the recording select Save Audio and then Save Voicemail.
-
Upload a File
- Upload a file your company already has by simply dragging and dropping the file or selecting upload
- Then make sure to select Save Voicemail.
- Tip: Make sure your audio files are saved as .wav and delete any spaces or special characters from the file's name.
-
Pick from Library
-
Email Address: Enter the email address where voicemails will be sent.
- When finished, select "Save Voicemail"
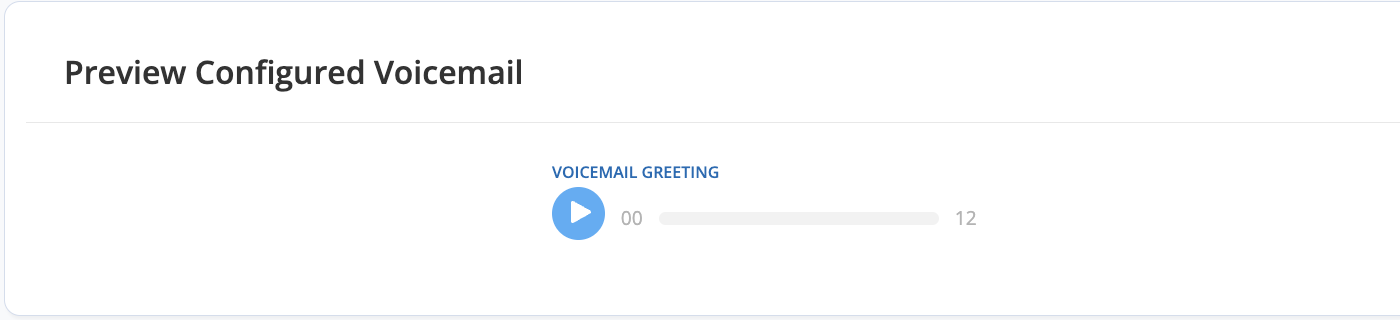
Preview Configured Voicemail
- Use the play button to preview your configured voicemail greeting
-
Use the "Reset" button to update this at any time.