The AVOXI Genius integration with Zendesk allows organizations to bring together their voice and support platforms seamlessly. By integrating these technologies, users can focus on voice communication with AVOXI Genius and have their ticketing workflow automatically updated in Zendesk.
AVOXI - Zendesk Integration Overview
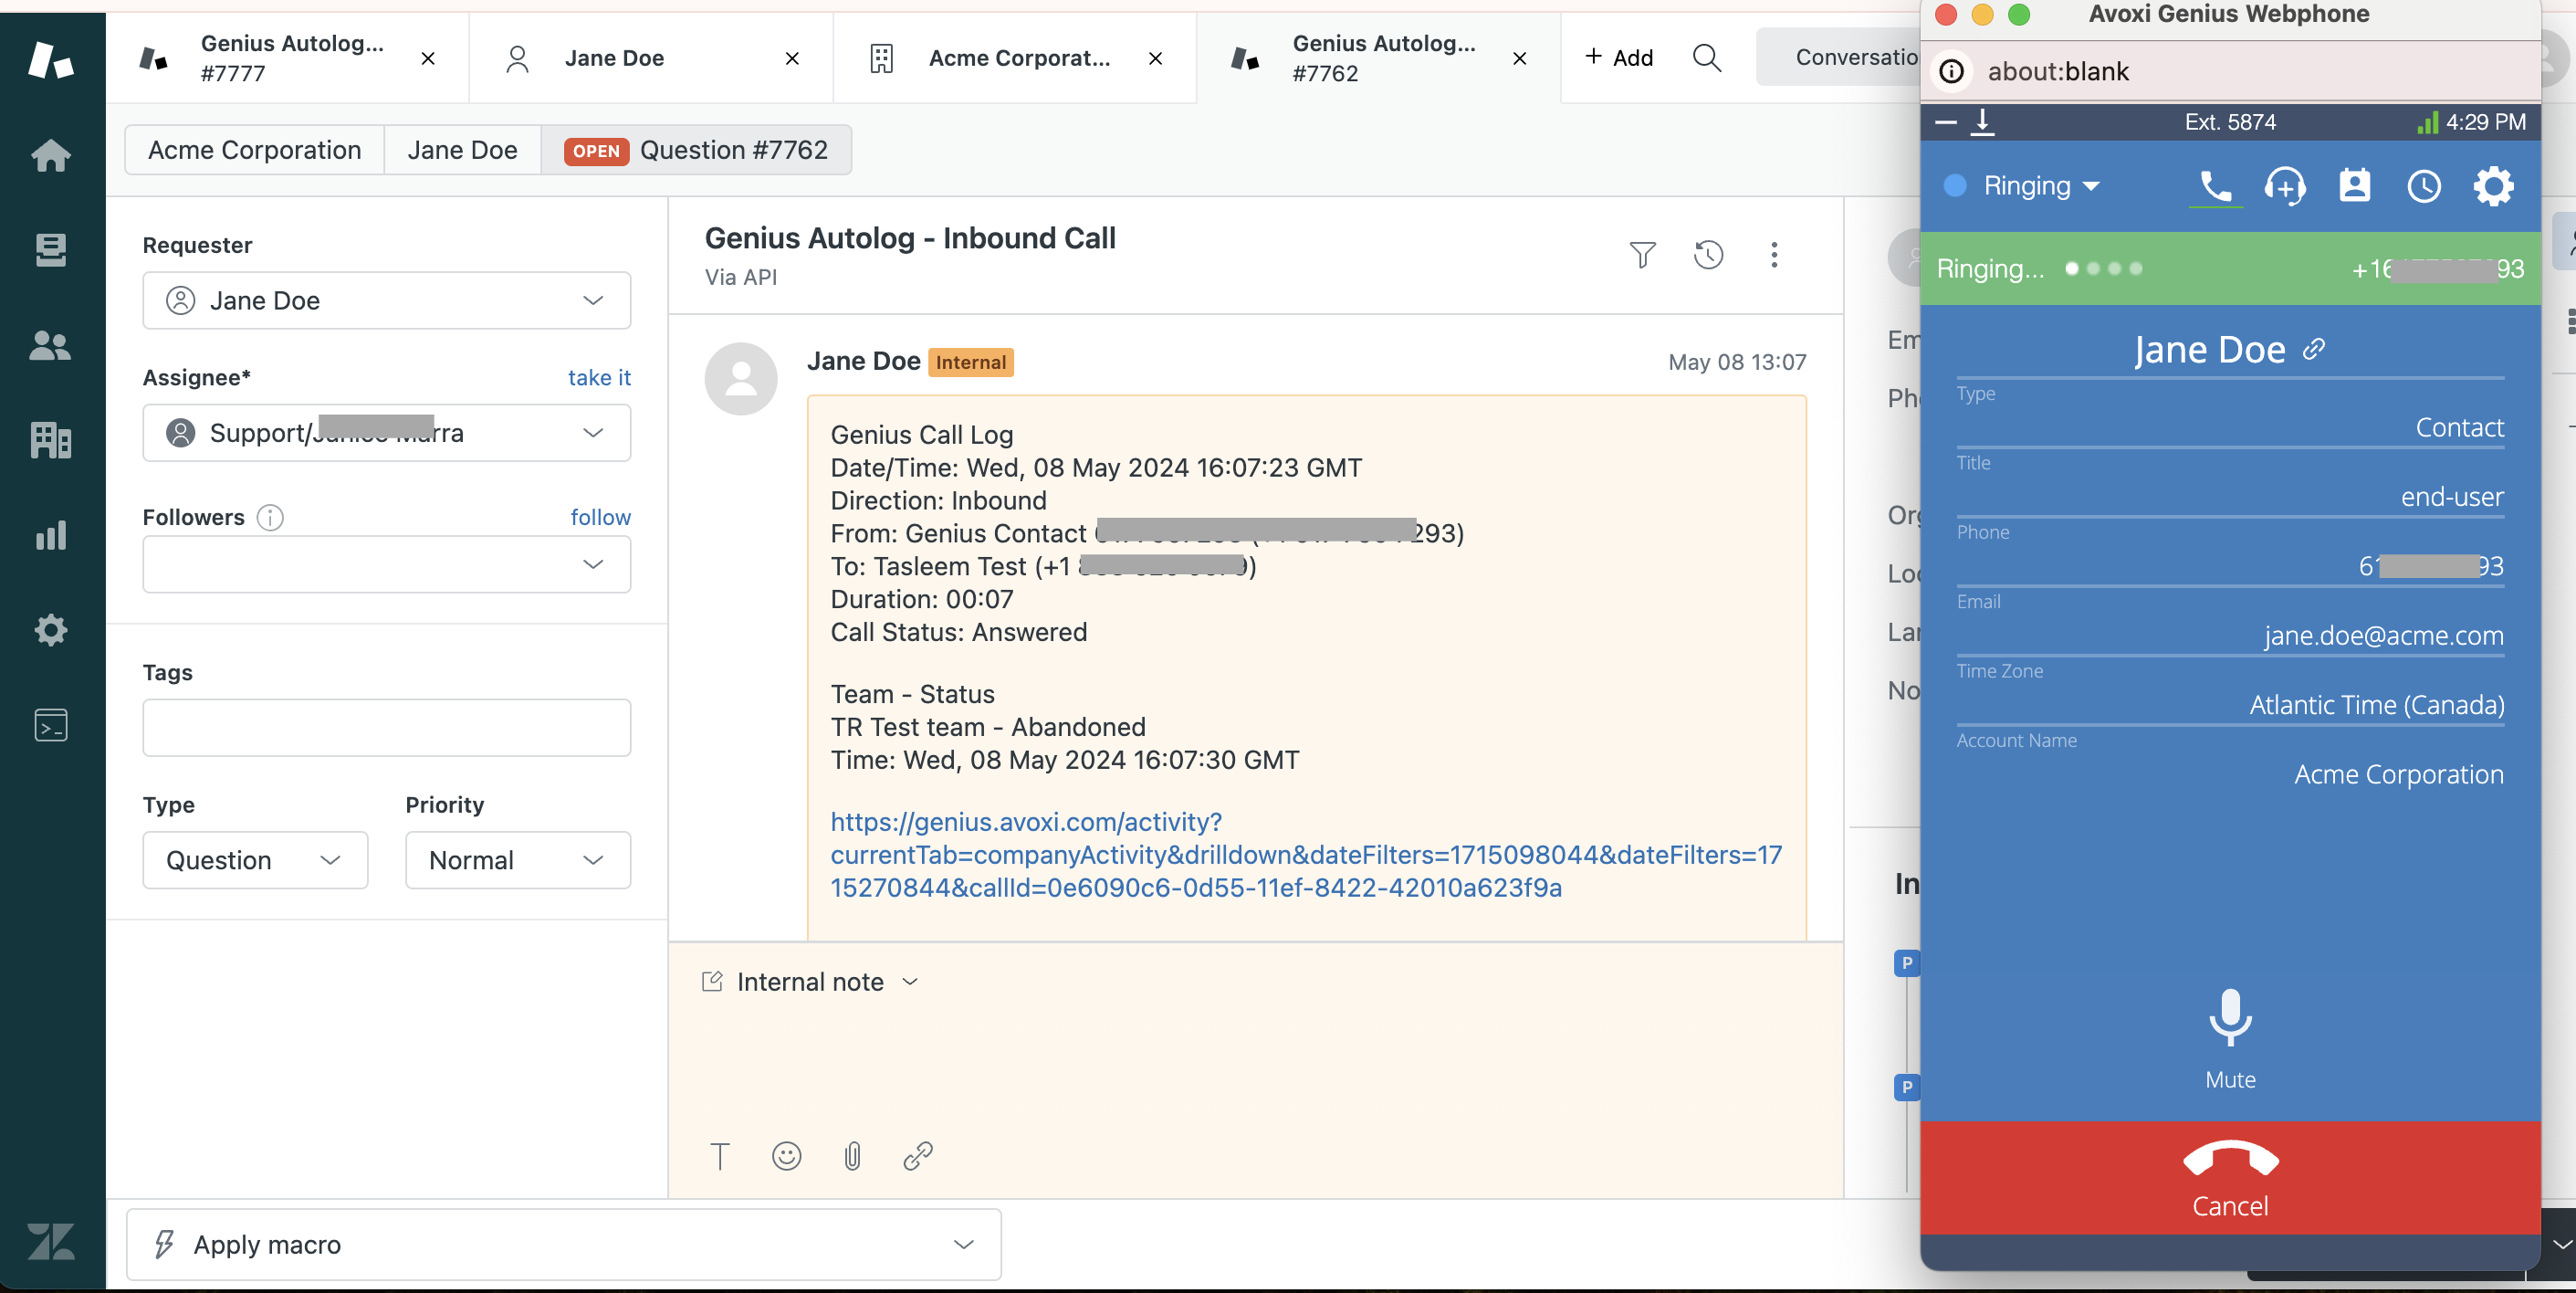
The first feature of the AVOXI Genius and Zendesk integration is the Screen Pop, where End Users stored in Zendesk are displayed in realtime in the Genius webphone when an agent receives or places a call. Using the caller ID of the incoming call, the integration leverages an API to reference any End User in Zendesk with the same phone number and displays that user to the Agent. From there, an agent can provide a personalized greeting and confirm contact information right away.
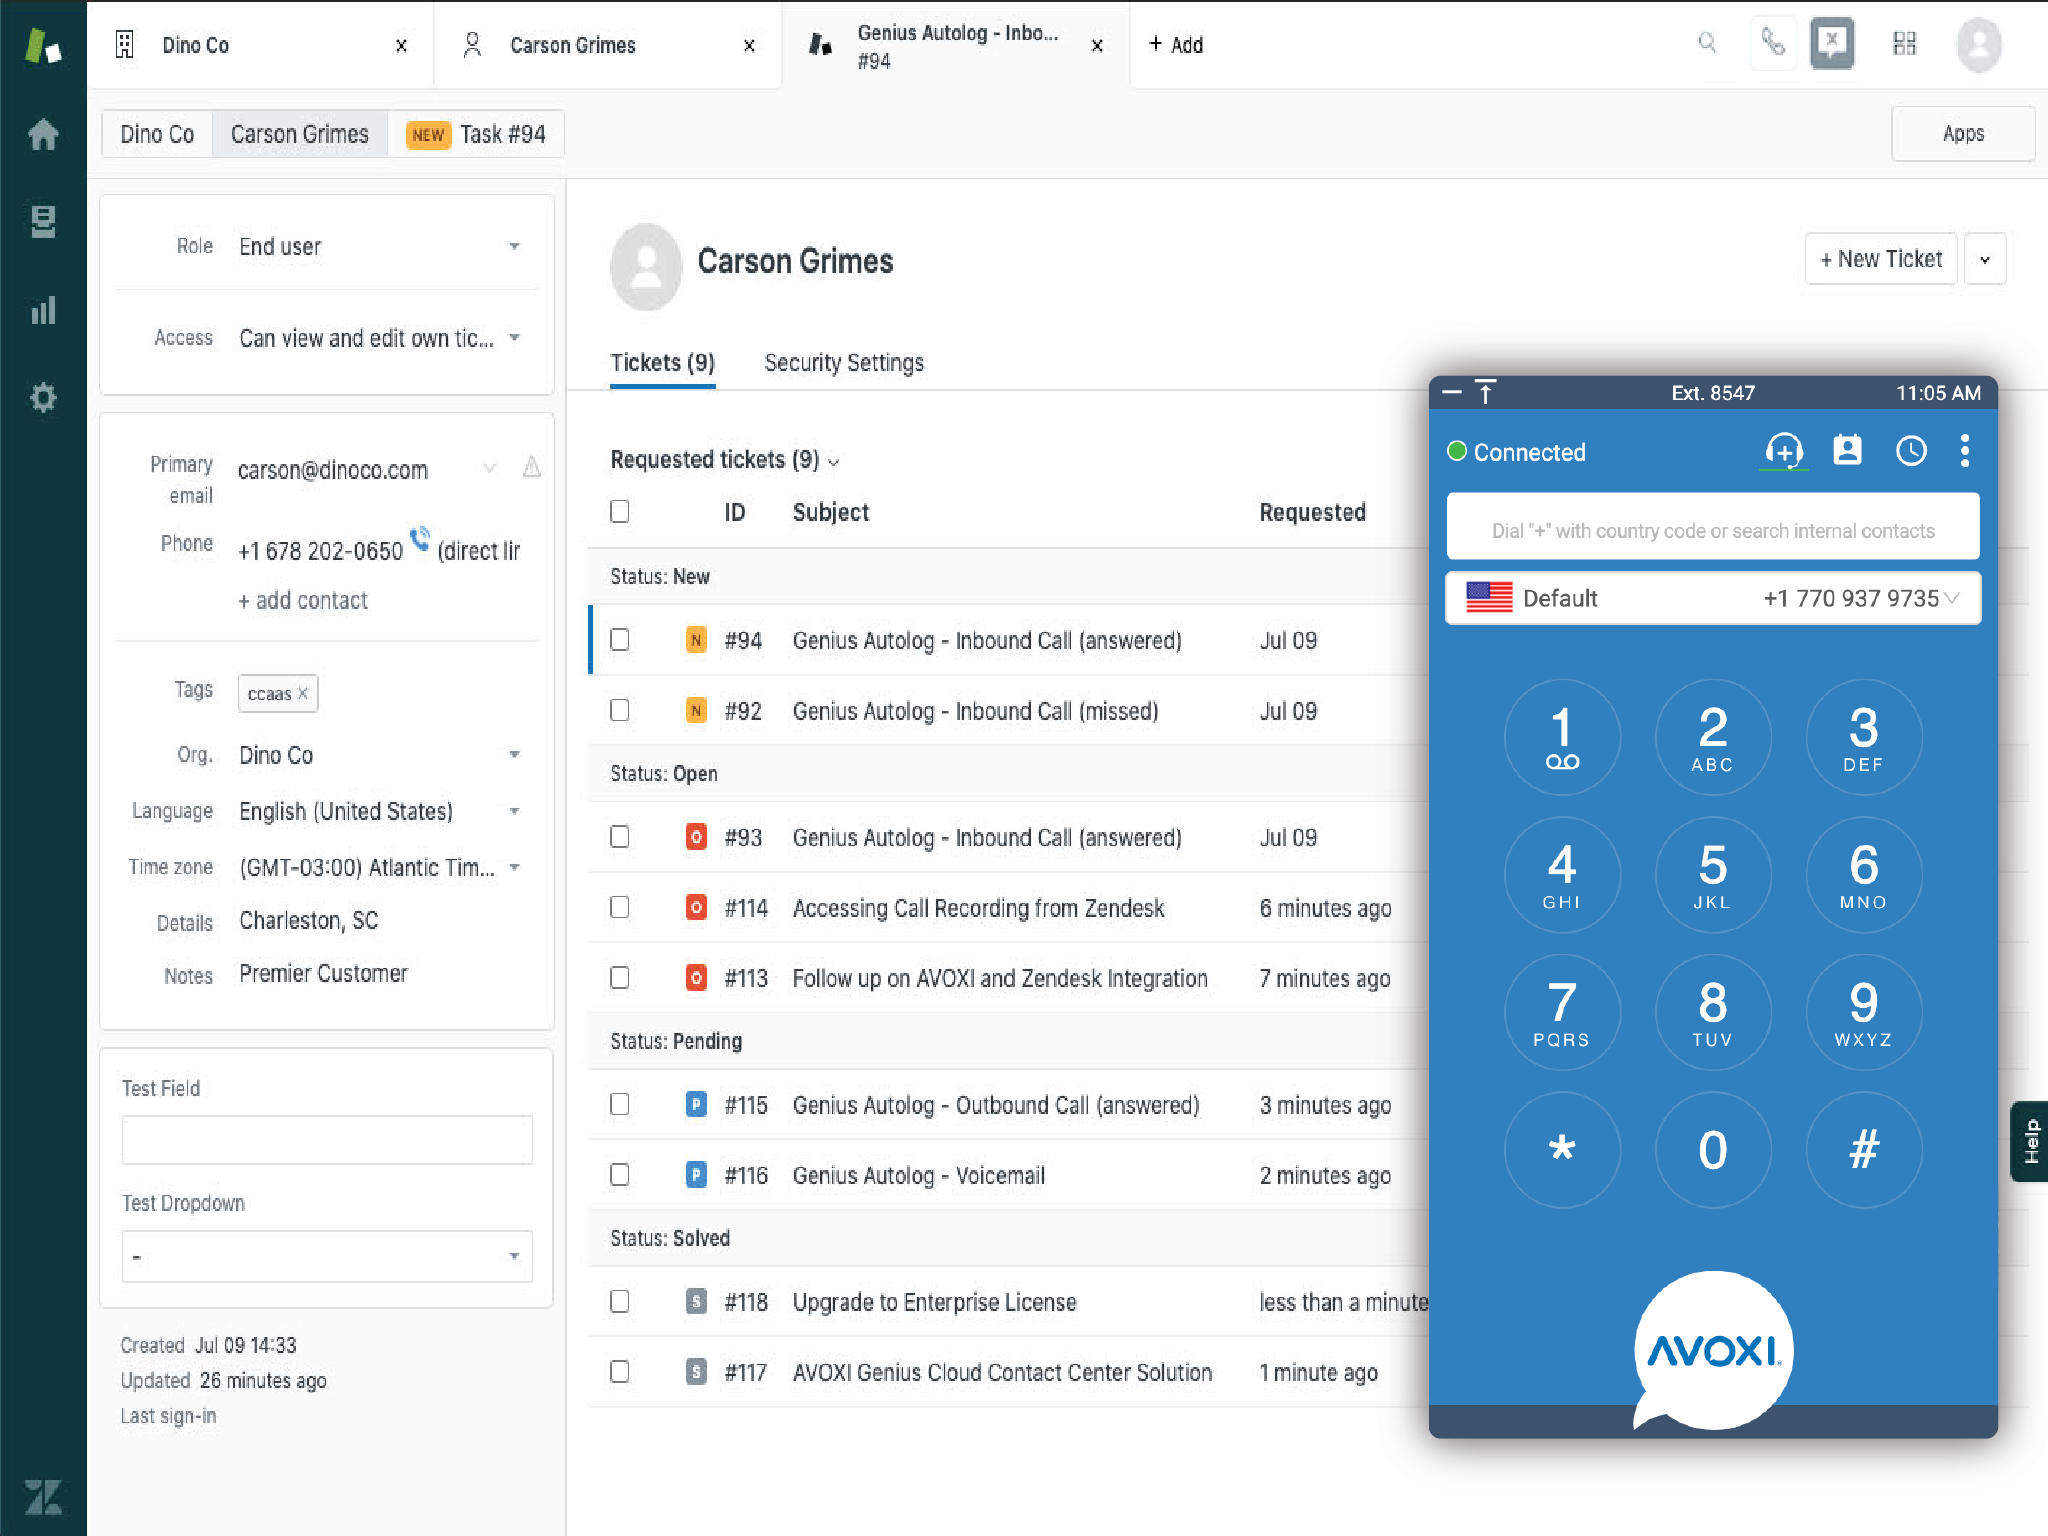
Also, a link is provided to the agent to quickly access the user's page in Zendesk giving the agent quick and comprehensive access to all the recent activity of the caller. If the agent is making an outbound call, they can utilize the "Click-to-Call" feature to quickly dial an "End User" in Zendesk and all of the user's information will also be available within the webphone throughout the call. If the agent ever navigates away from the user's page and needs to quickly access it again, the same link is available directing the agent to the End User's page with all the relevant information and activity for the user.
Automated Workflow
In addition to personalized communication, the ticketing workflow in Zendesk is also automated by the integration. Using the same API setup for the Screen Pop feature, the Workflow Automation will automatically create tickets in Zendesk from a call in the AVOXI Genius voice platform.
This allows agents to focus on the call and not worry about separate tasks or switching platforms. Creating the ticket is done automatically and created as a Genius Autologged ticket with all of the relevant call information saved in the ticket to be easily accessed at any time after the call. Automating this workflow not only saves the agent time but also prevents the possibility of manual errors from data entry or context switching. Providing this personalized communication and automated workflow through seamless integration with AVOXI Genius and Zendesk is also easy to set up and can be done in minutes.
Coming Soon!
The AVOXI Genius integrations are always growing and being enhanced and the Zendesk integration is no exception. In upcoming releases, more features will be available for the Zendesk integration including some noted below:
- Automatically opening a ticket in a new tab at the beginning of every call for even faster agent access
Installing Zendesk Integration
The AVOXI Genius and Zendesk integration gives agents the ability to provide personalized communication while also streamlining and automating their activities.
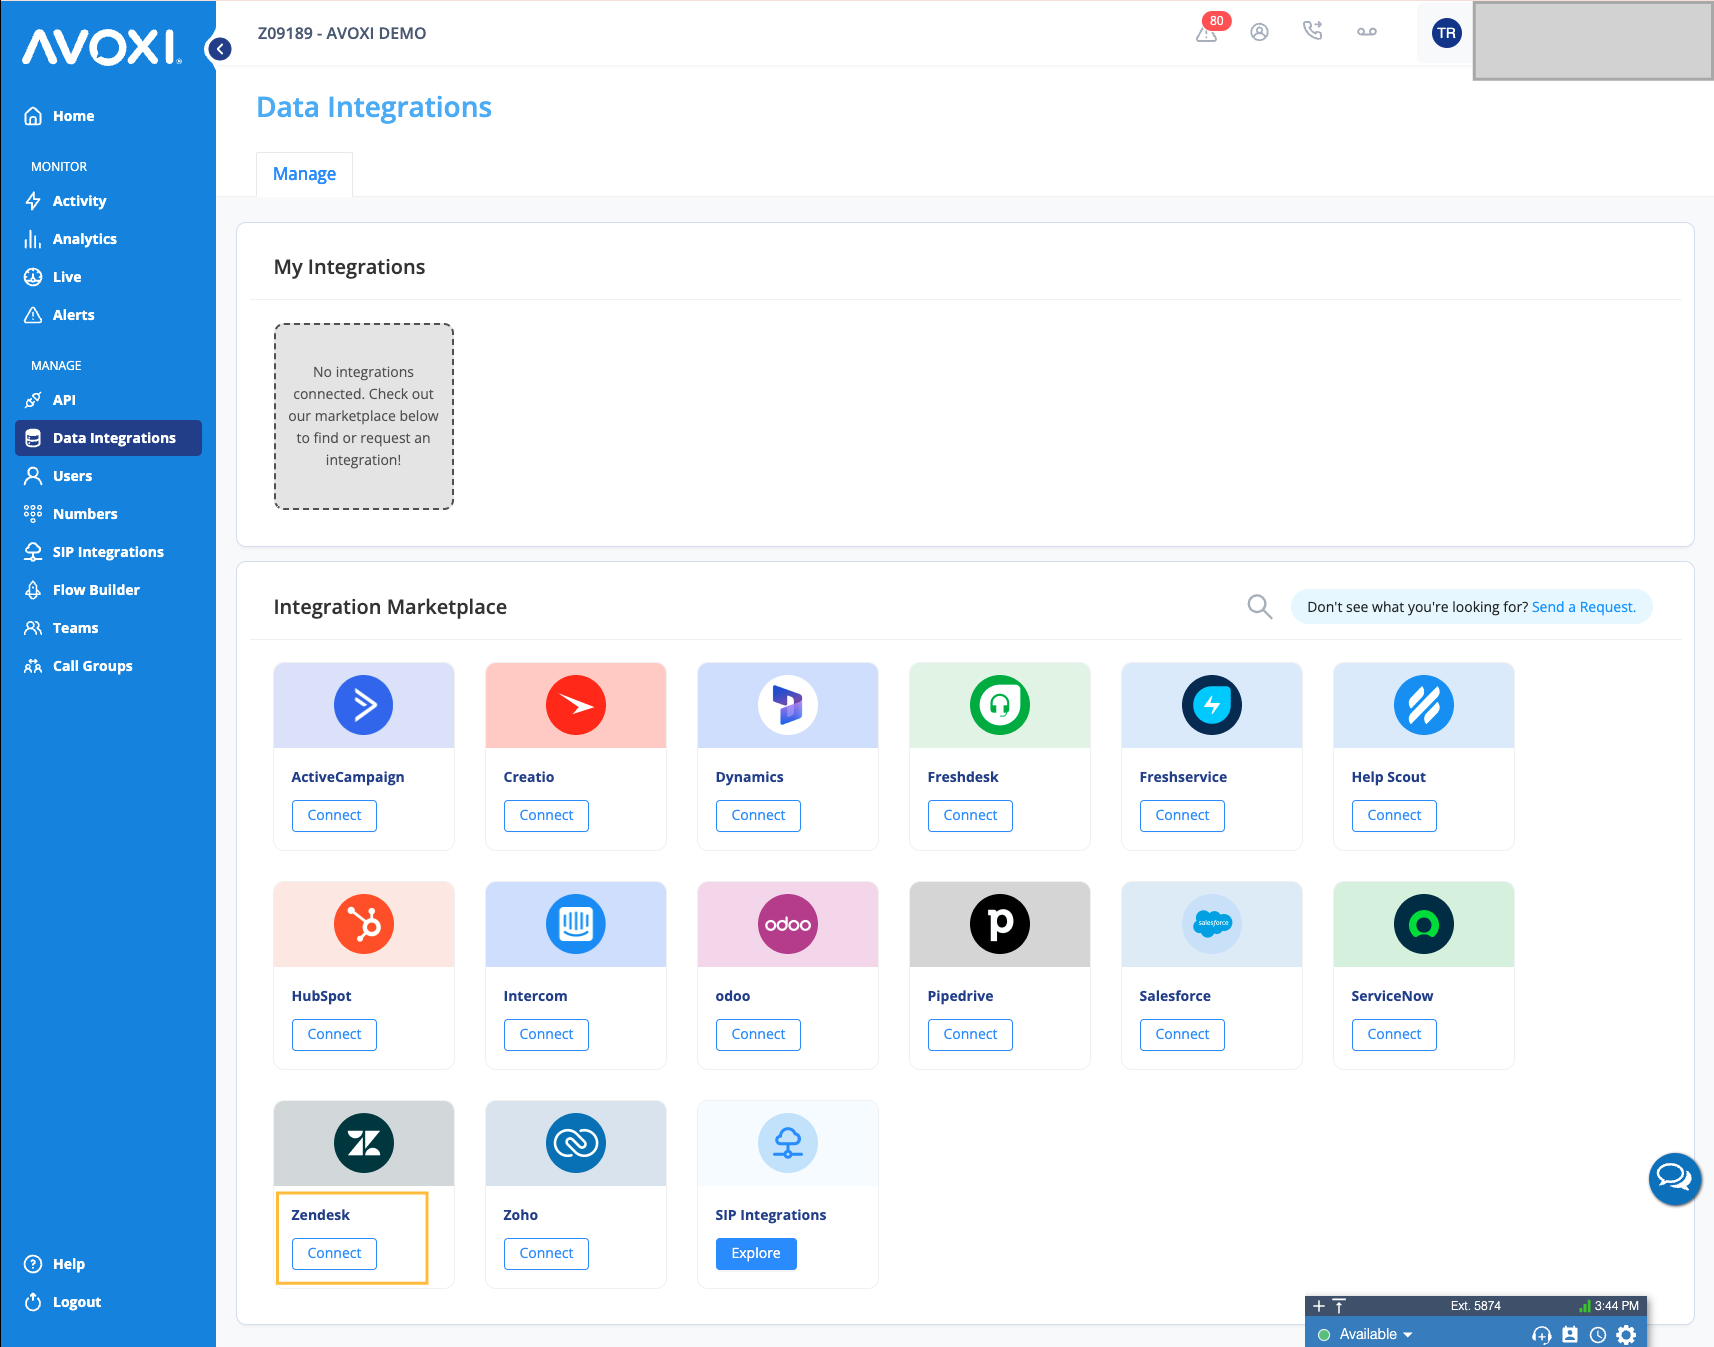
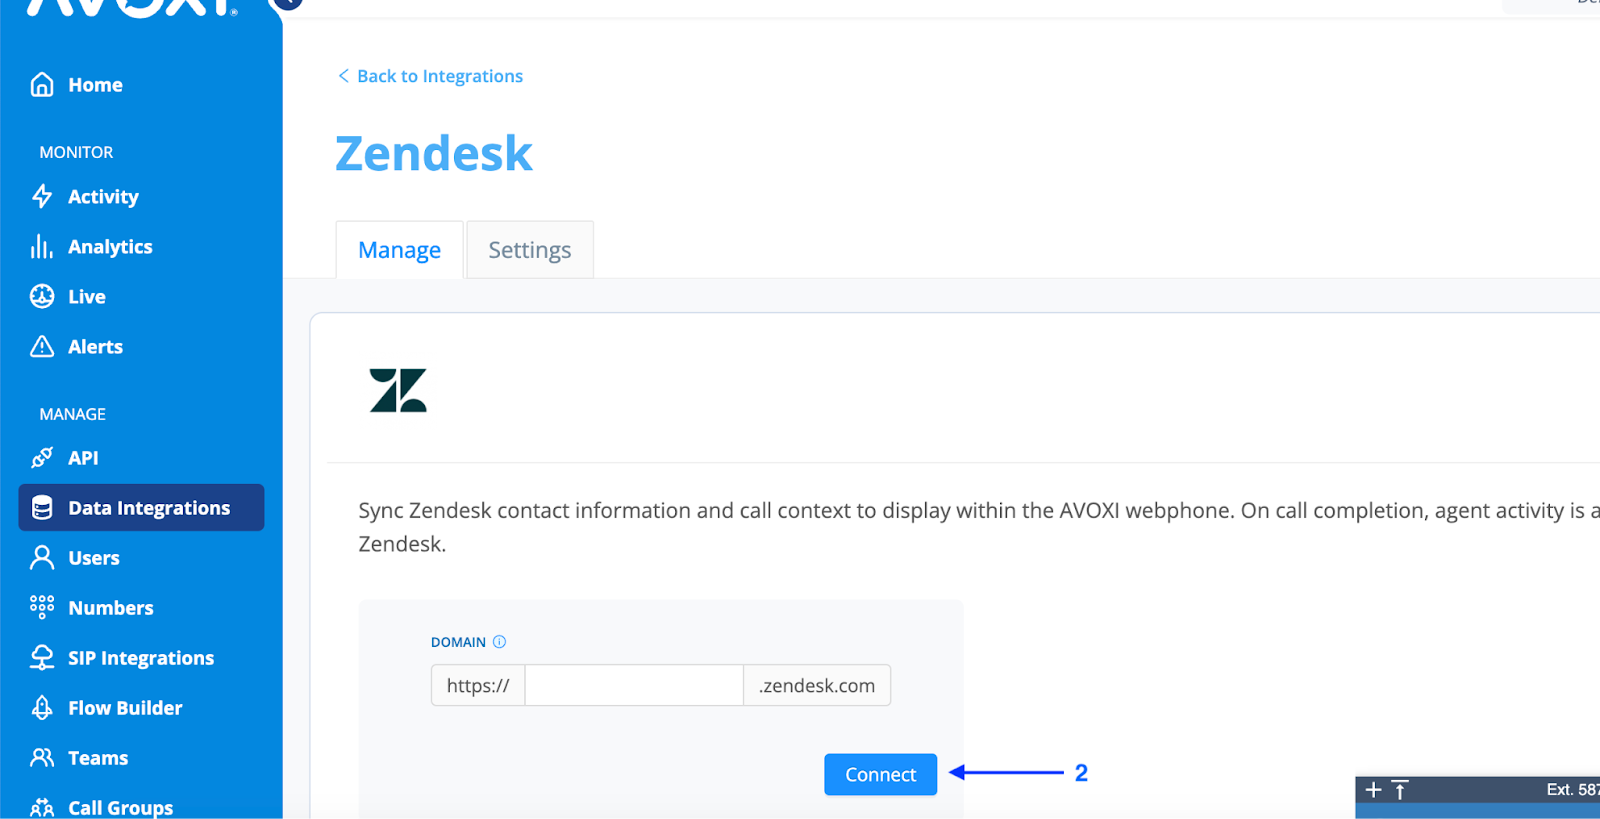
In the "Manage" tab of the Zendesk page, enter Domain and click "Connect"
Note: The Domain is the first portion of the Zendesk URL used to login.
Its the unique subdomain for your Zendesk account. Format: https://{subdomain}.zendesk.com
Example : When your Zendesk url is https://orgname.zendesk.com/, then the domain to enter here is "orgname"
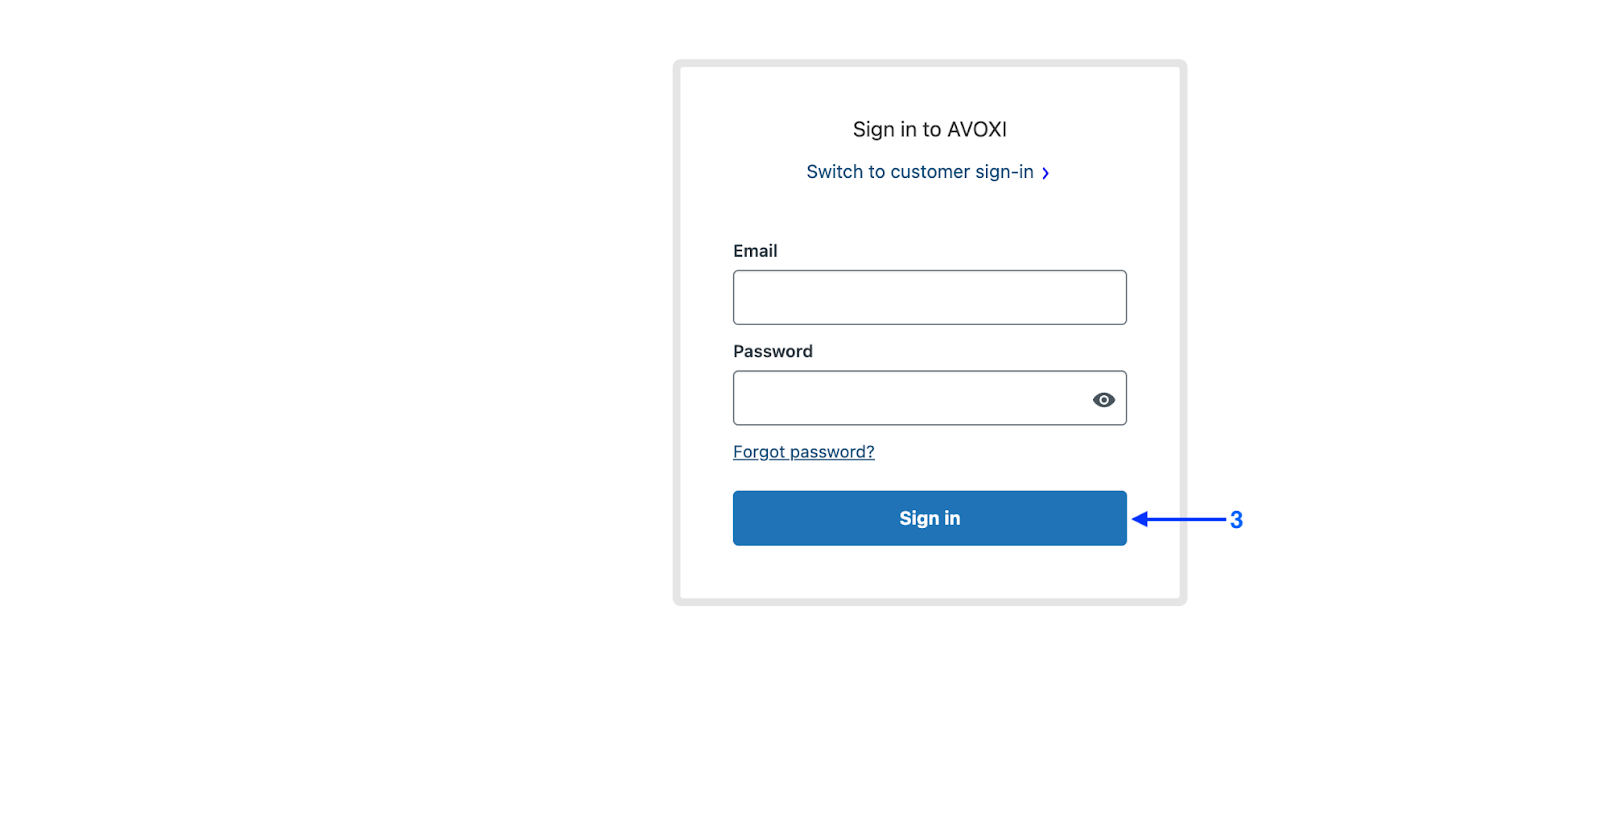
Once the domain is entered, the authorization process will redirect the user to another window to login to Zendesk for the connection.
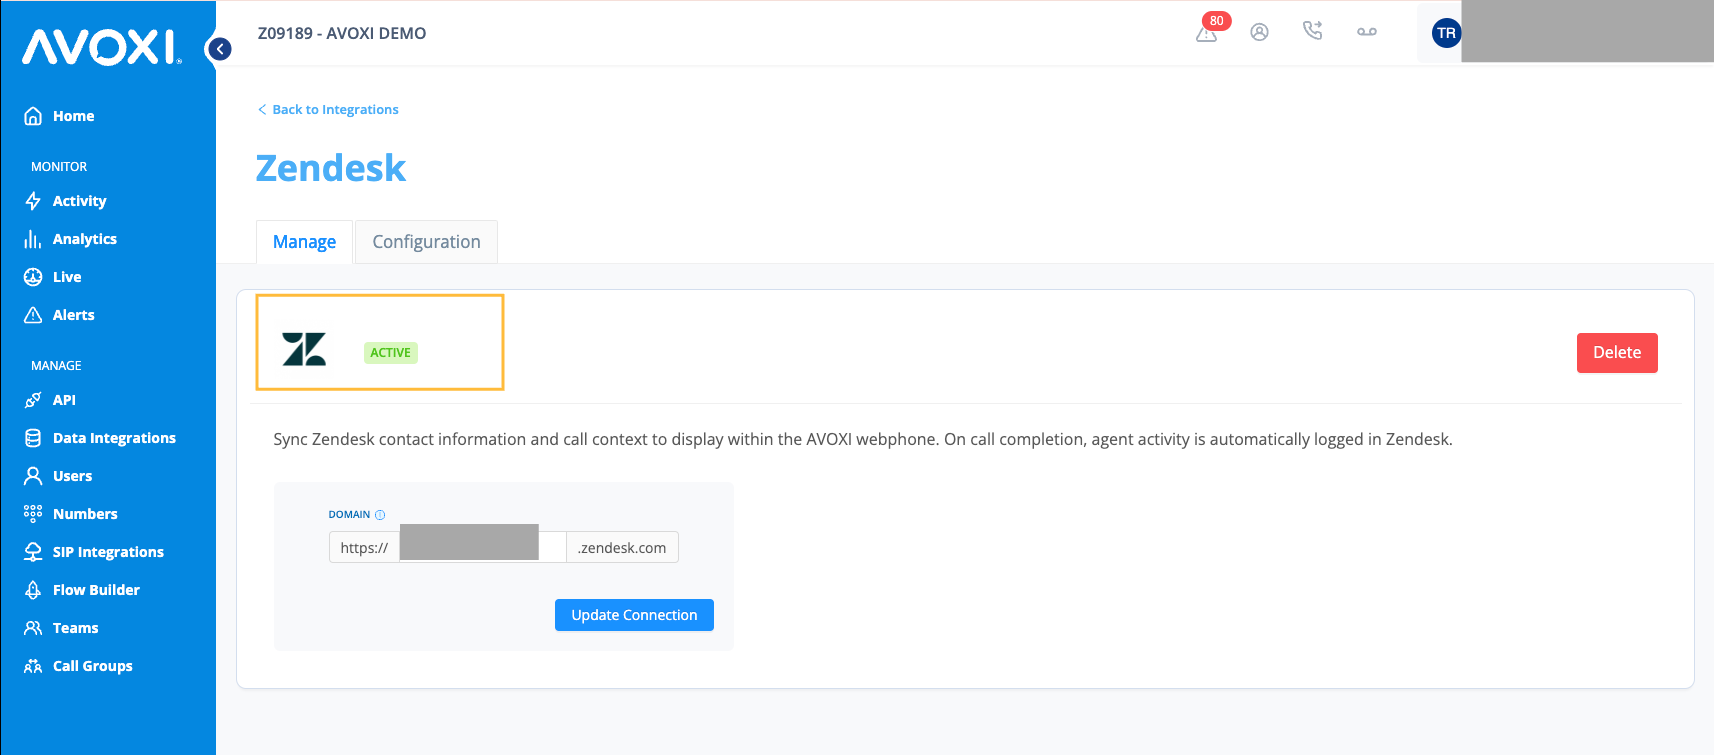
Congratulations, the AVOXI and Zendesk integration are complete!
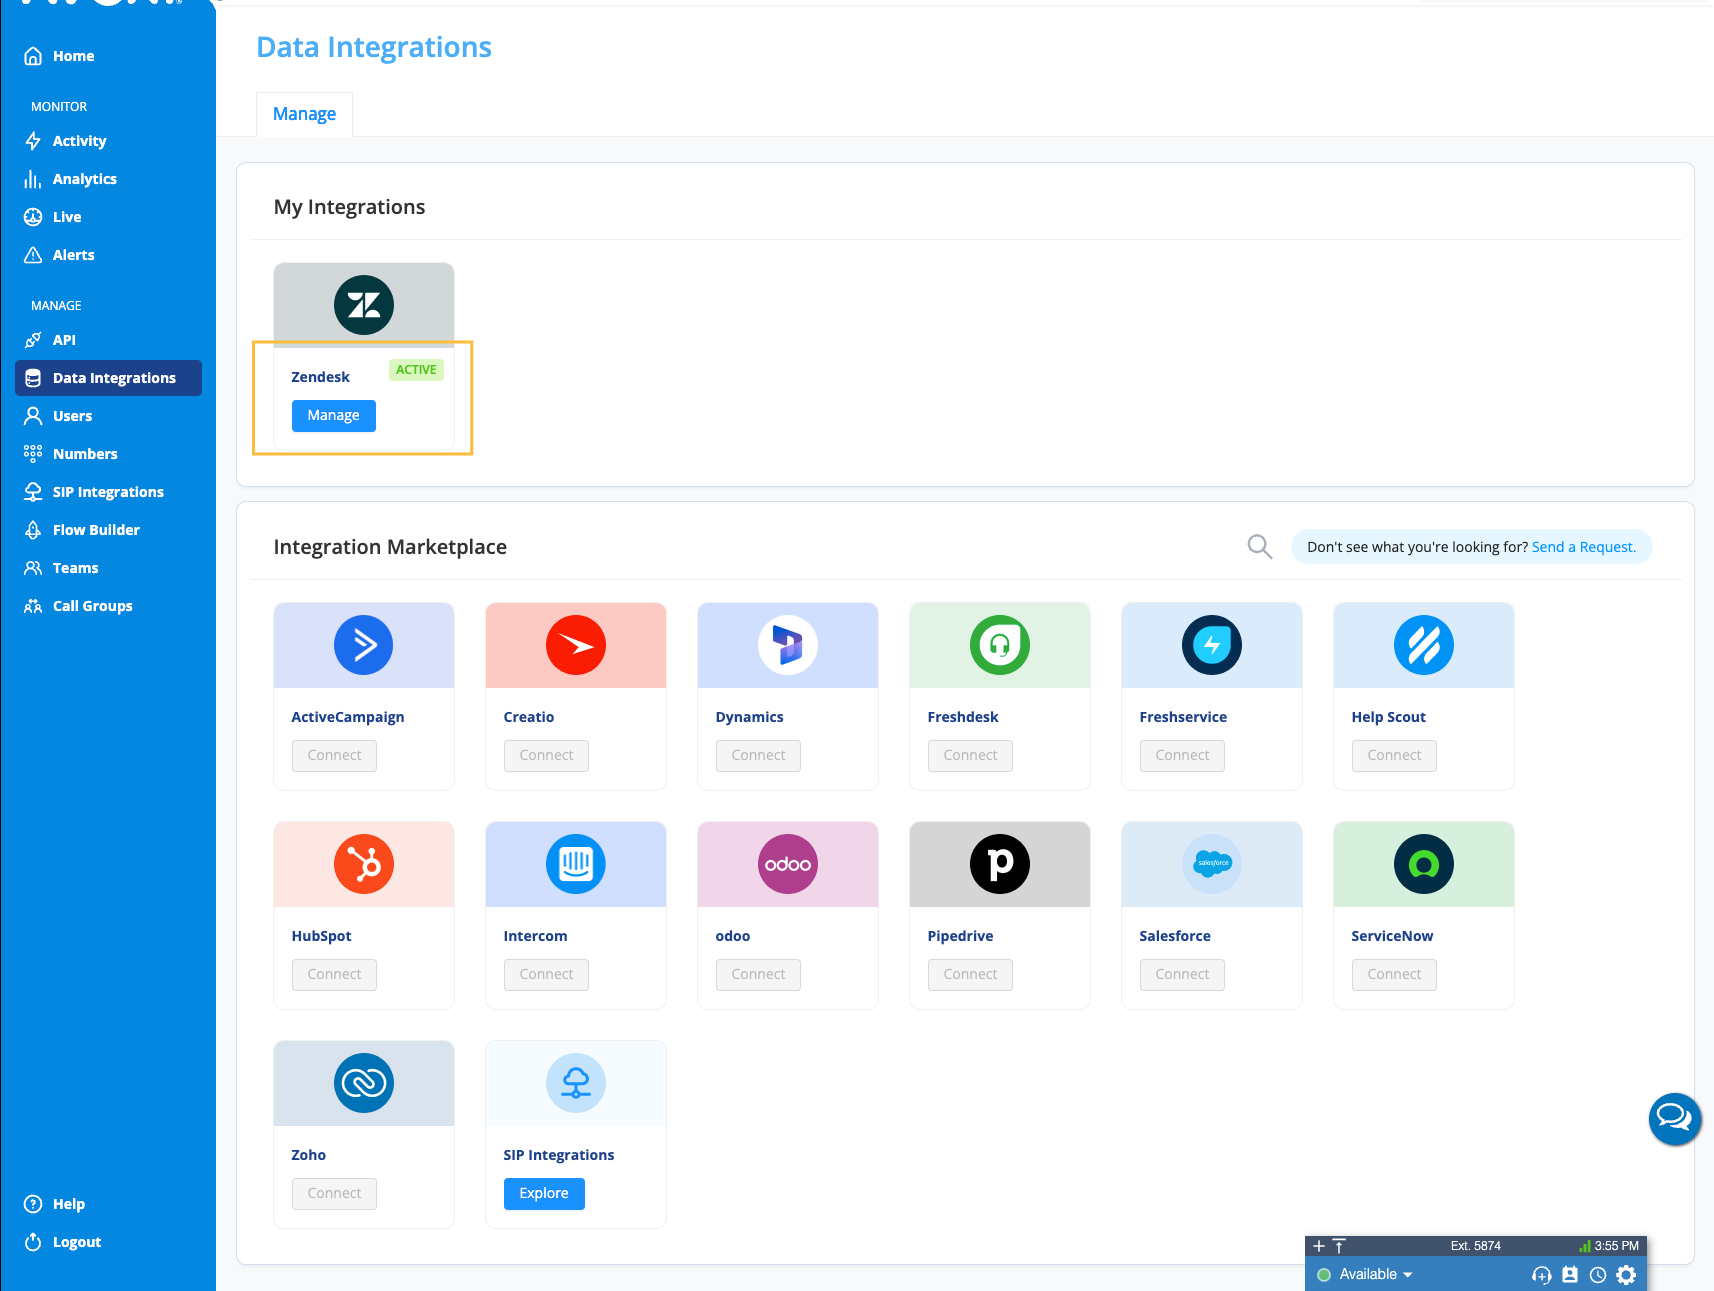
After a test call, the Zendesk integration will now show as 'Active' and additional configurations can be updated by selecting the 'Configuration' tab at the top of the page.
Unknown caller
- Create a new End User in Zendesk for calls where no matching record is found with the corresponding caller ID or number dialed.
- Automatically create a record in Zendesk when Genius does not recognize the phone number of the caller for incoming calls.
- Automatically create a record in Zendesk when Genius does not recognize the phone number dialed by an agent placing outgoing calls.

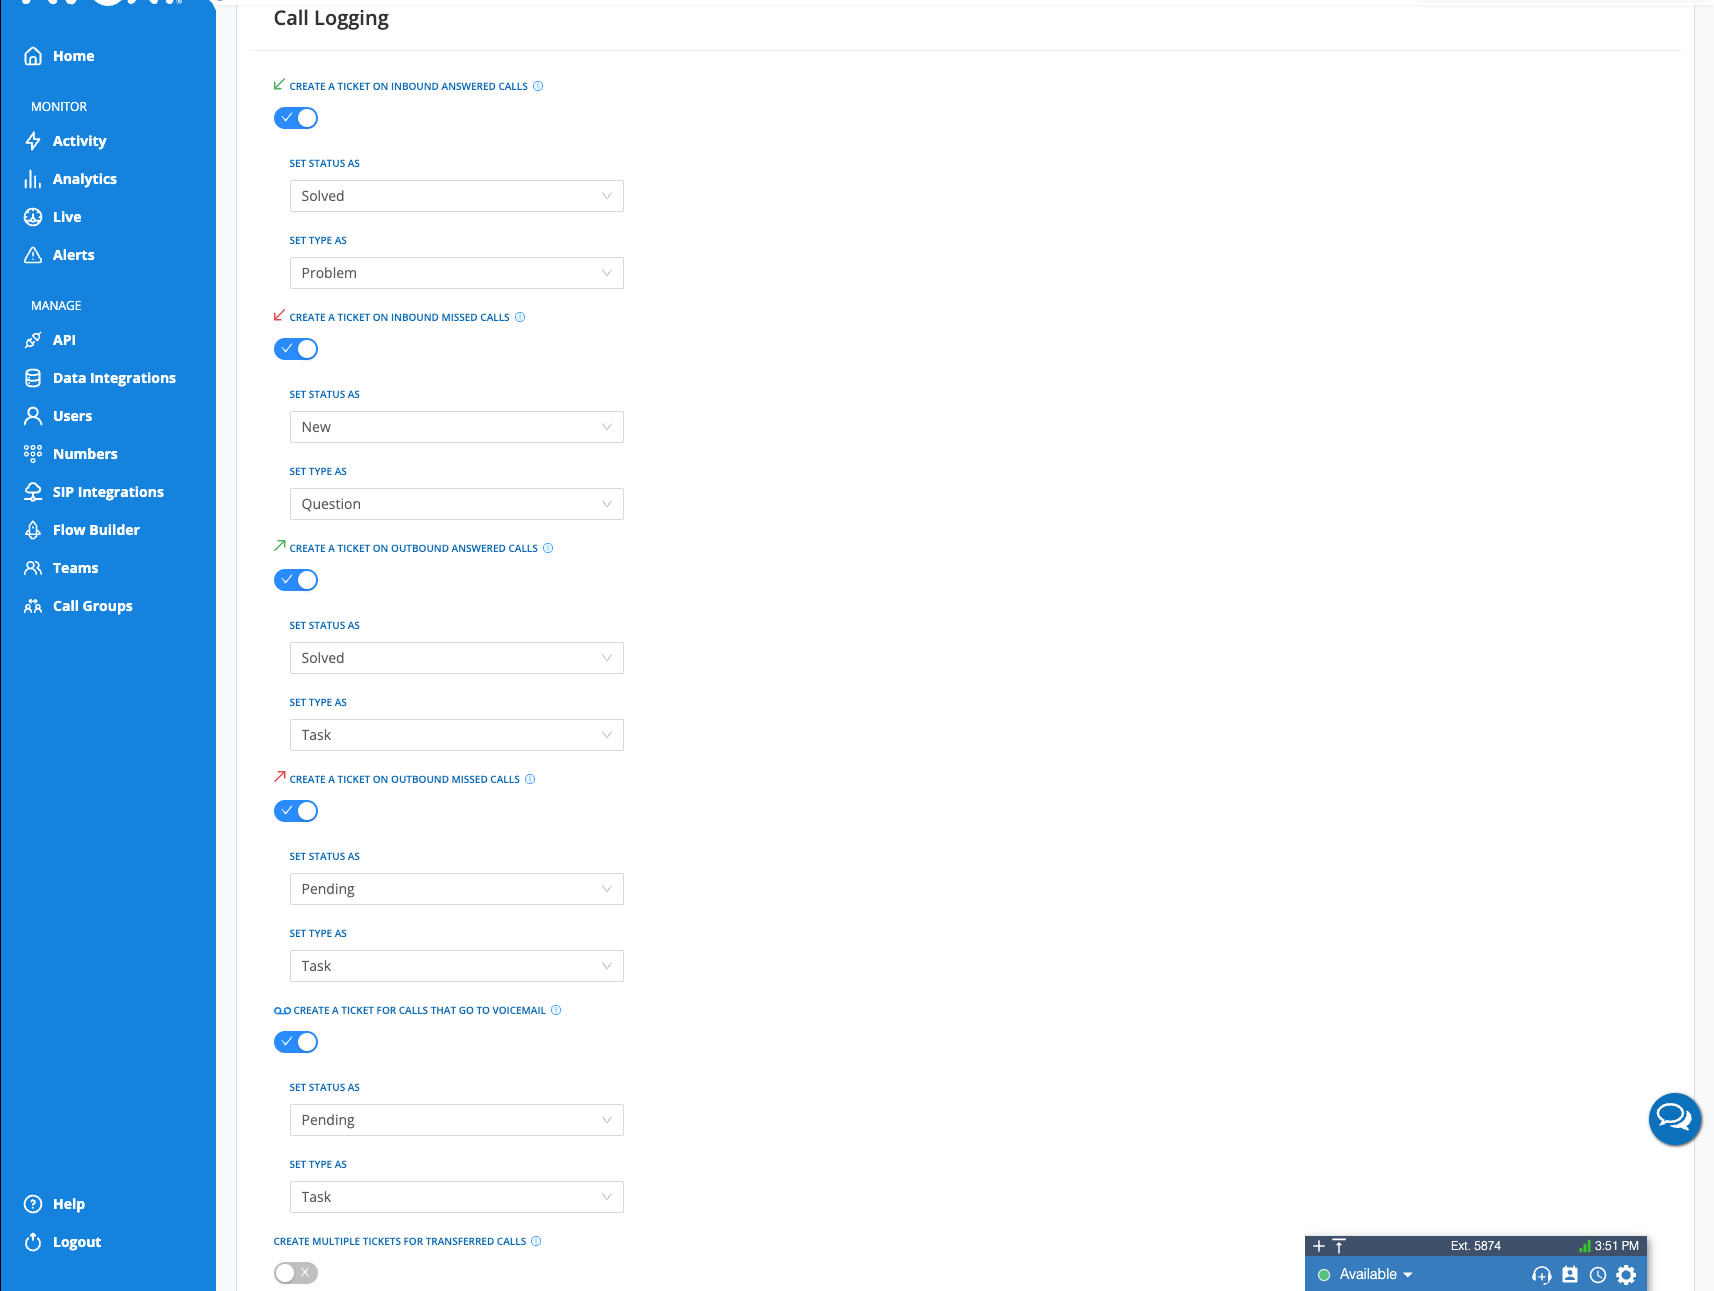
Call Logging
Information about calls will be logged as a Ticket in Zendesk after a call ends.
Configure different Statuses and Types for automated ticket creation.
Example -
- Set an Inbound Answered call as a Question and Submitting it as Open
- Set an Outbound Unanswered call as a Task and Submitting is as Pending.
- Configure to create multiple tickets for transferred calls - Genius will create a ticket in Zendesk for each leg of a transferred call. When possible, the ticket will be assigned to the answering agent, otherwise it will be assigned to the the Zendesk agent used to setup the integration.
Note: The Zendesk card on the main Data Integrations page will now show a 'Manage' button since it is connected. This can be accessed at any time to adjust the integration configurations.