The AVOXI Genius integration with Salesforce allows organizations to bring together their voice and CRM platforms seamlessly. By integrating these technologies, users can focus on voice communication with AVOXI Genius and have their customer management and call activity workflow in sync and automatically updated in Salesforce.
Use the below links to find out more and set up your integration:
AVOXI - Salesforce Integration Overview
Personalized Communication
The first feature of the AVOXI Genius and Salesforce integration is the Screen Pop, where Contacts, Accounts, and Leads stored in Salesforce are displayed in real-time on the Genius webphone when an agent receives or places a call. Using the caller ID of the incoming call, the integration leverages an API to reference any Contact, Account, or Lead in Salesforce with the same phone number and displays that user to the Agent. From there, an agent can provide a personalized greeting and confirm contact information right away.
In addition, a link is provided to the agent to quickly access the customer or prospect's page in Salesforce giving the agent quick and comprehensive access to all the recent activity of the caller. If the agent is making an outbound call, they can utilize the "Click-to-Call" feature to quickly dial a customer or prospect in Salesforce and all of the user's information will also be available within the webphone throughout the call. If the agent ever navigates away from the customer or prospect's page and needs to quickly access it again, the same link is available directing the agent back to the page with all of the relevant information and activity for the Contact, Account, or Lead.
Automated Workflow
In addition to personalized communication, the call activity workflow in Salesforce is also automated by the integration. Using the same API setup for the Screen Pop feature, the Call Logging Automation will automatically create a call activity in Salesforce from a call in the AVOXI voice platform.
This allows agents to focus on the call and not worry about separate tasks or switching platforms. Creating the call activity is done automatically and created as an AVOXI Autologged call with all of the relevant call information saved in the activity to be easily accessed at any time after the call. Automating this workflow not only saves the agent time but also prevents the possibility of manual errors from data entry or context switching. Providing this personalized communication and automated workflow through the seamless integration with AVOXI and Salesforce is also easy to set up and can be done in minutes.
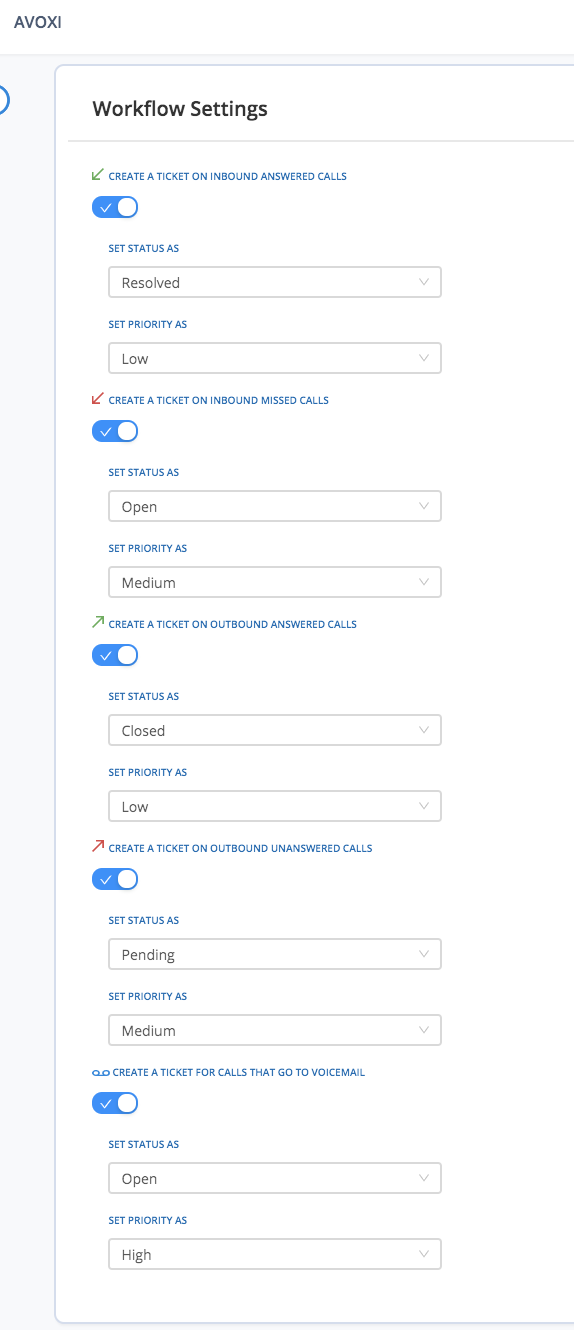
- Configure different Statuses and Priorities for automated Task/Activity creation. For example, creating an Inbound Answered call with a Status of 'In Progress' with a Priority of 'Normal'. Or creating an Outbound Unanswered call with a Status of 'Deferred' with a Priority of 'High'.
- Create a new Contact, Account, or Lead in Salesforce for calls where no matching record is found with the corresponding caller ID or number dialed.
AVOXI - Salesforce CRM Activation Guide
Using AVOXI-Salesforce CRM integration businesses can create better experiences between their customers and agents. Also known as computer telephony integration (CTI), AVOXI's SFDC contact center provides useful Salesforce CTI features such as automatic call logging, screen pop, softphone, click-to-call, and many more VoIP telephony benefits for improving customer interactions while simplifying your work. Learn more here.
The CRM Integration feature is included in available to all license holders, use our easy-to-follow guide to view, purchase, or upgrade a license.
- Your connection can be accessed via the Integrations page on the left-hand navigation bar of your AVOXI online account. (1)
- Select the "connect" button located under the Salesforce tab and follow the in-product step-by-step installation guide. (2)

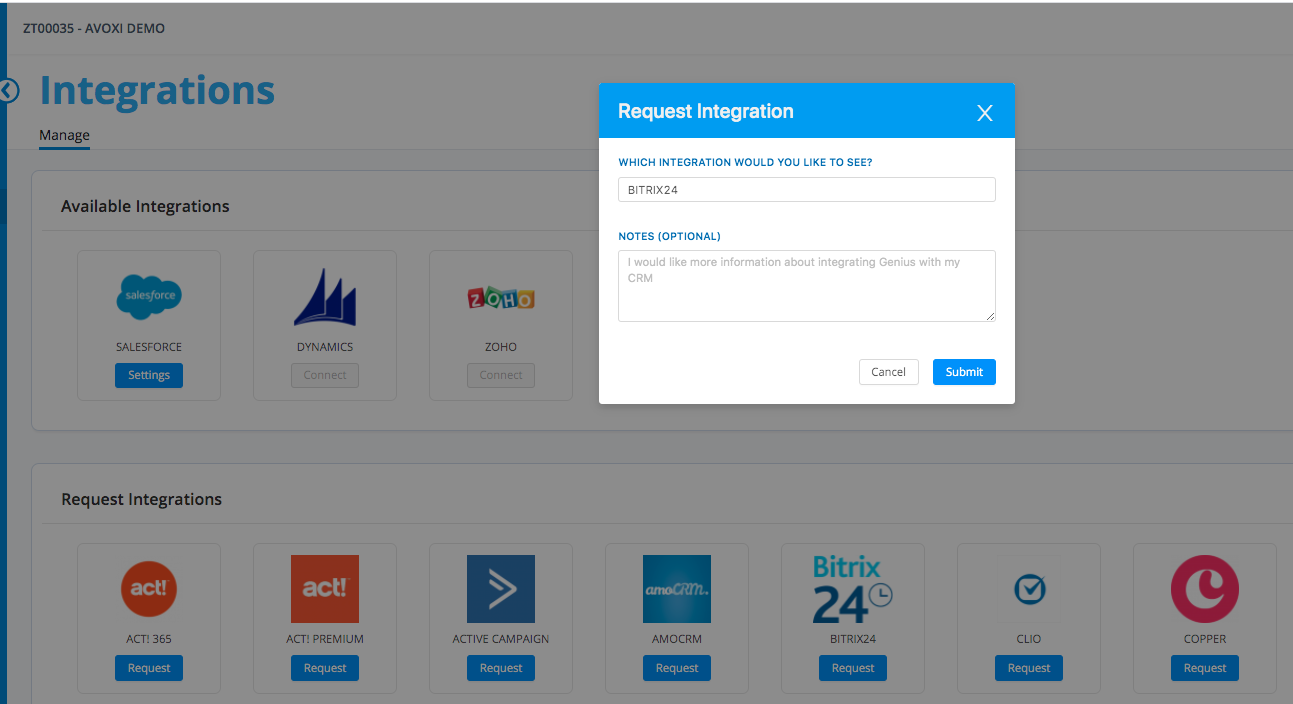
If the CRM/Helpdesk Integration platform you require is not available you can request it using the "request" button located under the required integration.
Add additional notes and select the "Submit" button when complete.
Viewing your Salesforce Settings
To view your Salesforce settings, select the "Settings" button on your active integration located under the "Manage" tab.
Next, select the "Settings" tab
Here you can view and manage your Integration "Workflow Settings" and "Screen Pop Templates".