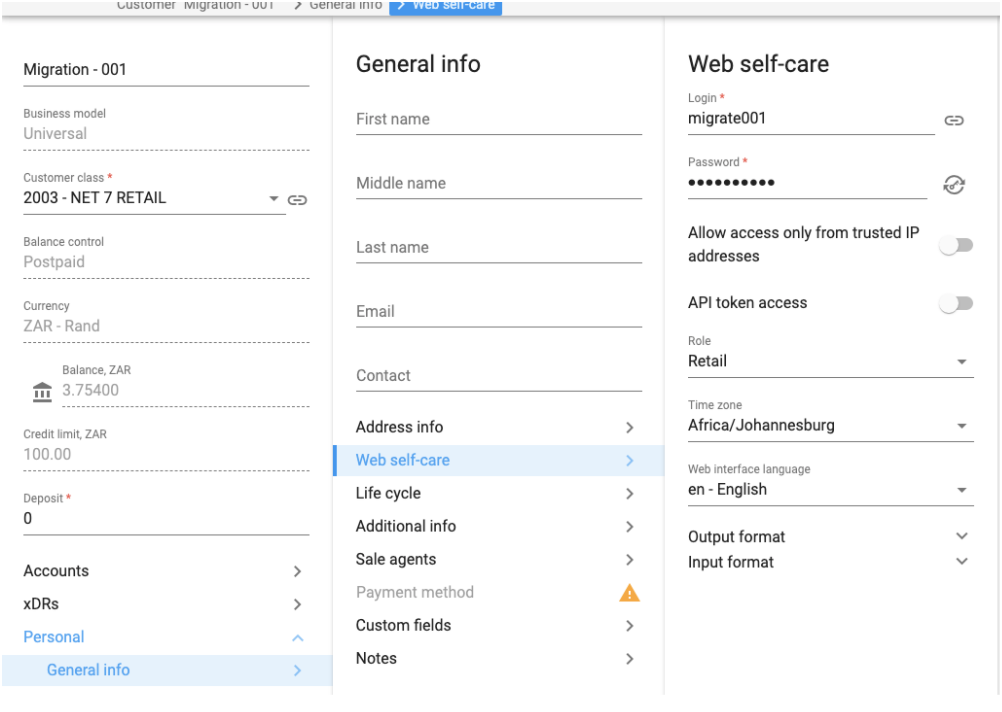
This process stays unchanged and can be done by logging into the IP Centrix portal through web-self care.
- To get there select the customer you want to create the extensions for.
- Click on personal, general info, and Web self-care.
- You will see an icon next to the username that you can click on to log into the portal.
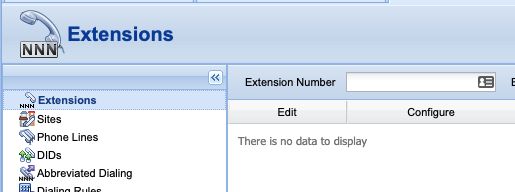
- This will then take you to the IP Centrix portal. Click on IP Centrix and select extensions.
- Next, click on the add extension button

- This will take you to the add extension window.
-
Fill in the form with the following info
- Extension number - 3 digit extension number i.e 100 or 201 etc.
- Extension Name - This can be the person’s name
- Assigned Phone Line - Choose the account ID created for this extension
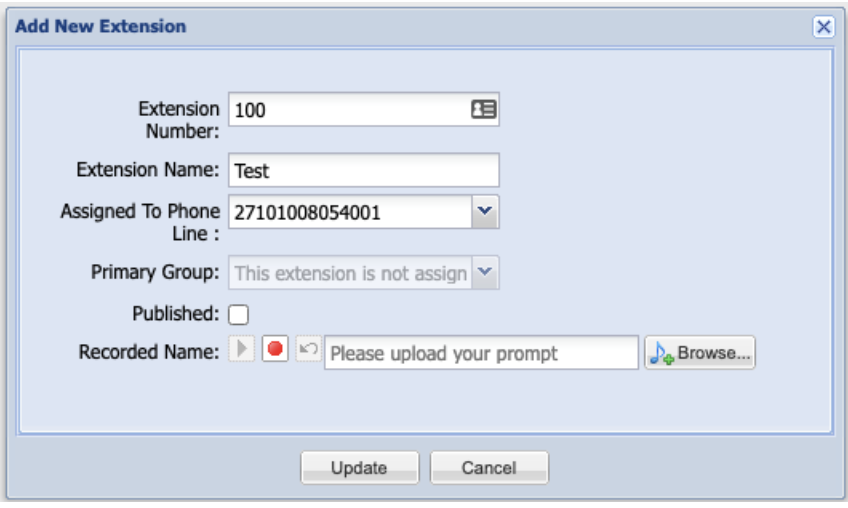
- Once done click on Update. You will now see the new extension in your extension list.